I Am... TikTok Crinkle Cake Recipe
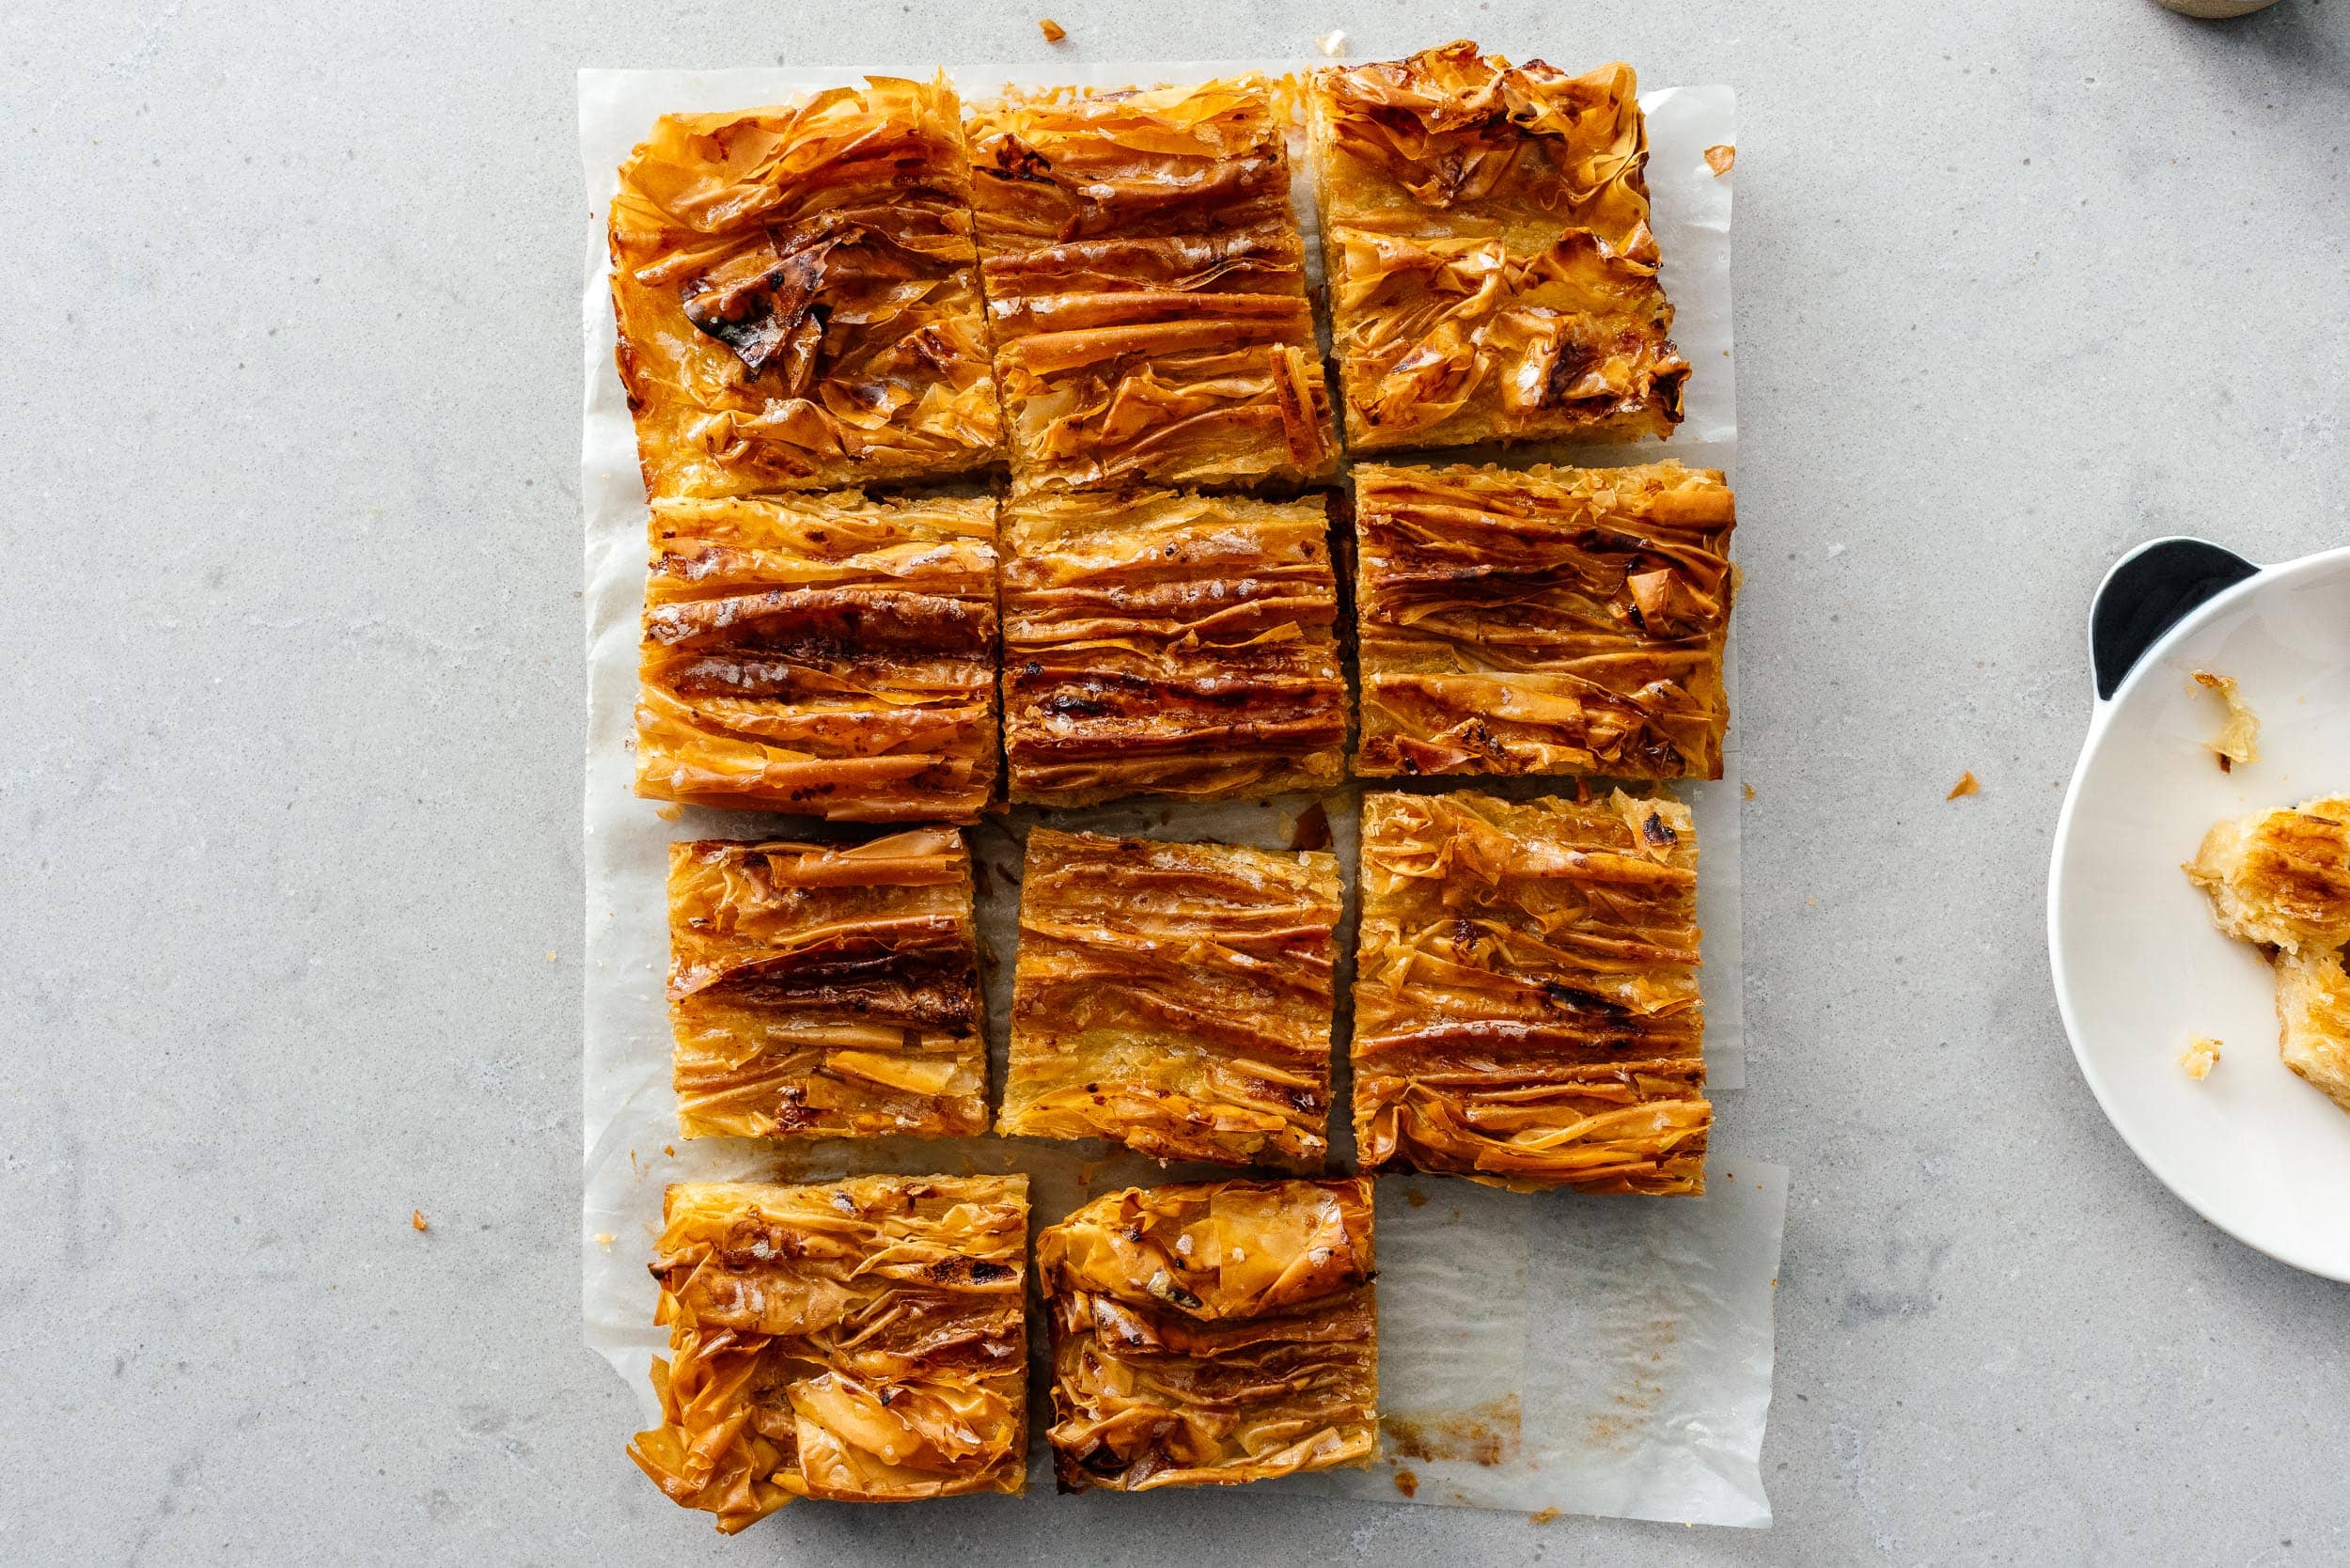
If you love sweet and crispy layers and layers of pastry, this Tiktok Crinkle Cake is going to be perfect for you! I’m always looking for new recipes to try to keep me interested in the food world and when I saw this phyllo crinkle cake I was sold. It’s definitely going to be on our list of Easter bakes! If you haven’t seen or heard about it, TikTok crinkle is crunchy, crispy layers of folded over phyllo with pillowy soft custard bread pudding insides. It’s sweet and vanilla-y and full of deliciousness!
What is Tiktok crinkle cake?
Crinkle is a crispy, flaky, custard-y pastry made from phyllo dough, melted butter, and custard. It bakes up in three parts, first to crisp up the layers, then to add butter, then again to set with custard. According to TikToker @ramena this crinkle recipe is the corner stone of her baking business. It’s based off of a dessert called muakacha, from the Middle East. Muakacha means wrinkled in Arabic and it makes total sense when you see how crinkly and wrinkly this phyllo pastry dessert is. Traditional muakacha has pistachios and rose water but the Tiktok version is vanilla. Crinkle is super customizable so you can make it your own. The best part of this crinkle recipe is that it comes together so easily.Crinkle cake ingredients
- phyllo dough - this is a pastry dough that you can find in the freezer section of any grocery store near the frozen pie crust and puff pastry. Phyllo dough is usually used for making dishes like spanakopita and baklava. It’s super easy to use, just defrost it in the fridge overnight, then open the package and unroll and it’s ready to go.
- butter - the butter is going to add richness and depth to the crinkle
- sugar - everyone needs a little bit of sweetness in their life. We’re going to use the sugar in two ways: to make a custard and to make a thick simple syrup.
- milk, eggs, vanilla - these three ingredients, plus some sugar combine into a custard liquid that will fill up the pockets of phyllo and bake up creamy and sweet.
How to make Tiktok crinkle cake
This recipe has a multi bake technique, which means that it has all the textures: crispy, crunchy, and soft and custard-y. It’s like a fluffy croissant-like bread pudding that has a caramelized top. Here’s how to make it.- Crinkle: Grab 2 sheets of phyllo dough by the corners and then fold them in an accordion crinkle, scrunching in about 1 inch thickness.
- Arrange: Place the crinkle in a parchment pan lined 13x9 baking sheet with the folds facing up and repeat until the pan is full.
- Bake: Bake for 10 minutes at 350°F.
- Butter: After the crinkle bakes for 10 minutes, drizzle on 1 cup of melted butter over the folds and bake for another 10 minutes.
- Custard: While the crinkle is baking, whisk together 1 cup milk, 2 eggs, 1 cup sugar, and 2 tsp vanilla until evenly combined.
- Bake: Take the crinkle out of the oven and pour the custard on evenly and then bake again until golden and crispy, for another 30-40 minutes.
- Syrup: While the crinkle is doing it’s last bake, make a simple syrup but combining 1/2 cup water and 1 cup sugar in a small saucepan over medium heat. Reduce until it’s a thick simple syrup so it doesn’t soak into the cake too much.
- Enjoy: When the crinkle is ready, drizzle the syrup on top then let it cool before slicing and enjoying!
What is phyllo dough?
Phyllo dough is paper thin, translucent sheets of unleavened pastry used for making layered sweet and savory baked treats. Phyllo dough consists of flour, water, and a tiny bit of oil. You can make it at home but it’s super labour intensive and most people just buy it. Phyllo doesn’t puff when it bakes, it just gets feather light, crispy, and shatters. It comes frozen at the grocery store, near the puff pastry and ready made pie crusts.Tips and tricks
- Thaw the phyllo dough, in the package, in the fridge overnight.
- When you unwrap it, keep it covered with a damp paper or kitchen towel and plastic wrap so it doesn’t dry out.
- Make sure you use 2 sheets of phyllo per crinkle.
- Don’t forget to line your pan with parchment paper for easy release
- You can use aluminum foil trays if you’re making this as a gift for someone
Crinkle cake recipe variations
- Cinnamon crinkle: add 2 teaspoons of cinnamon to the custard and 1 tsp to the simple syrup.
- Chocolate crinkle: sprinkle on 1.5 cups of chocolate chips on the crinkle, tucking some of the chips into the folds.
- Fruit crinkle: serve the crinkle with fresh fruit and softly whipped cream.
- Brown butter crinkle: Brown the butter before pouring it on in the second bake.
Crinkle Cake Recipe
If you love sweet and crispy layers and layers of pastry, this crunchy, crispy Tiktok Crinkle Cake is going to be perfect for you!
- 1 package phyllo dough (defrosted)
- 2 sticks butter (melted, 1 cup)
- 1 cup milk
- 2 large eggs
- 2 cups sugar (divided)
- 2 tsp vanilla extract
- 1/2 cup water
Heat the oven to 350°F and line a 13x9 inch baking sheet with parchment paper. Separate the phyllo dough and grab 2 sheets of phyllo dough by the corners. Fold them in an accordion crinkle, scrunching in about 1 inch thickness.
Place the crinkle in a parchment pan lined 13x9 baking sheet with the folds facing up and repeat until the pan is full. Bake for 10 minutes.
Drizzle on the melted butter bake for another 10 minutes.
While the crinkle is baking, whisk together 1 cup milk, 2 eggs, 1 cup sugar, and 2 tsp vanilla until evenly combined.
Take the crinkle out of the oven and pour the custard on evenly and then bake again until golden and crispy, for another 30-40 minutes.
While the crinkle is doing its last bake, make a simple syrup but combining 1/2 cup water and 1 cup sugar in a small saucepan over medium heat. Reduce until it’s a thick simple syrup, about 10 to 12 minutes. Finish by drizzling the syrup on top then letting it cool before slicing and enjoying!
I Am... Sesame Oil
Nutty, deeply fragrant, and aromatic, a good quality toasted sesame oil can enhance all kinds of dishes with a delicious roasted flavor. I LOVE toasted sesame oil. It’s my number one finishing and flavoring oil. I fell in love with it when I was just a little girl. My favorite pack of instant ramen, Nissan sesame noodles, came with a tiny little package of it that you add to the soup right before you eat. It was so amazing, that little packet of flavor started my life long affair with this stuff. It's now is one of my top must have pantry items.
What is toasted sesame oil
Toasted sesame oil is a super nutty, aromatic finishing oil pressed from toasted sesame seeds. The aroma and nuttiness of the sesame is more intense and noticeable because of the toasted seeds.What is the difference between regular sesame oil and toasted sesame oil?
There are two types of oil and they don’t taste the same at all!- Untoasted: pressed from raw sesame seeds has a very light blonde color, no flavor, and no scent. It has a high smoke point, making it a good cooking oil.
- Toasted: pressed from toasted sesame seeds is a deep amber and intensely toasty with a nutty flavor and aroma. It has a low smoke point so it’s typically drizzled on at the end of cooking as a finishing and flavoring oil.
Where to buy
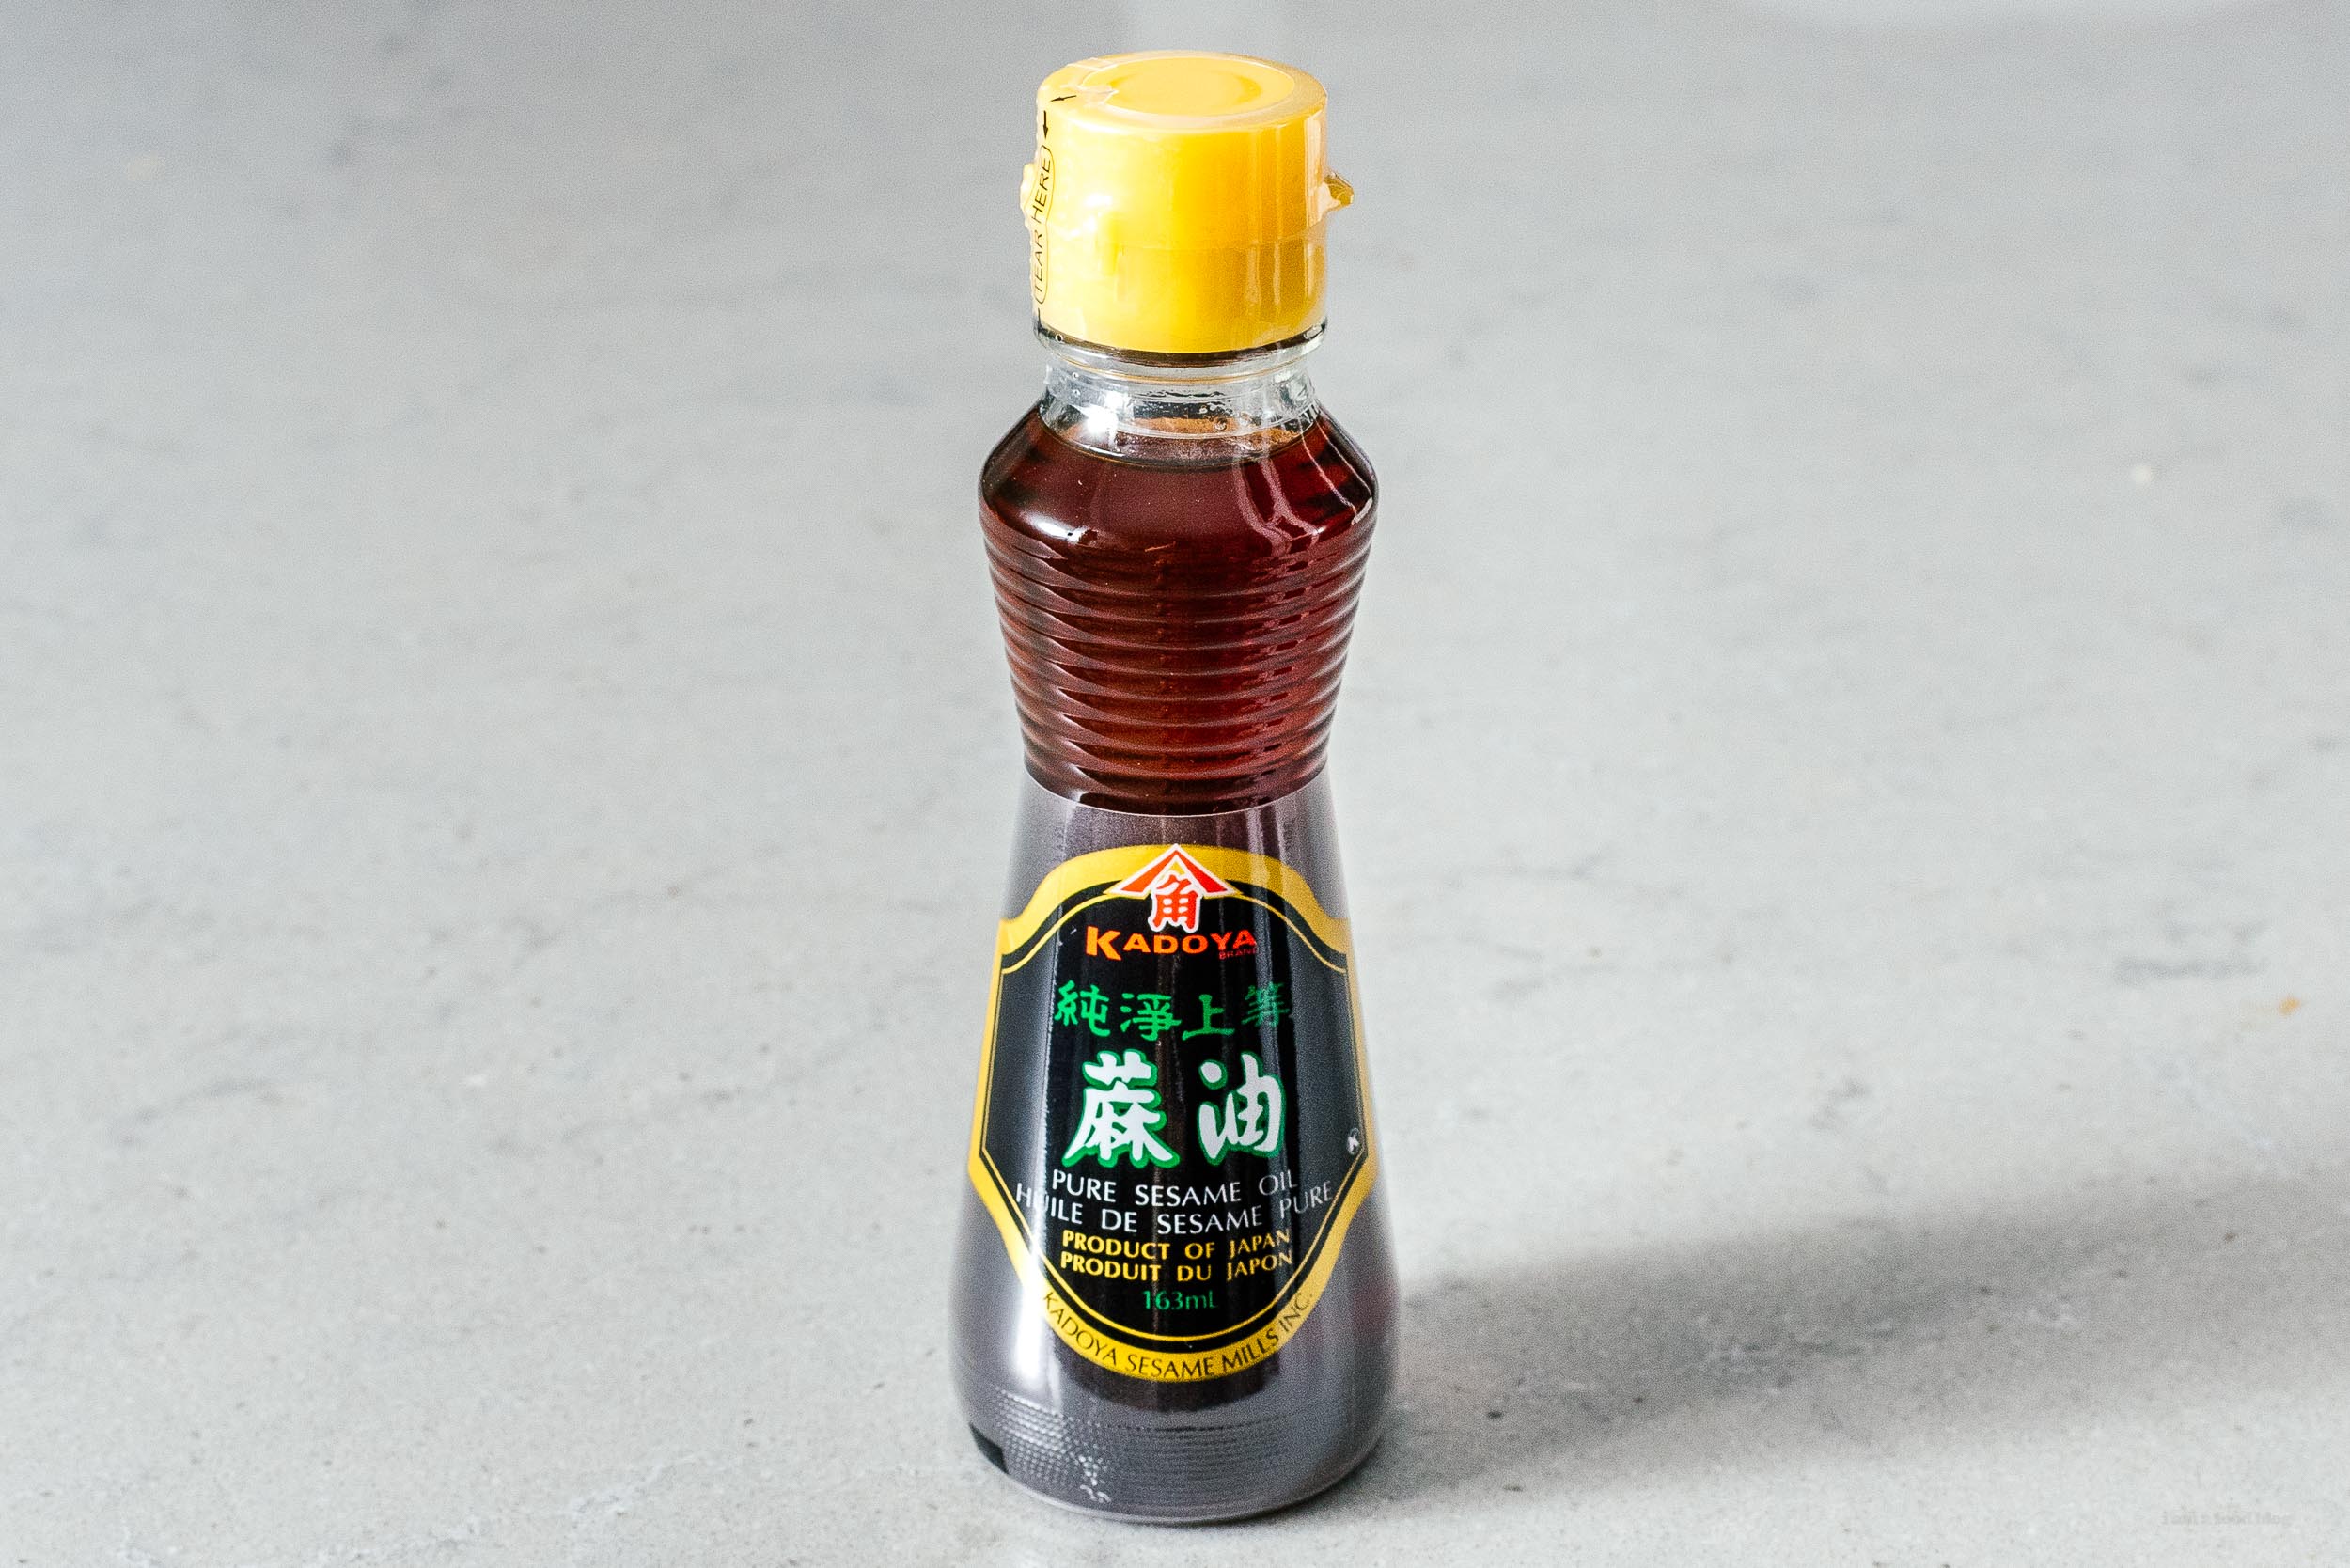
You’ll probably be able to find it in the Asian aisle at your local grocery store. Otherwise, it’s available at all Asian grocery stores and online. Our favorite brand is Kadoya, a Japanese brand that has been around forever.How to use
It's perfect for adding a toasted nutty flavor to:- noodles: adding a little to your noodles will bring them to another level
- stir fries: finish your stir fries with a dash for extra flavor
- grains: add a drizzle to your rice, quinoa, farro, popcorn
- salad dressings: add 1-2 tsp to your favorite salad dressing recipes for a hit of nuttiness
- glazes: for meats, fish, or tofu. It's an essential ingredient in our Korean fried chicken.
- sauces: for vegetables
Can I cook with toasted sesame oil?
Truthfully, it's more of a finishing oil, but you can use it when you’re cooking too! Just like when you add a bit of oil when cooking with butter to prevent burning, you can add a bit of neutral oil (like canola or sunflower) with your toasted sesame oil, then you can easily use it with heat.Homemade version
You can even make it at home! It won't come out as dark or nutty as the commercial version but it's still pretty sesame-y. All you need is:- 1/2 cup toasted sesame seeds
- 1 cup neutral oil
- Add the seeds and oil to a pan and gently heat for 2-5 minutes, stirring or swirling constantly so that the seeds don’t burn.
- When the oil is aromatic, remove from the heat and strain out the seeds.
Toasted sesame oil substitute
It’s super easy to buy the real deal these days but if you’re looking for a substitute, you can try sesame paste - either Chinese or, in a pinch, tahini - are both good options.Chinese sesame paste
Made from toasted sesame seeds, this basically has the exact same flavor. Chinese sesame paste is essentially toasted sesame seeds ground into a paste, much like tahini. You can scoop a bit out of the jar and thin it out with a neutral oil.Recipes that use sesame oil
In case you end up with extra you don't know what to do with:Toasted Sesame Oil Recipe
Nutty, deeply fragrant, and aromatic
- 1/2 cup toasted sesame seeds
- 1 cup neutral oil
Add the toasted sesame seeds and oil to a small pan and heat over very low heat, swirling and stirring, for 2-5 minutes.
Remove from the heat and strain out the sesame seeds.
If you don’t have toasted sesame seeds, you can toast un-toasted sesame seeds in a dry pan over very low heat, stirring, until they become toasted and fragrant.
I Am... The Easiest Dan Dan Noodles
These are the super easy dan dan noodles you’re going to be making over and over again when you want a fast, easy, flavorful meal that takes just under ten minutes.
Dan dan noodles for the win!
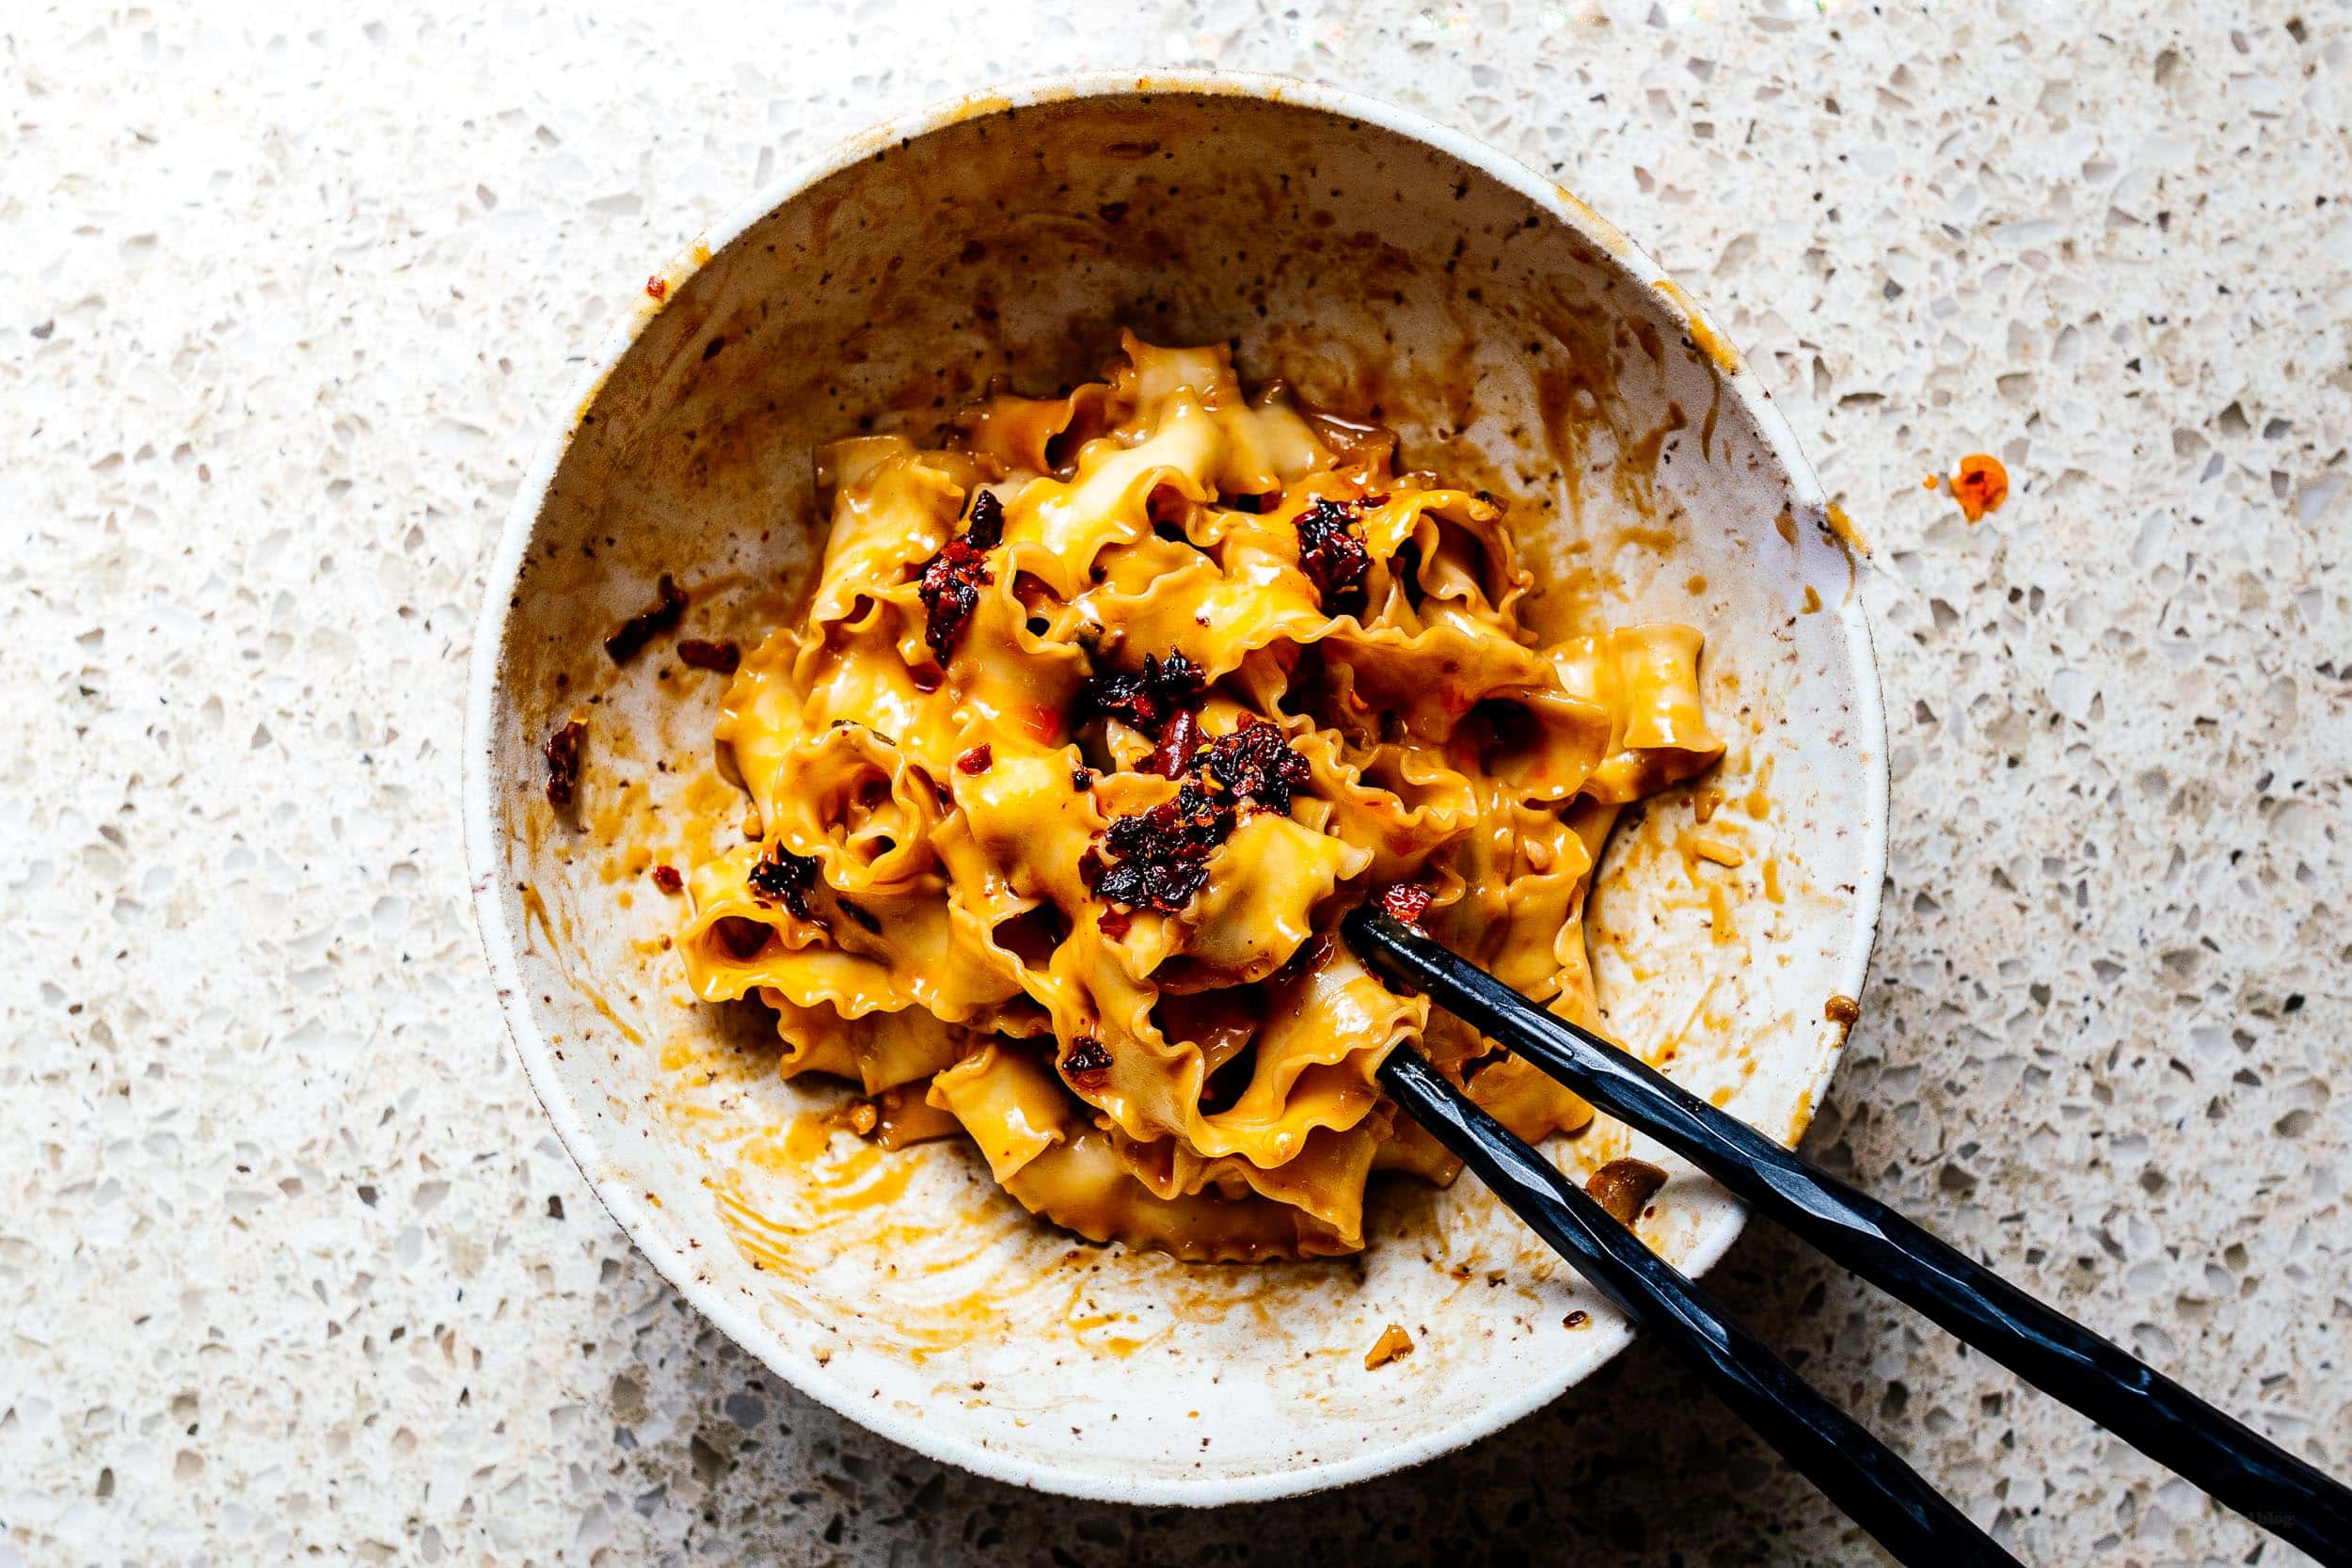
This is my go to meal when I don’t know what to eat but I want something fast and quick and flavorful. Technically it isn’t dan dan mian/dan dan noodles but it technically is too. See, dan dan noodles are one of those dishes, the kind where there are a thousand variations, even in Sichuan, where they’re from. They can come in soup, they can come more dry, they can have pork, they can be vegetarian, they can be whatever you want, really. The beauty of these noodles is: if you can boil noodles and mix sauce in a bowl, you can make these super satisfying spicy noodles.What do these dan dan noodles taste like?
These noodles are spicy, savory, and nutty with a little hint of malty vinegar. They’re full of flavor and so good.How to make dan dan noodles
- Mix. In a large bowl, mix together all the the sauce ingredients.
- Cook. Add the noodles to boiling water and cook according to the package directions. Save 1/4 cup of the cooking water then drain the noodles.
- Toss. Toss the noodles with the sauce until coated and glossy, loosening with extra hot noodle water if too thick.
- Eat. Enjoy immediately topped with toasted sesame seeds and extra chili crisp if desired.
Ingredients for dan dan noodles
Chinese sesame paste
This is similar to tahini but really different. Just by looking at it, you can tell that Chinese sesame paste is a lot darker and thicker. That’s because it’s made from toasted un-hulled sesame seeds whereas tahini is make from untoasted hulled sesame seeds. Chinese sesame paste is nuttier, deeper, and more toasty tasting. If you love sesame, you’ll love it. It’s super thick, so give it a good stir (just like natural almond butter) before using. They sell sesame paste at Asian grocery stores and online. Whangzhihe is probably the most common sesame paste sauce you’ll see.Chili crisp
Our go-to brand, along with the rest of the world is Lao Gan Ma. It’s a chili oil that’s deeply savory, not too spicy, and has little bits of crispy crunchy bits that are incredibly addictive. The crunchy bits are chili peppers, garlic, and roasted soy beans. It’s seriously amazing. You can buy it at Asian grocery stores or online. You can even make your own at home!Soy sauce
There are so, so many soy sauces out there. I could write a whole blog post on soy sauce! Most good Asian grocery stores devote a whole aisle to the hundreds of different types. Obviously the best one is the one in your pantry, but if you’re running out or want to expand your soy sauce collection, make sure you go for naturally brewed. There are two main types of soy sauces commercially available: naturally brewed/fermented and chemically produced. Get the naturally brewed or fermented for its complex deep aroma and flavor. We like both Amoy and Lee Kum Kee. In this case, you’re looking for light soy sauce. Even better if you get first extract/first press soy sauce.Chinese black vinegar
Black vinegar, also known as Zhenjiang or Chinkiang vinegar is a black sticky rice based vinegar that is fruity, slightly sweet, malty, and just the bit reminiscent of balsamic. It has a deep flavor and just a hint of smoke. It adds acidity and sweetness and is a backbone in Chinese cooking. It’s perfect for balancing out rich flavors like sesame. Chinese black vinegar can be found at Asian grocery stores and online.Sugar
Just a touch of sugar balances out the spice and tang of the chili crisp and vinegar. The hint of sweetness contrasts the savory flavors and makes everything sing.Garlic
Raw garlic adds a huge punch of garlicky spiciness. Make sure your finely mince, or better yet, use a garlic press.Noodles
You can use any type of noodles for this recipe but I love using knife cut noodles, known as dao xiao mian (刀削面) or Chinese shanxi planed noodles. They’re noodle ribbons with a ruffled, frilly edge that have an amazing texture. The center of the noodle is thicker and chewier and the frills are thinner and more supple. Sometimes they’re referred to as non-fried noodles because they’re steamed before they’re dried, unlike a lot of other dried noodles. They sell them at Asian grocery stores and online. They don’t sell the ones we buy online but these look pretty similar, you just need to use the noodles and discard the sauce packets.Ingredient substitutes
This an easy noodle bowl, so don’t worry too much about the ingredients. If you need to substitute ingredients, go for it!- Chinese sesame paste substitute: You can use natural, unsweetened peanut butter or tahini mixed with 1 teaspoon toasted sesame oil
- Chili crisp substitute: If you don’t have chili crisp but you have crushed red peppers, you can make a quick substitute by heating up a bit of oil until shimmery and pouring them over the crushed red peppers.
- Black vinegar substitute: The top choice to substitute is balsamic vinegar because it will have the same sweet notes. If you don’t have balsamic you can use rice vinegar, apple cider vinegar, or white vinegar with a 1 tsp of brown sugar mixed in.
Dan Dan Noodles
When you want a fast, easy, flavorful meal that takes just under ten minutes.
- 2 tbsp Chinese sesame paste
- 2 tbsp chili oil (or to taste)
- 2 tbsp soy sauce
- 2 tsp black vinegar
- 2 tsp sugar
- 1-2 cloves garlic (finely minced)
- 2 servings noodles (of choice)
- toasted sesame seeds (if desired)
In a large bowl, mix together the sesame paste with the the chili oil, soy sauce, vinegar, sugar, and garlic.
Cook the noodles according to the package instructions. Save 1/4 cup of the cooking water, then drain well.
Toss the noodles with the sauce, loosening with hot noodle water if too thick.
Enjoy topped with toasted sesame seeds and extra chili oil.
Estimated nutrition doesn't include your noodles of choice.
I Am... Miso Tuna Salad
Tuna salad is a vibe. Those who love it love it and those who hate it just haven’t tasted the right tuna salad. I love it and I pretty much always have. Give me a tuna melt and I’m in HEAVEN. This miso tuna salad has been my go to forever because: miso! Miso makes everything better, it adds depth, umami and healthy probiotics.
The best tuna salad
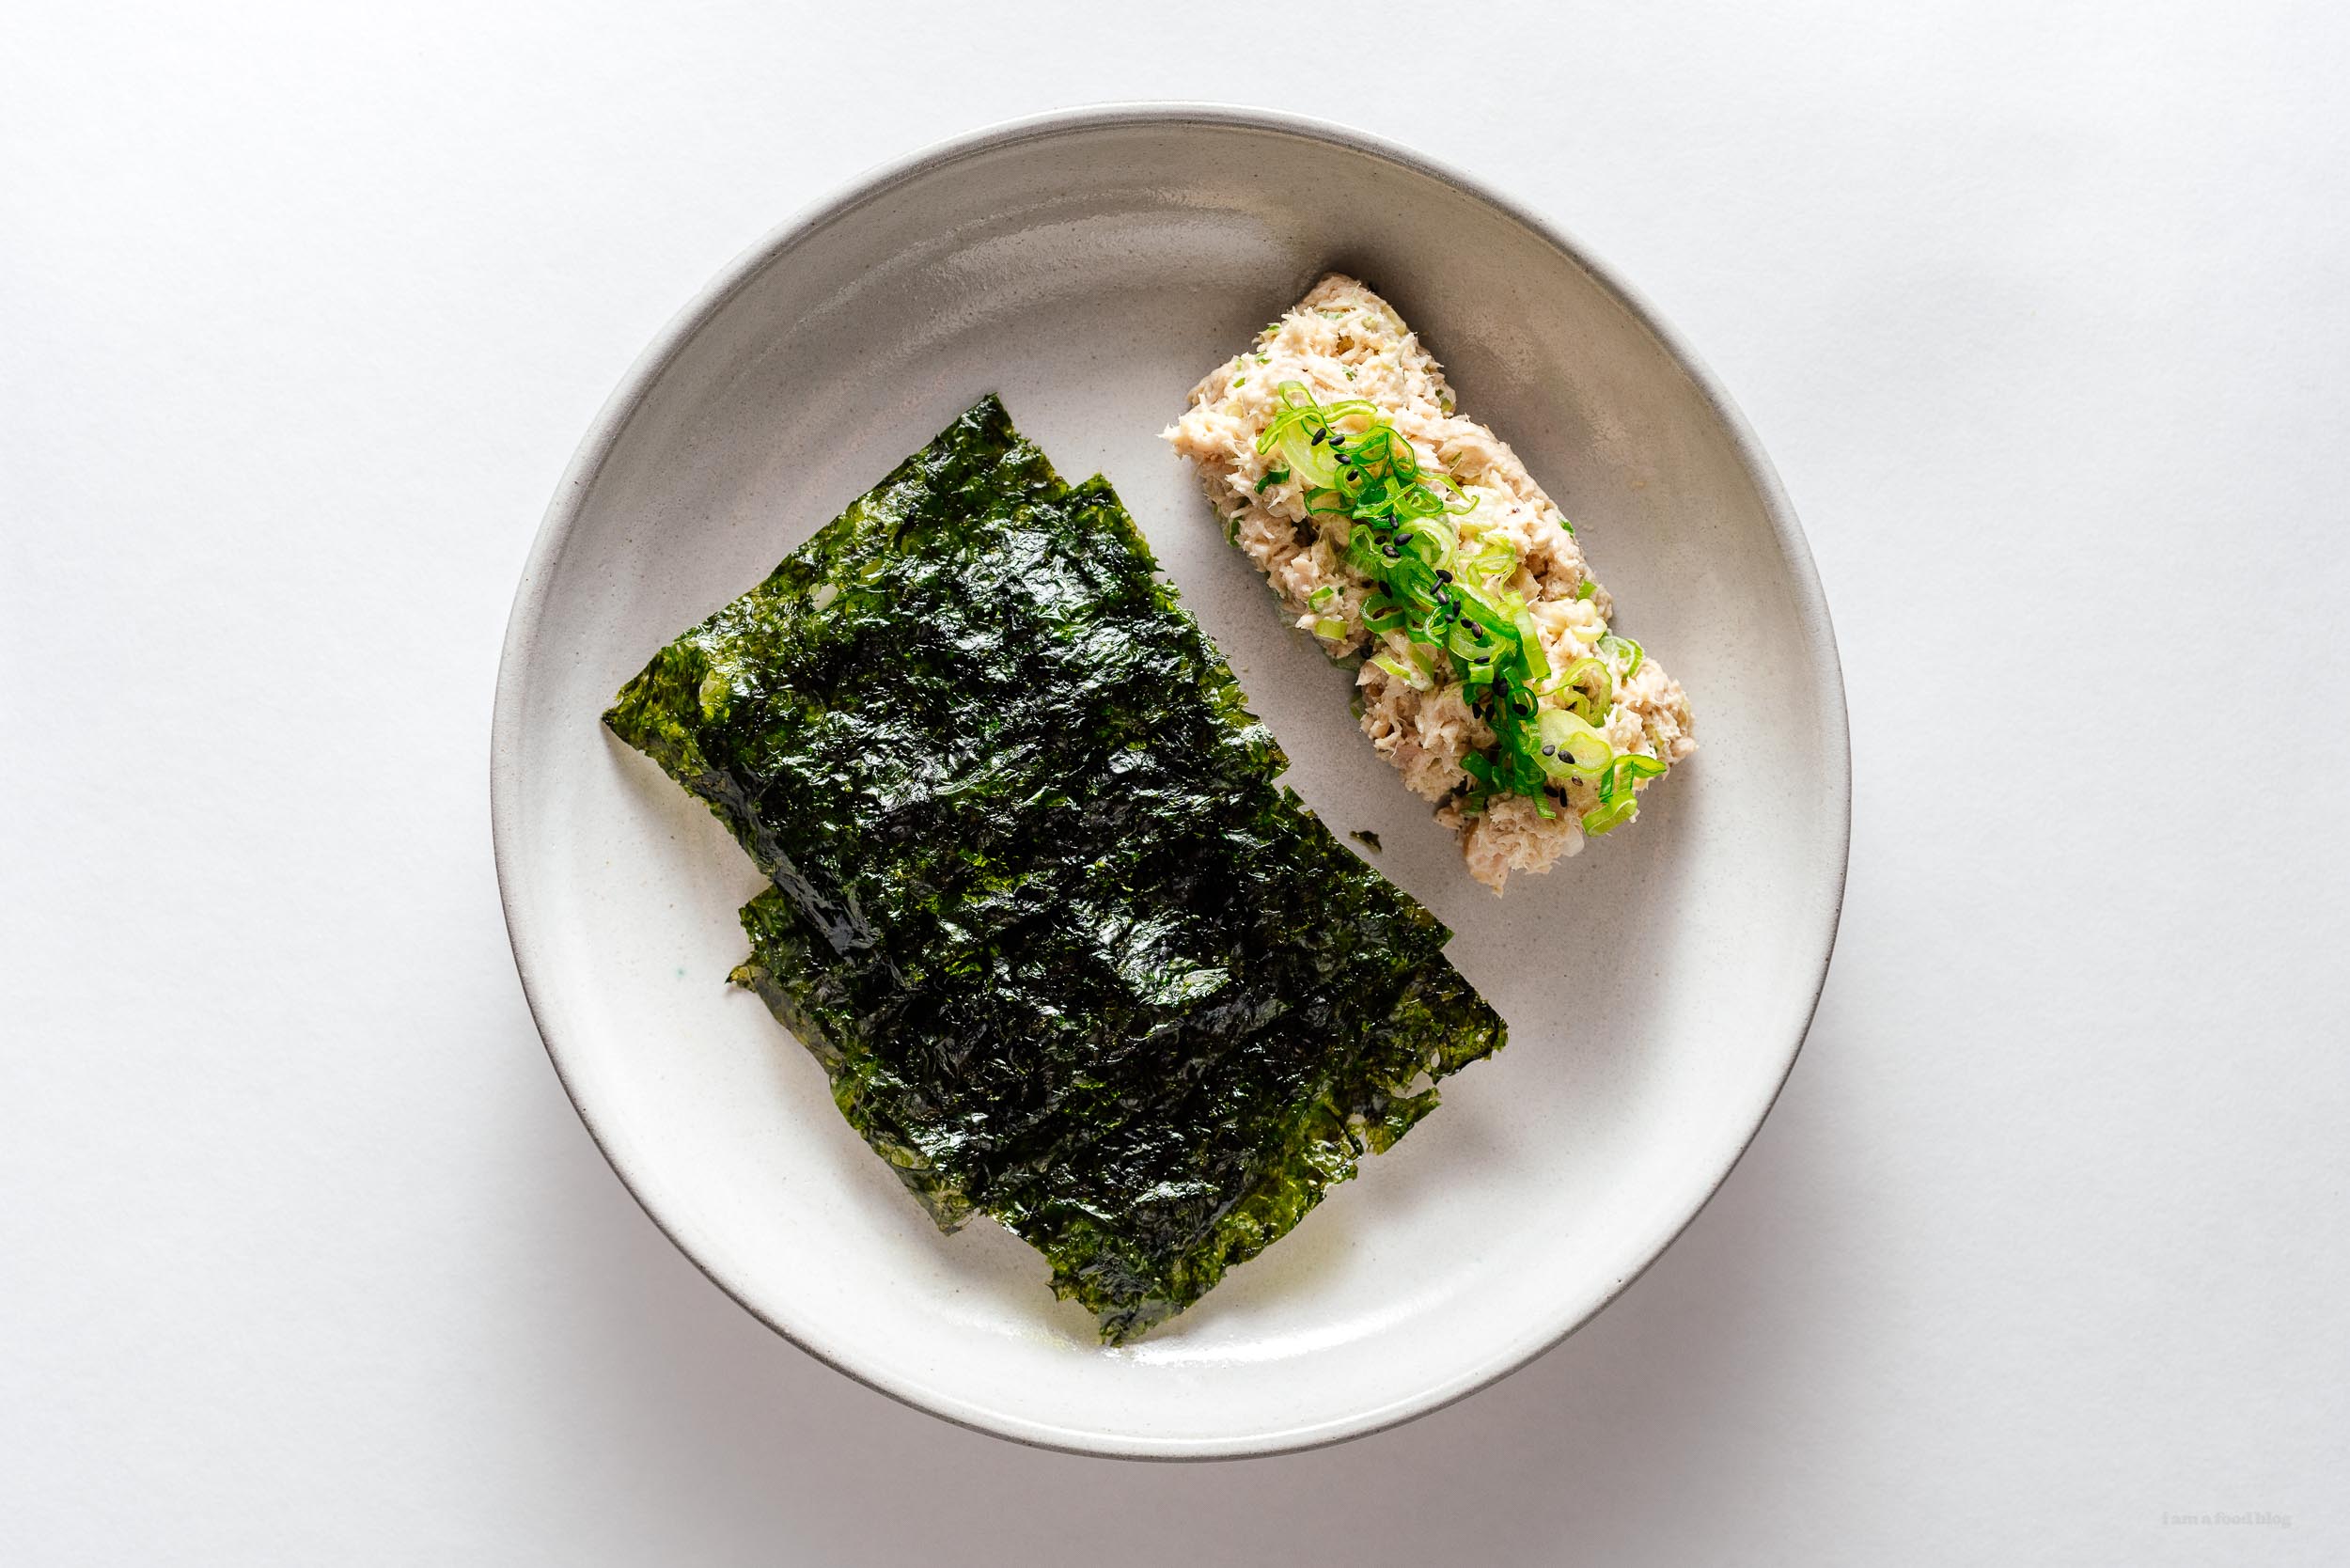
This tuna salad is a simple mix because it’s one of my go-tos when I’m hungry but don’t have any groceries. It’s a little umami bomb and absolutely the perfect moreish no-carb snack. To a can of drained tuna, I stirred in a little bit of kewpie mayo, white miso instead of salt, celery for crunch, and green onions for bite. Crisp seaweed snacks are the best for scooping it up! It’s also amazing on super soft Japanese fluffy bread, toasted sourdough, or sourdough crackers.How to make miso tuna salad
- Super simple: mix together the miso and Kewpie until smooth and then add tuna, diced celery, and sliced green onions. Season with freshly cracked black pepper and enjoy!
Miso tuna salad ingredients
- miso - a traditional Japanese seasoning that is pretty much found everywhere now, miso adds depth and salty umami to this tuna salad. It adds a rich savoriness and as a bonus you don’t need to season with salt.
- kewpie mayo - this is a no brainer, kewpie mayo is so delicious, more on that below!
- tuna - you can use any tuna you like, we’re going to drain it so it doesn’t matter too much. I usually go with a chunk tuna as opposed to flaked. I like tuna packed in water, usually light tuna because it’s supposed to have less mercury. If you want your tuna a bit more rich, you can always add more kewpie but you can’t control the flavor of oil packed tuna.
- celery - tuna salad isn’t tuna salad without celery to add crunch.
- green onions - sliced them up and add them for freshness and a bit of oniony bite
- pepper - freshly cracked of course!
Which miso
For tuna salad I like to reach for a white miso, which is mellow and sweet. It’s called shiro miso or sweet miso and you can find it near the tofu at places like Whole Foods or at Asian grocery stores.Which mayo
Kewpie mayo, forever and always! If you’re not a mayo fan, you have to try Kewpie mayo: the ubiquitous clear, red-topped squeeze bottle of mayo found in practically every Japanese household. It’s tangy from rice vinegar, slightly sweet, and extra creamy. It is absolutely delicious and will take this salad to the next level! Read more about kewpie here.What else can I make with kewpie mayo?
You can use kewpie mayo anywhere you would use regular, but here are some recipes to get you started:- Mayo ramen – for an extra rich luxe restaurant style ramen
- Ebi chili mayo – Deep fried tempura prawns with sweet and spicy Kewpie
- Japanese Egg Sando (or this one) – Japanese egg salads aren’t Japanese unless you use Kewpie. This is gonna be the best egg salad you’ll ever taste
- Japanese potato salad – It just hits different. It’s the Kewpie!
- Takoyaki – the classic takoyaki topped with Kewpie
- Deviled eggs – eggs get an upgrade with Kewpie mayonnaise
- Sushi bake – because it’s the creamiest, warmest, most satisfying casserole
Miso Tuna Salad
Miso makes everything better, it adds depth, umami and healthy probiotics.
- 1 tbsp white miso
- 2 tbsp kewpie mayo
- 1 can tuna (drained)
- 2 tbsp celery (diced)
- 2 tbsp green onions (sliced)
- freshly ground pepper (to taste)
Mix together the miso and kewpie until smooth. Add the drained tuna, celery and green onions.
Mix throughly and season to taste. Enjoy on its own or on top of crackers, toast, or seaweed.
Adjust the miso content to taste, miso pastes vary greatly in terms of saltiness. Also, feel free to add more kewpie mayo if needed.
I Am... Udon Carbonara
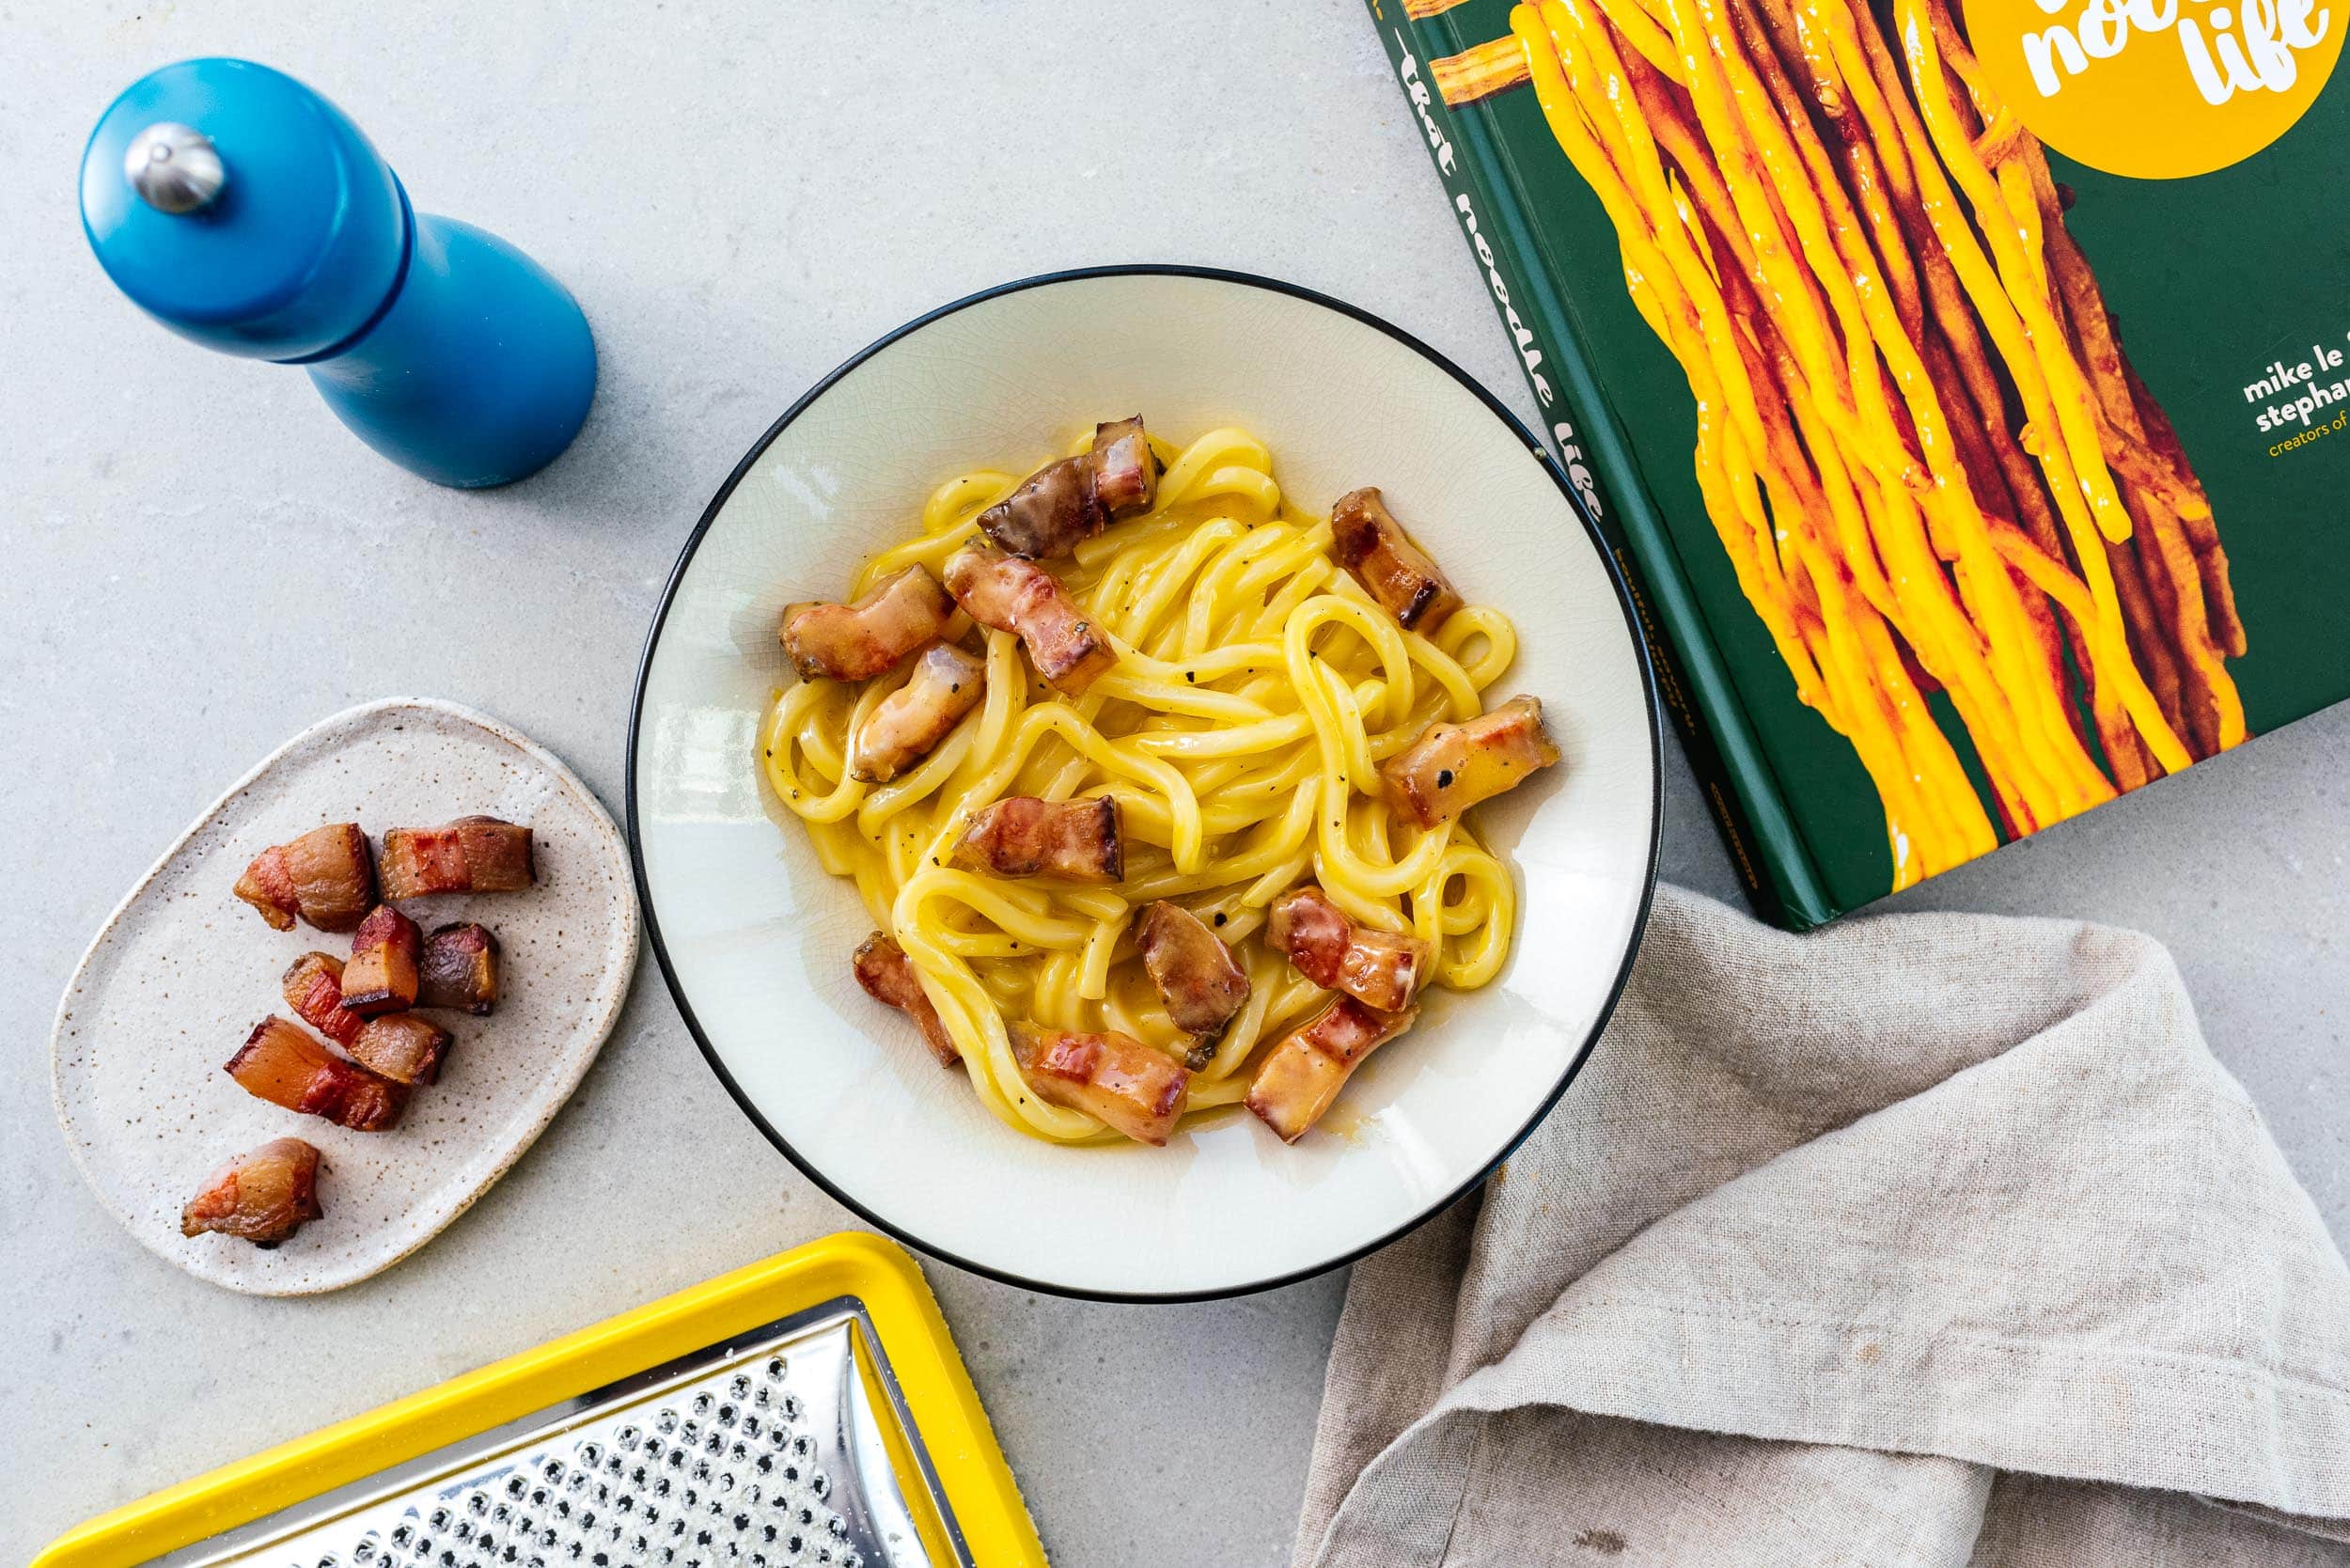
I love thick noodles. And the bestest, thickest noodle of them all is udon. And one of the bestest ways to make udon is this udon carbonara. I love udon so much that Mike and I took a pilgrimage to the birthplace of sanuki udon in Japan so we could eat ALL the chewy thick noodles. It was glorious. We are truly noodle lovers. So much so that we wrote a 272 page love letter to noodles in the form of our very first cookbook together, That Noodle Life. It comes out April 12, 2022 and you can pre-order it today to get a free NOODLES NOODLES NOODLES tote as a bonus!
Udon is the ultimate noodle
If you’re going to live that noodle life, you need to have udon in it. The best thing about udon is that it is a noodle that is well suited to just about anything. It holds up perfectly in soup, stir fries like a boss, and is amazing in classic Italian pasta dishes. The chewy toothsome fill-your-mouth wholesomeness of udon paired with silky smooth cheesy eggy carbonara sauce is the noodle pairing you never knew you were missing.Udon carbonara: the ultimate carbonara
When you have a good carbonara you know it in your bones. The cheesy, creamy, perfectly emulsified sauce is full of flavor. The nuggets of salty crispy pork accentuate the savory cheesiness of the sauce. Everything comes together into one perfect flavor-filled rich and peppery note. This carbonara is excellent. Dare I say the ultimate?! The glossy golden sauce clings to the extra plump strands of udon. The guanciale is crisp and explosive. It’s just so good, I have no words.Why is this carbonara sauce so good?
While recipe testing for our book, we made so many batches of carbonara that we bought eggs by the flats and whole guanciale cheeks. Eventually we came up with these rules:- Yolks only: An all yolk carbonara sauce is key. Egg whites and yolks cook at different temperatures due to the their differing fat content. Using only yolks gives you so much more control and no scrambled eggs. Aerating the yolks and really whipping air into the along with the cheese allows the sauce the emulsify and disperse evenly around your noodles.
- Two kinds of cheese: Any Italian will tell you that you need both Parmesan and Pecorino. Parmigiano-Reggiano, made from cow’s milk, will give your carbonara an intense umami note. Pecorino Romano, made from sheep’s milk, adds saltiness and depth. If you can, get the cheese that’s imported from Italy, it’s the real deal.
- Guanciale, please: There are carbonara recipes out there made with pancetta and we get it - guanciale is not a pick it up at your local corner grocery store kind of ingredient, but it is so worth the special trip. When rendered, guanciale fat is fragrant, sweet, savory, and not too salty.
What kind of udon?
Our favorite kind of udon is sanuki udon. Sanuki udon comes from the Kagawa area of Japan and is square with flat edges. It’s super chewy, thick, and has the best texture. You can easily find sanuki udon in the freezer section of Asian grocery stores. It usually comes in a 5 pack, precooked, imported from Japan. All the noodles need is a quick bath in boiling hot water to warm them through. Since they’re already cooked, they don’t need long in the boiling water, we’re just heating them through and getting a bit of starch from the noodles into the water to thicken up the sauce.Guanciale vs pancetta
We call for guanciale in this carbonara because it lends a slight sweetness that pairs well with the cheeses. Biting into a crisped up cube of guanciale is biting into pure delicious pork goodness. If you can’t get your hands on guanciale, go for pancetta, but the whole kind so you can cut it into sizable cubes.- Guanciale: salt and spice cured pork cheeks. Guanciale tends to be fatter and has a more robust flavor due to a longer cure. Slightly sweet due to the curing process.
- Pancetta: salt and pepper cured pork belly. Pancetta is a tiny bit less fat compared to guanciale and leans more towards the saltier side.
How to make carbonara udon
Carbonara udon goes much the same way as classic carbonara.- Make the sauce. Whip up room temp egg yolks with finely shredded parmesan, pecorino, and freshly ground pepper. Use a large bowl and a whisk to really whip it up, aerating the thick mix as much as you can.
- Crisp up the guanciale. You don’t need to add any extra fat to the pan, just pop in large cubes of guanciale into a dry pan over medium low heat and flip the cubes as needed, rendering out the fat and crisping up the nuggets of deliciousness. When crispy, remove the pan from the heat.
- Cook the udon. Briefly warm up the udon in boiling water. When hot, scoop the udon directly from the pot of boiling water into the pan with the guanciale and fat, coating the udon in the rendered fat.
- Toss. Scoop out 2 tbsp of hot udon water into the bowl with the egg and cheese. Whisk well to emulsify and combine then add the sauce to the pan. Place the pan over low heat and toss the udon with the sauce, loosening with extra udon water if needed, until coated and glossy.
- Enjoy. Plate it up, top with extra cheese and pepper and slurp away!
Carbonara Udon
Glossy golden sauce, extra plump strands of udon, crisp and explosive guanciale. It’s just so good.
- 2 large egg yolks (room temp)
- 1/2 cup Parmigiano Reggiano cheese (finely grated)
- 1/2 cup Pecorino (finely grated)
- 1/4 tsp freshly ground pepper
- 1.5 oz guanciale (chopped, sub pancetta if needed)
- 1 brick frozen udon (Sanuki style)
- 1/4 cup udon water
Whisk the egg yolks with the grated cheeses and pepper in a large bowl until everything comes together into a thick aerated paste. Set aside.
Crisp the guanciale in a pan over medium heat until the fat renders and the guanciale is crisp. Remove the pan from the heat and set aside.
Meanwhile, bring a pot of water up to a boil over high heat. Add the udon noodles to the boiling water. When the water comes back to a boil, scoop out the udon and add it to the pan with the guanciale, making sure to save the remaining udon water.
Toss the udon with the guanciale. Add 2 tablespoons of the hot udon water to the bowl with the egg and cheese mix and whisk to combine well. Add the sauce to the pan and toss everything low heat, loosening with extra udon water, until saucy and glossy. Enjoy immediately topped with extra freshly ground pepper.
I Am... 15 Recipes to Make for St Patrick’s Day
It’s almost St Patrick’s Day which means hello shamrock shake time! To be honest, I haven’t had a shamrock shake before but I am all about the green foods, Irish stews, and Lucky Charms. Are you planning a St Patrick’s Day feast? If so, check out some of the recipes below!
Best St Patrick's day food
Our go-to recipes every yearCorned Beef and Cabbage
Can you even have an Irish celebration if you don’t have corned beef and cabbage? Tender corned beef, creamy potatoes, sweet orange carrots, and cabbage make this the perfect St Patrick’s day feast. Corned Beef and Cabbage RecipeCorned Beef
Make your own corned beef! Super tender, juicy, and full of flavor. You’ll have some for corned beef and cabbage, sandwiches, and corned beef hash. Corned Beef RecipeCorned Beef Hash
This corned beef hash might just be the best ever breakfast. Juicy seared corned beef, roasted potatoes, and jammy eggs come together in this elevated and super pretty corned beef hash. Corned Beef Hash RecipeBoxty
Irish boxty is a traditional potato pancake and it’s amazing! Soft on the inside and crisp on the outside, served with sour cream and scallions, this pancake makes for an extra potato-y side. Boxty RecipeBeef and Guinness Pie
Super hearty, savory beef and Guinness pie is always the answer when you want to have a night of cozy deliciousness. Tender chunks of beef braised with Guinness, carrots, and mushrooms all topped off with a golden puff pastry top. Beef and Guinness Pie RecipePot of Gold Pasta
A little pot of golden pasta at the end of the rainbow: handmade orecchiette, sun gold yellow tomatoes, baby bocconcini, and fresh basil for a bit of lucky green. Pot of Gold Pasta RecipeGreen food for St Patricks Day
My lucky color: Green!Green Salad
It’s green and it’s great, so why not make a huge batch of the viral green goddess salad that’s been insanely popular. Bonus points if you find green tortilla chips to scoop it up with! Green Goddess Salad RecipeAir fryer broccoli
Air fryer broccoli is probably the easiest and best way to broccoli. Crisp, extra green, and just the right amount of char. Air Fryer Broccoli RecipeBroccoli Soba
Green is lucky and noodles are lucky, so why not combine the two and make a broccoli soba bowl? Super light, refreshing, and healthy. Broccoli Soba RecipeBroccoli and Cheddar Pies
We all know broccoli and cheddar are a match made in heaven and broccoli beef and cheddar hand pies are the dream team. These guys are perfect for a St Patrick’s Day picnic as they taste amazing hot or at room temp. Broccoli and Cheddar Pie RecipeBroccoli Tots
Make a huge bowl of these cheddar broccoli tots and pour yourself some Guinness or Irish whiskey for a St Patrick Day’s happy hour at home. Broccoli Tots RecipeLucky Charms Dessert Recipes
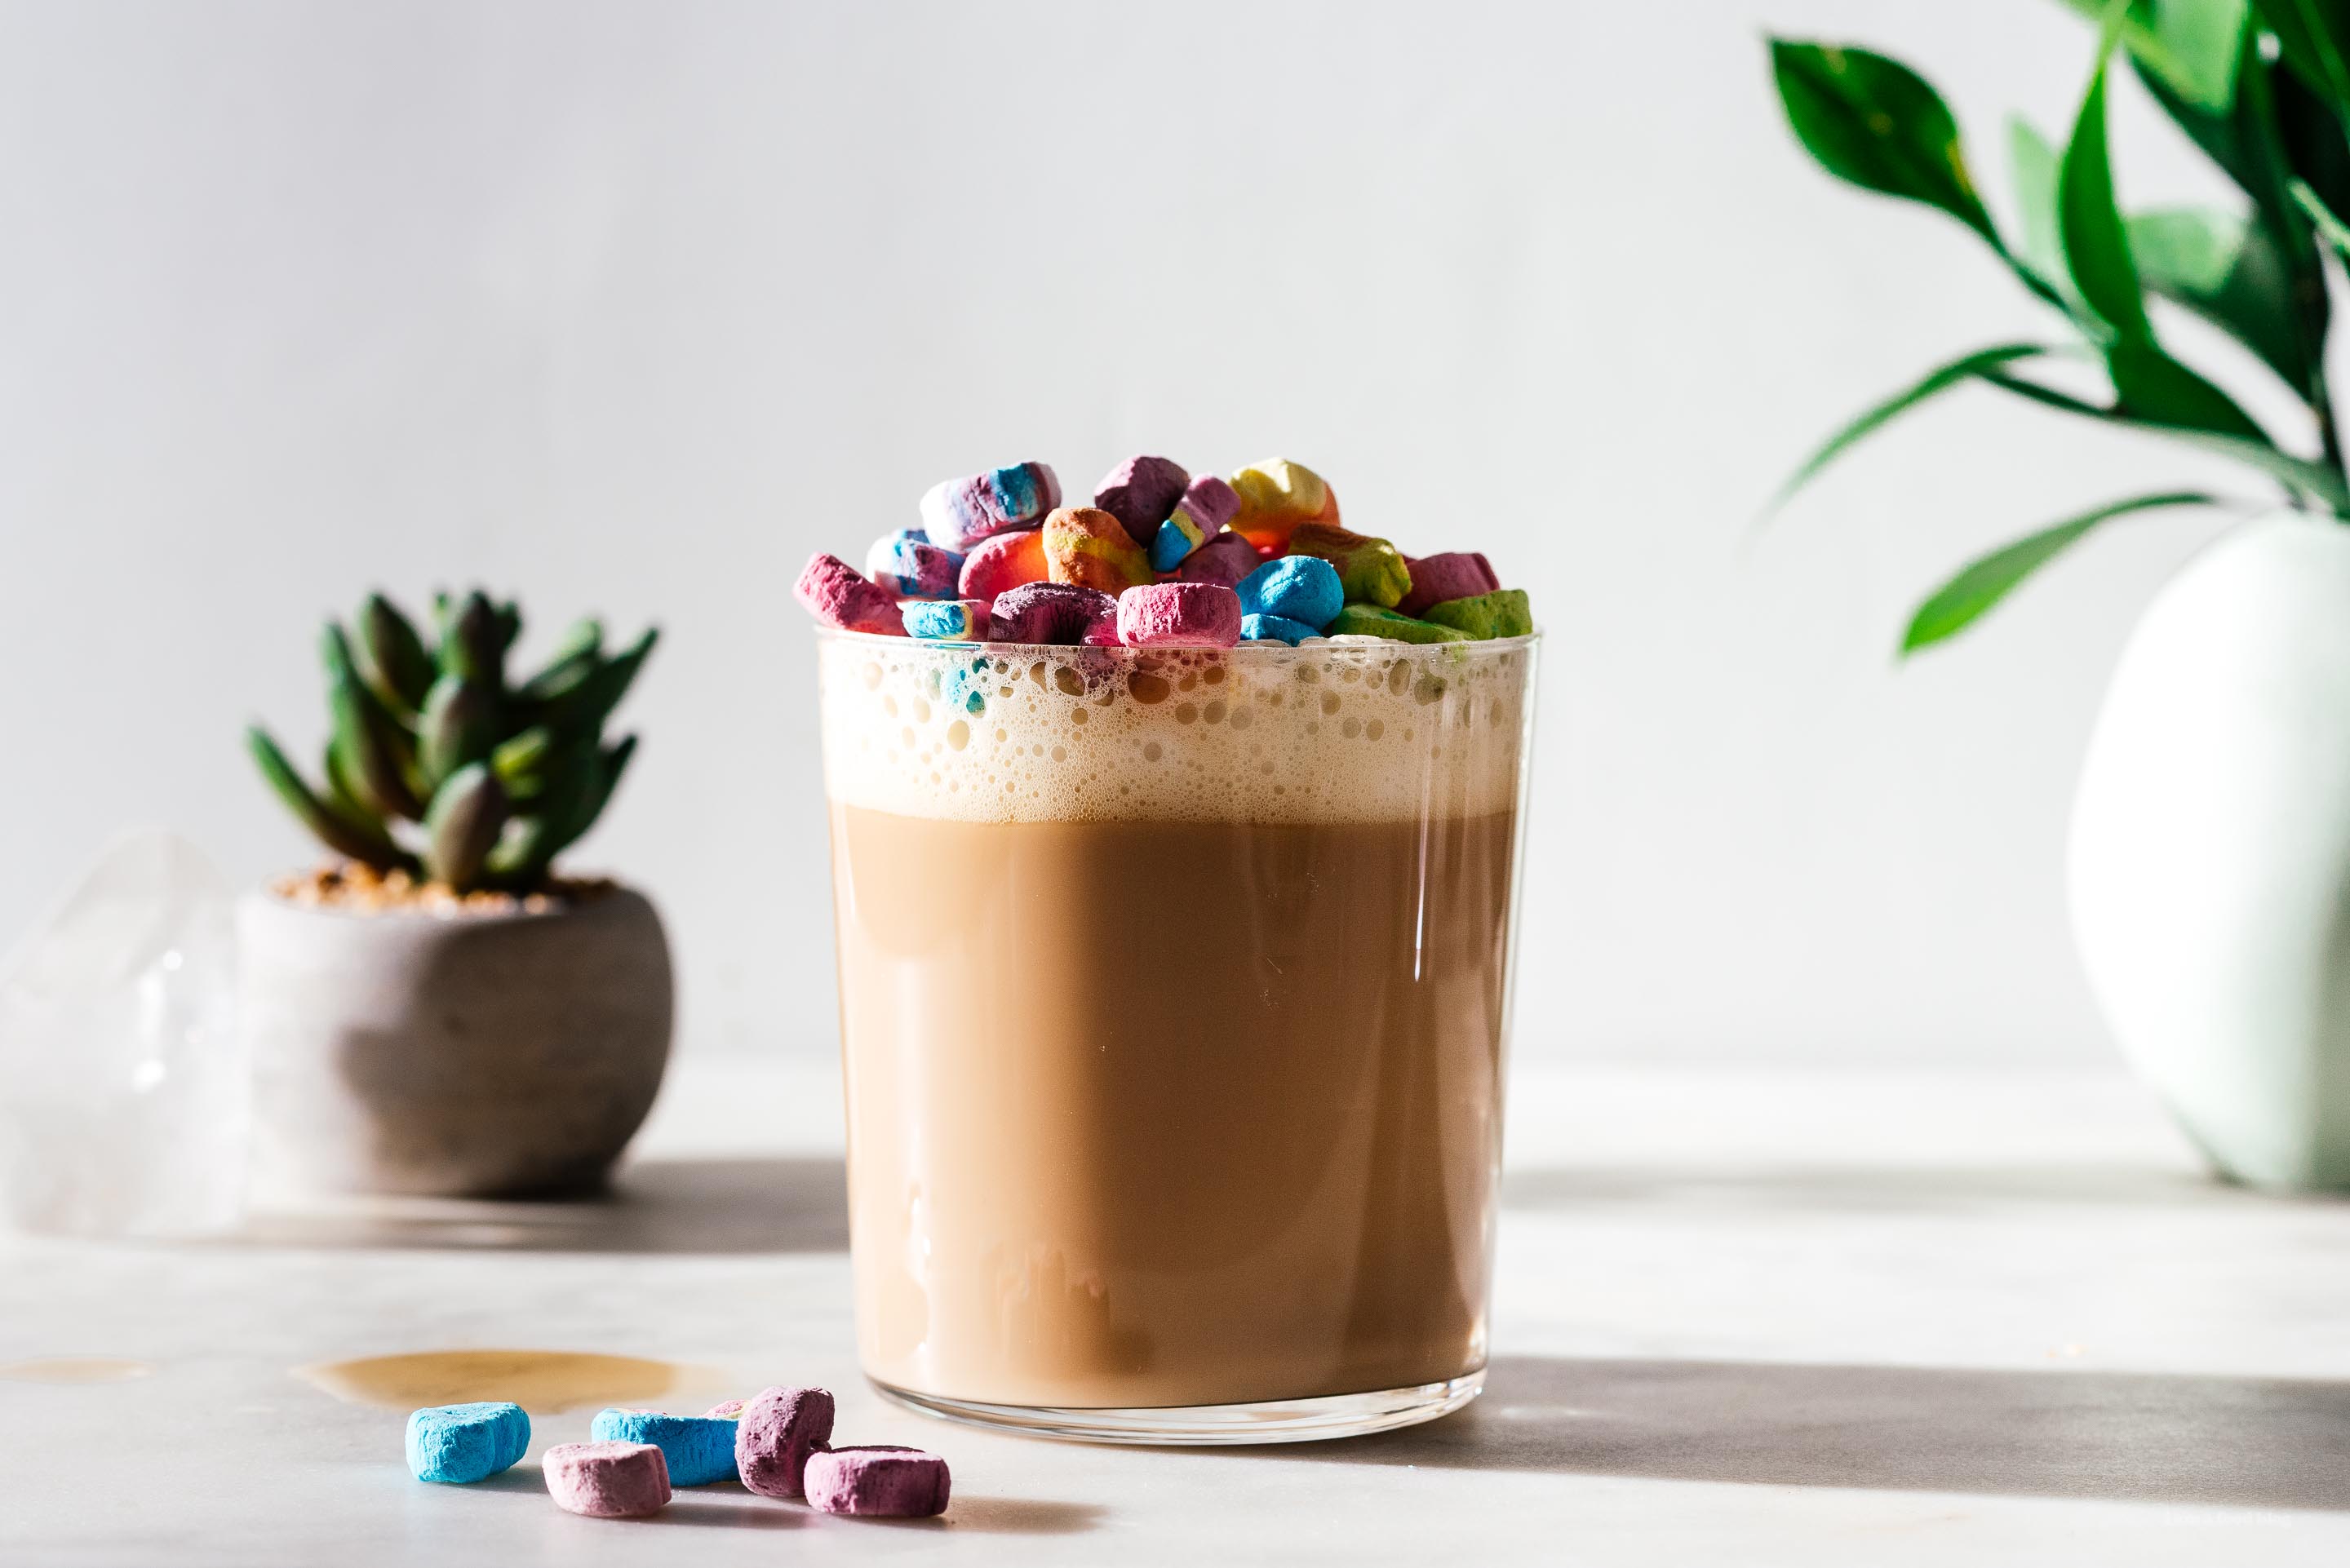
I love Lucky Charms year round but getting a box or two near St Patrick’s Day is a must. I love separating the cereal and marshmallows and I especially love making Lucky Charms treats.Lucky Charms Cereal Milk Latte
If you’re a cereal milk lover and you like coffee, make a cereal milk latte topped off with Lucky Charms marshmallows. This year I’m going to do a little twist and make dalgona with cereal milk! Lucky Charms Latte RecipeLucky Charms Treats
Just like rice crispy squares but better because Lucky Charms. This recipe makes one giant 4 inch by 4 inch treat that you can cut up or just enjoy by yourself because why not, it’s lucky, right?! Lucky Charms Treats RecipeLucky Charms Snickerdoodles
Cinnamon-sugar chewy cookies studded with Lucky Charms marshmallows. I would definitely want to find a batch of these at the end of the rainbow. Lucky Charms Snickerdoodles RecipeDouble Baked Lucky Charms Croissant
If you have a croissant lover in your life and they like lucky charms you have got to make this for them on St Patrick’s Day! It’ll look like a super fancy croissant from a high end bakery but you will have made it yourself. All you need to do is buy a nice croissant, make an almond filling, and bake the croissant with filling and Lucky charms on top! Seriously so good :) Lucky Charms Croissant Recipe Happy cooking/baking! Hope everyone has a lucky and fun filled St Patrick’s Day! xoxo steph Read More →I Am... Pesto Eggs
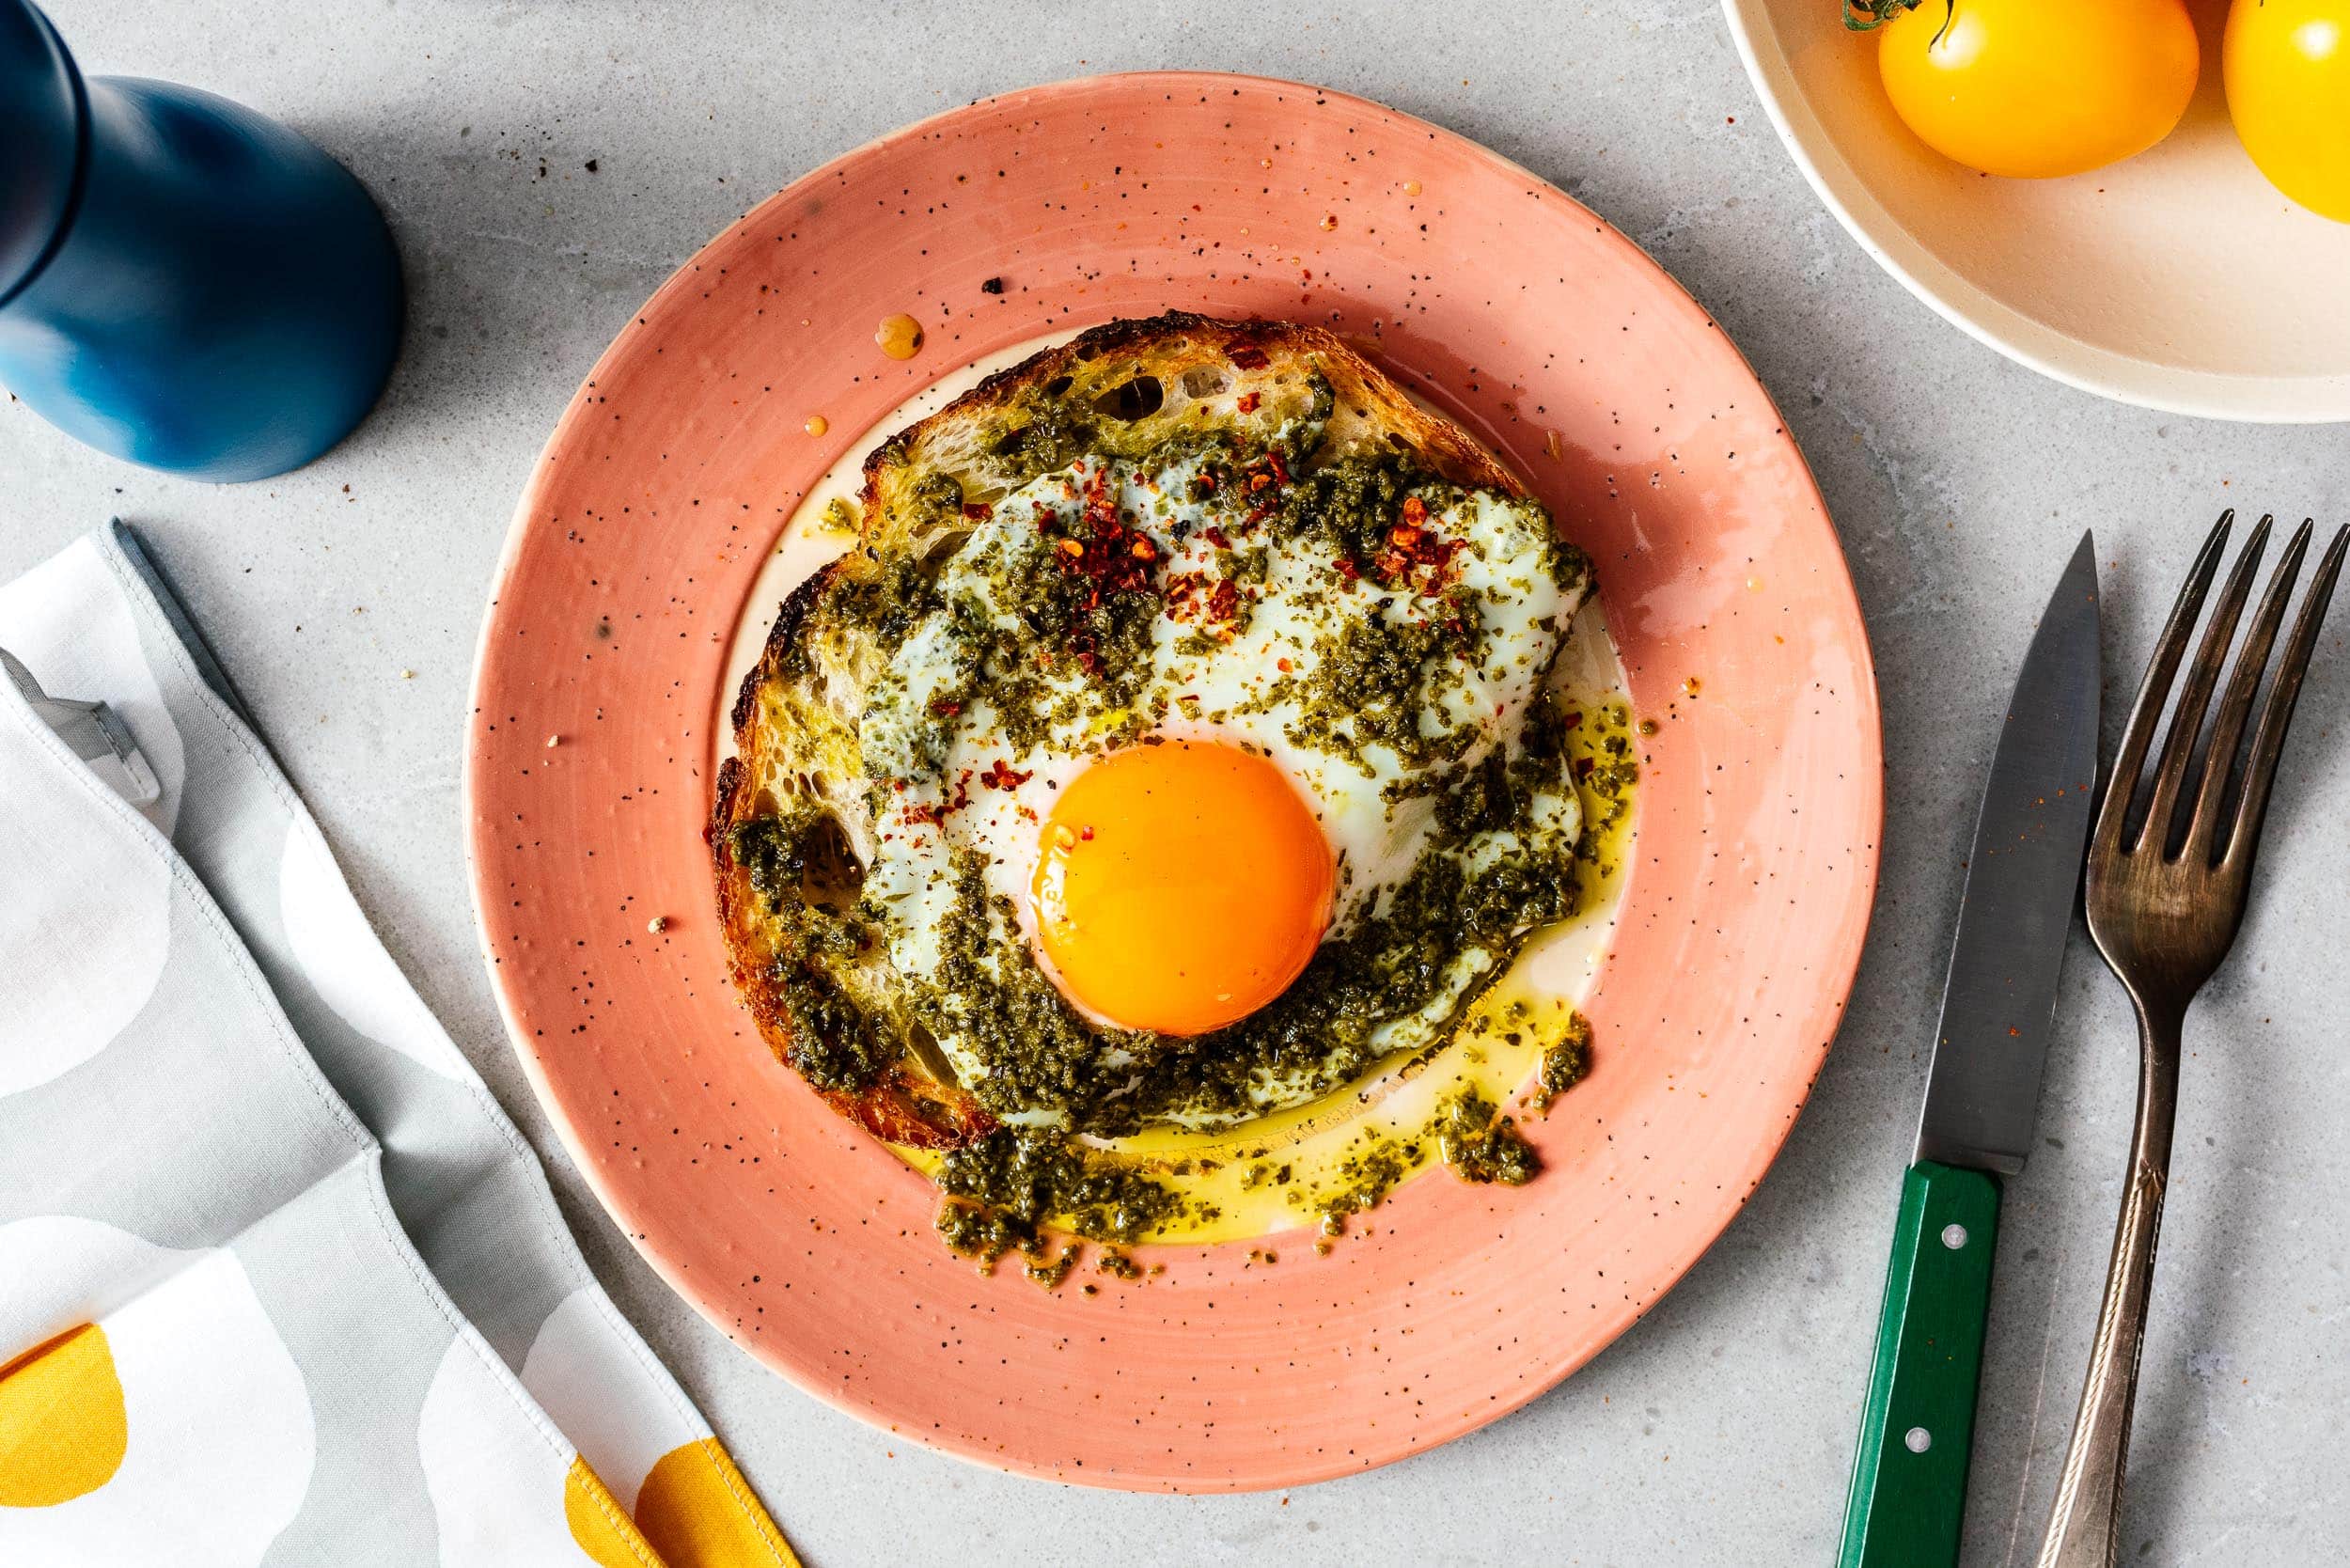
Pesto eggs will change your life. If you’re a fan of pesto and eggs, pesto eggs are going to change your life. It’s so simple you’re going to think it’s incredibly silly, but the truth is, sometimes simple things are best! Pesto eggs are the best of both worlds: Italian flavors and breakfast.
Tiktok is super eggcitied (sorry not sorry!) about pesto eggs
Pesto eggs come to us via Amy Wilichowski - it’s her favorite way to make eggs and she shared it on Tiktok where it’s now going viral. All you do is take a couple spoonfuls of pesto, heat it in a hot pan, then add eggs. The eggs fry up in the pine-nutty, basil oil and get infused with all those delicious pesto flavors.What do pesto eggs taste like?
If you love the flavors of pesto, you’ll love these guys. You get a huge fresh hit of basil, loads of garlic, cheesy parmesan, olive oil, and nutty toasted pine nuts. All the pesto flavors combine with the richness and crispiness of a fried egg. Finish it off with a sprinkle of flaky sea salt and chili flakes and you’ll be in breakfast heaven.Pesto egg ingredients
Pesto and eggs: that’s it! If you’re wanting to fancy it up a bit, toast up a piece of sour dough, spread some ricotta on top, add some avocado, top it with the pesto egg, a drizzle of honey, and a sprinkle of chili flakes, and flaky sea salt.Where to buy pesto
You can find pesto at the grocery store in the refrigerated section near the fresh pastas. If your grocery store doesn’t sell it, you can make it at home!How to make fresh pesto:
You need:- 1 large bunch of basil
- 2-3 cloves of garlic
- 1/3 cup toasted pine nuts
- 1/2 cup freshly grated parmesan
- 1/2 cup olive oil
- salt and pepper
How to make pesto eggs
- Add a couple of tablespoons of pesto to a non-stick skillet. Spread it around and let the oil heat up.
- When the oil is hot, crack and egg (or two) into the pesto.
- Let the egg cook slowly until it’s at your desired doneness (don’t turn the heat up too high or the pesto will burn).
- Enjoy sprinkled with chili flakes and flaky sea salt!
How to make perfect sunny side up eggs
Sunny side up eggs are so happy. Who doesn’t love perfectly cooked whites with a runny, gloriously yellow yolk? The trick to making perfect sunny side up eggs is all in controlling the temperature.- Take your eggs out of the fridge and let them come to room temp. They’ll cook faster and more evenly.
- Crack the egg into a small bowl to ensure that the yolk stays unbroken.
- Heat up the pan over medium heat with a bit of oil.
- When the oil is hot and shimmery, slowly pour the egg into the oil. The whites should turn opaque immediately.
- Turn the heat down and let the whites cook until solid, then slide a spatula under the egg, remove, and enjoy!
Tips
- keep the heat on low so the pesto doesn’t burn
- store bought pesto works but if you have the time, homemade pesto is insanely delicious!
- try the eggs scrambled instead of sunny side up
How to serve
- on their own
- on toast
- in breakfast sandwiches
- in breakfast bowls
- on pasta
- on instant noodles
- with rice
- in a tortilla
If you love pesto, try these other pesto forward recipes!
Pesto Eggs
Pesto eggs will change your life.
- 1-2 tbsp pesto
- 1 large egg
Heat the pesto in a non-stick skillet over medium heat.
When the pesto is warmed and shimmery, add in the egg. Cook the egg to your desired doneness.
Enjoy over toast, on a breakfast plate, in a breakfast bowl, or on its own!
I Am... Grated Egg Toast
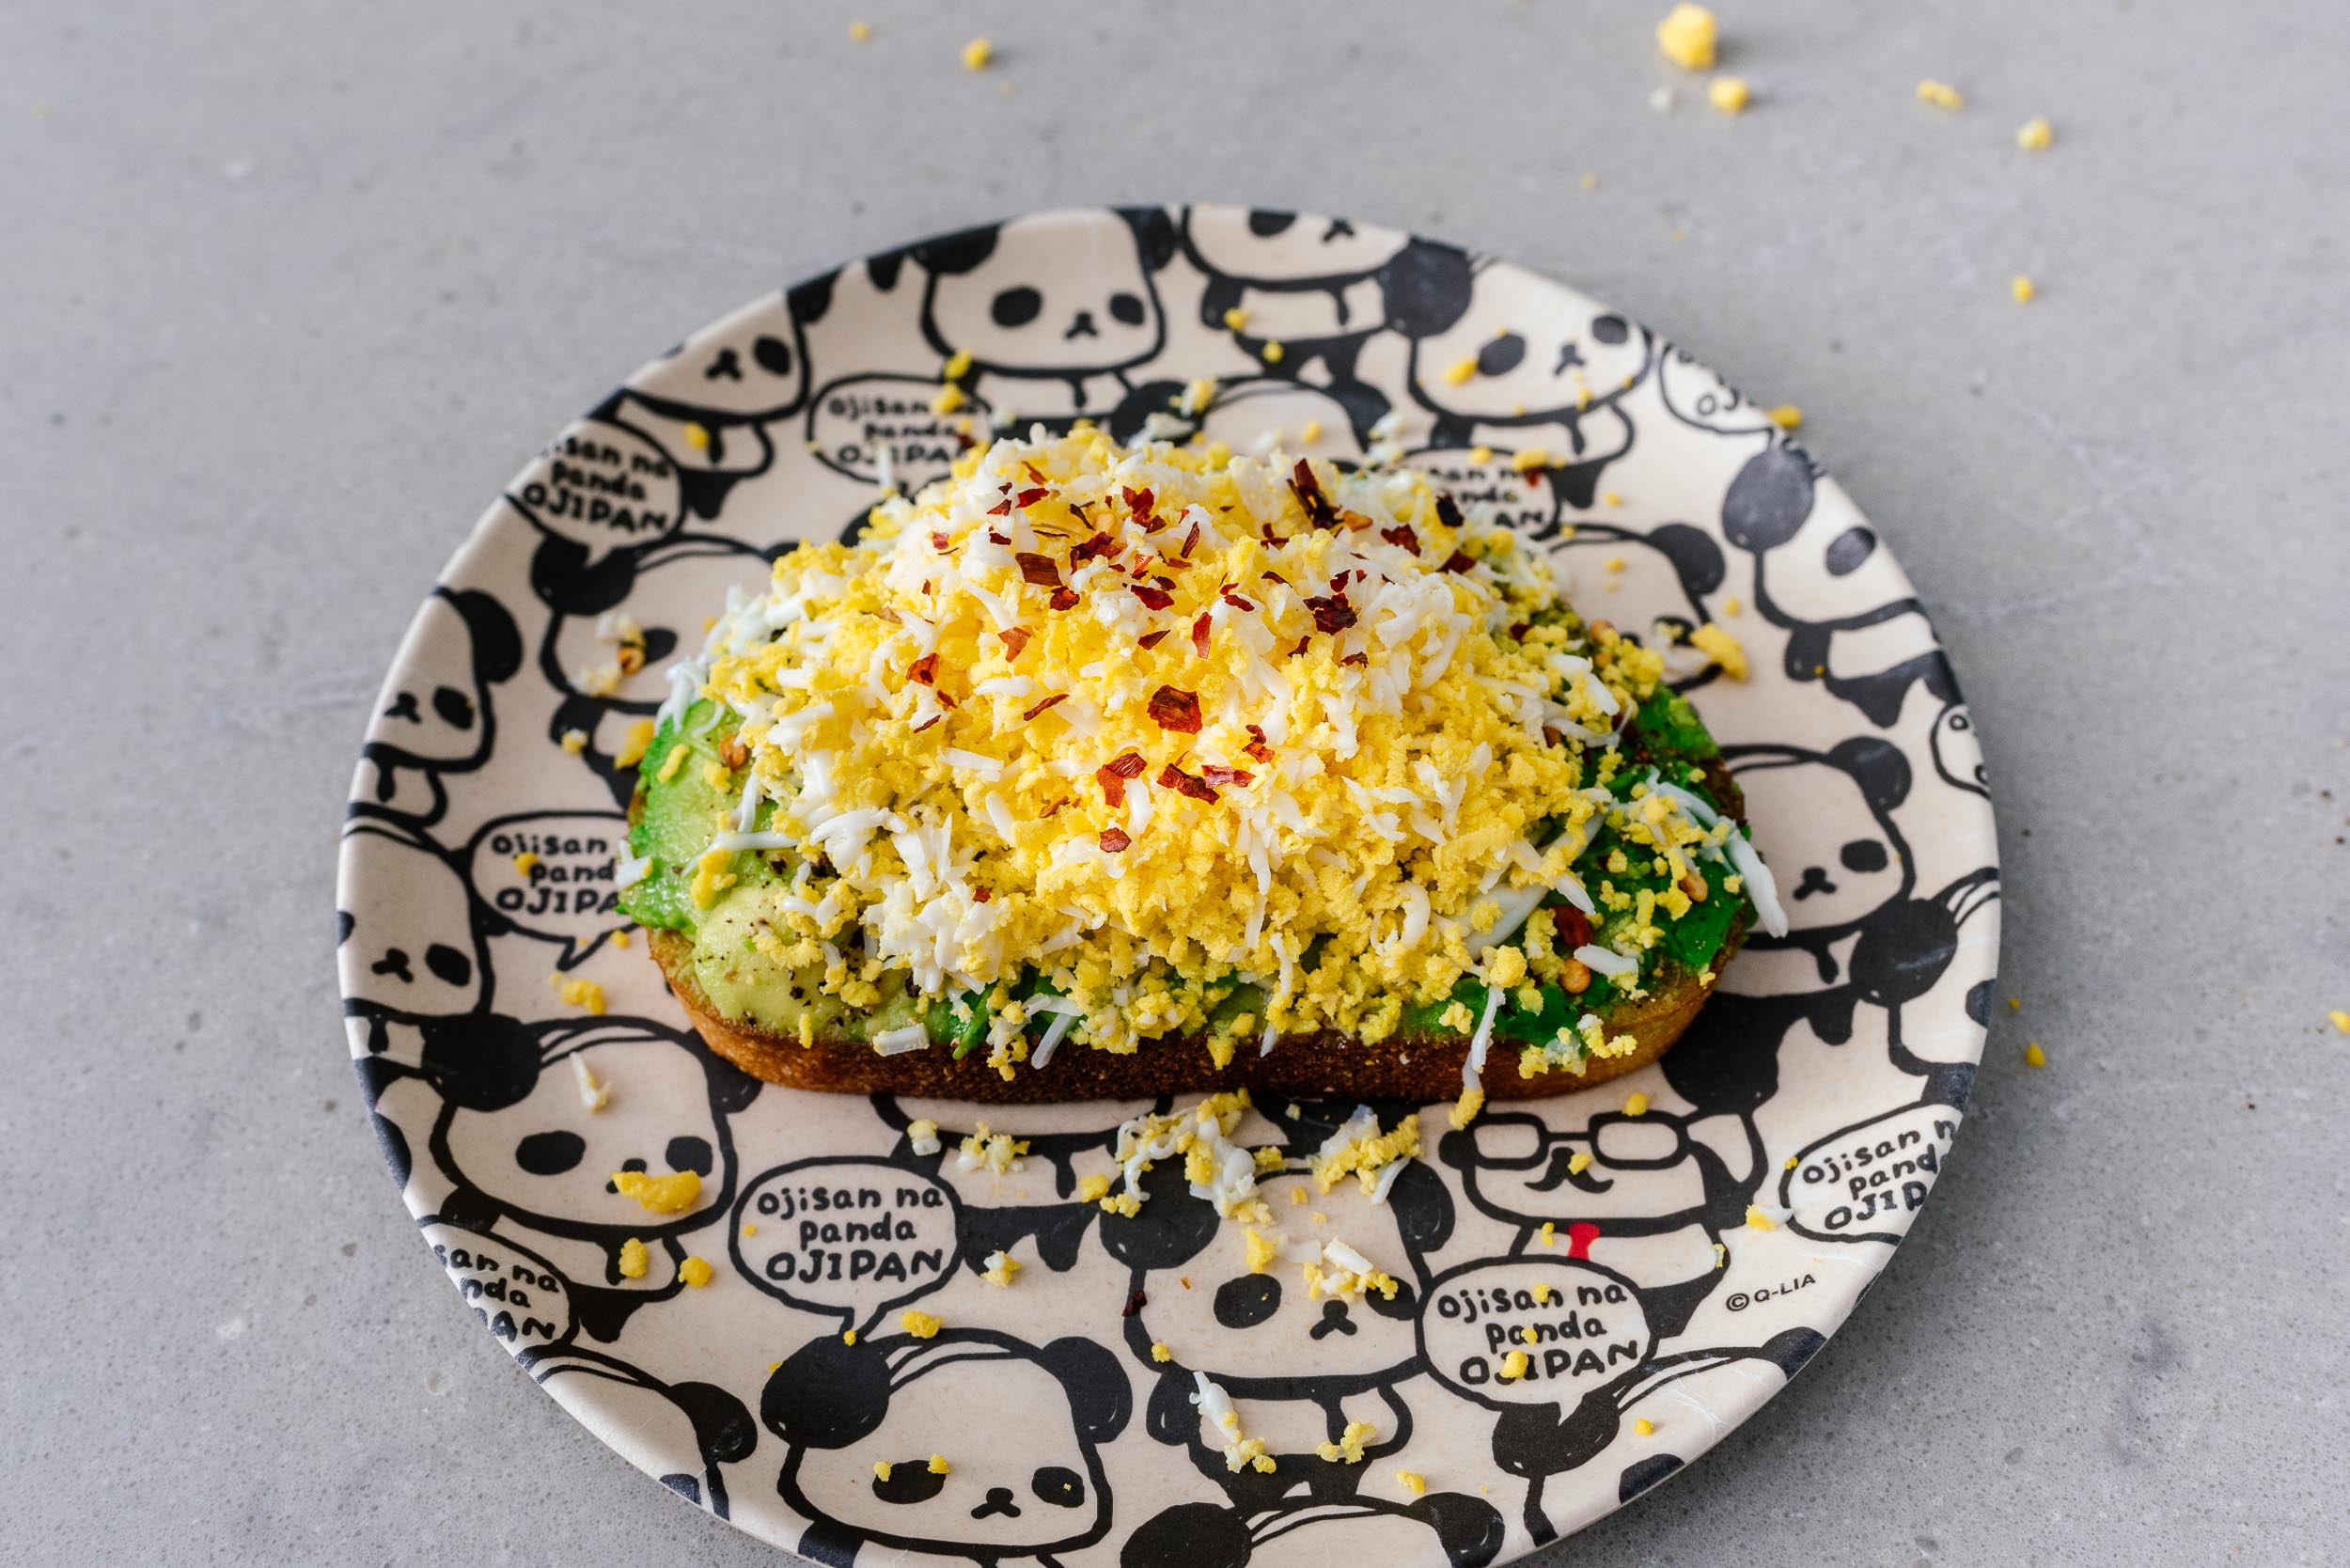
Have you tried grated egg toast? Grated eggs aren’t anything new. In fact, they’re super retro a la Russian mimosa salad or grated egg salad. They even get super fancy at Dan Barber’s Blue Hill at Stone Barns served a top potato chip crust pizza. But grated eggs on avocado toast? That’s pure 2022. There’s a viral Tiktok going around from @healthyishfoods where she grates hard boiled eggs onto avocado toast. The eggs are fluffy and super pretty with shreds of white and yellow. Grated egg on toast is genius. The beauty of eggs is how many different ways you can make them and I love this new take on eggs on avocado toast!
What are grated eggs?
Light, fluffy, and ethereal, grated eggs are simply hard boiled eggs, grated. It’s the same egg you know and love prepared a little differently to give it a fluffy, light, melt in your mouth texture.How do you grate an egg?
It’s pretty simple: hard boil your egg using your favorite method then grab a grater. Peel your egg then gently grate it. Done! Use your grated egg to top toasts, sprinkle on salads, noodles, pasta, you name it, anything that you want to add a little richness to.How to make grated egg avocado toast
- Make your avocado toast your preferred way. I like toasting a hearty piece of bread, smushing on ripe avocado, drizzling it with extra virgin olive oil and seasoning with flaky salt, freshly ground pepper, and a bit of crushed chili.
- Hard boil and peel your egg.
- Grate your egg on top of your toast. Enjoy the gloriousness of grated egg avocado toast!
What kind of grater?
You can use any kind of grater! I used to love those rotary graters https://amzn.to/3uuKJ06 and that would be a good option for this because you’d be able to grate the whole egg without your fingers getting in the way. A regular box grater or a microplane will work wonders as well. What kind of grater you use will give you different kinds of grated eggs. The coarse side of a box grater will give you larger shreds and a microplane will give you a fine egg dusting.How to make perfect hard boiled eggs
For perfect grated egg toast, you need the BEST hard boiled eggs. I have done my eggs in the air fryer and the instant pot but usually I’ll just go for the straight up stovetop method.- Remove the eggs from the fridge as your bringing your water to a boil. Prepare and ice bath with a large bowl of cold water and ice.
- Bring a pot of water to rolling boil, then turn the heat down and gently add eggs in, with a slotted spoon. Turn the heat back up to medium high and maintain a simmer for 12 minutes - we’re going to go on the harder side so they yolks grate properly - adjusting the heat down, if needed. You don’t want an intense boil, just a happy little simmer.
- When the time is up, immediately plunge the eggs into an ice bath to cool down.
- When cool, peel the eggs: Gently tap the wide end of the egg on the countertop, then flip around and tap the pointed end. Gently roll the egg and peel, under running water, if it helps.
Pro tip
Grating a cold egg is a lot easier than grating warm eggs. Meal prep a bunch of eggs, grab a cold egg from the fridge then grate away! Plus, refrigerated eggs peel more easily.Other things you can top with grated eggs
Happy grating! xoxo stephGrated Egg Toast
Grated egg on toast is genius.
- grater
- 1 slice toast
- 1/2 avocado
- 1 egg (hard boiled, peeled)
Toast your bread and smash the avocado on top. Drizzle with a bit of olive oil and season with salt, pepper, and chili flakes.
Grate the hard boiled egg on top and enjoy!
I Am... Nutritional Yeast
Cheesy, nutty, and full of umami and protein, nutritional yeast is your pantry flavor friend that’s here to stay. Everything you ever wanted to know about the cheesy, delicious seasoning and how to enjoy it. If you’ve been hearing about nutritional yeast and are wonder what the heck it is, you’re in the right place.
What is nutritional yeast?
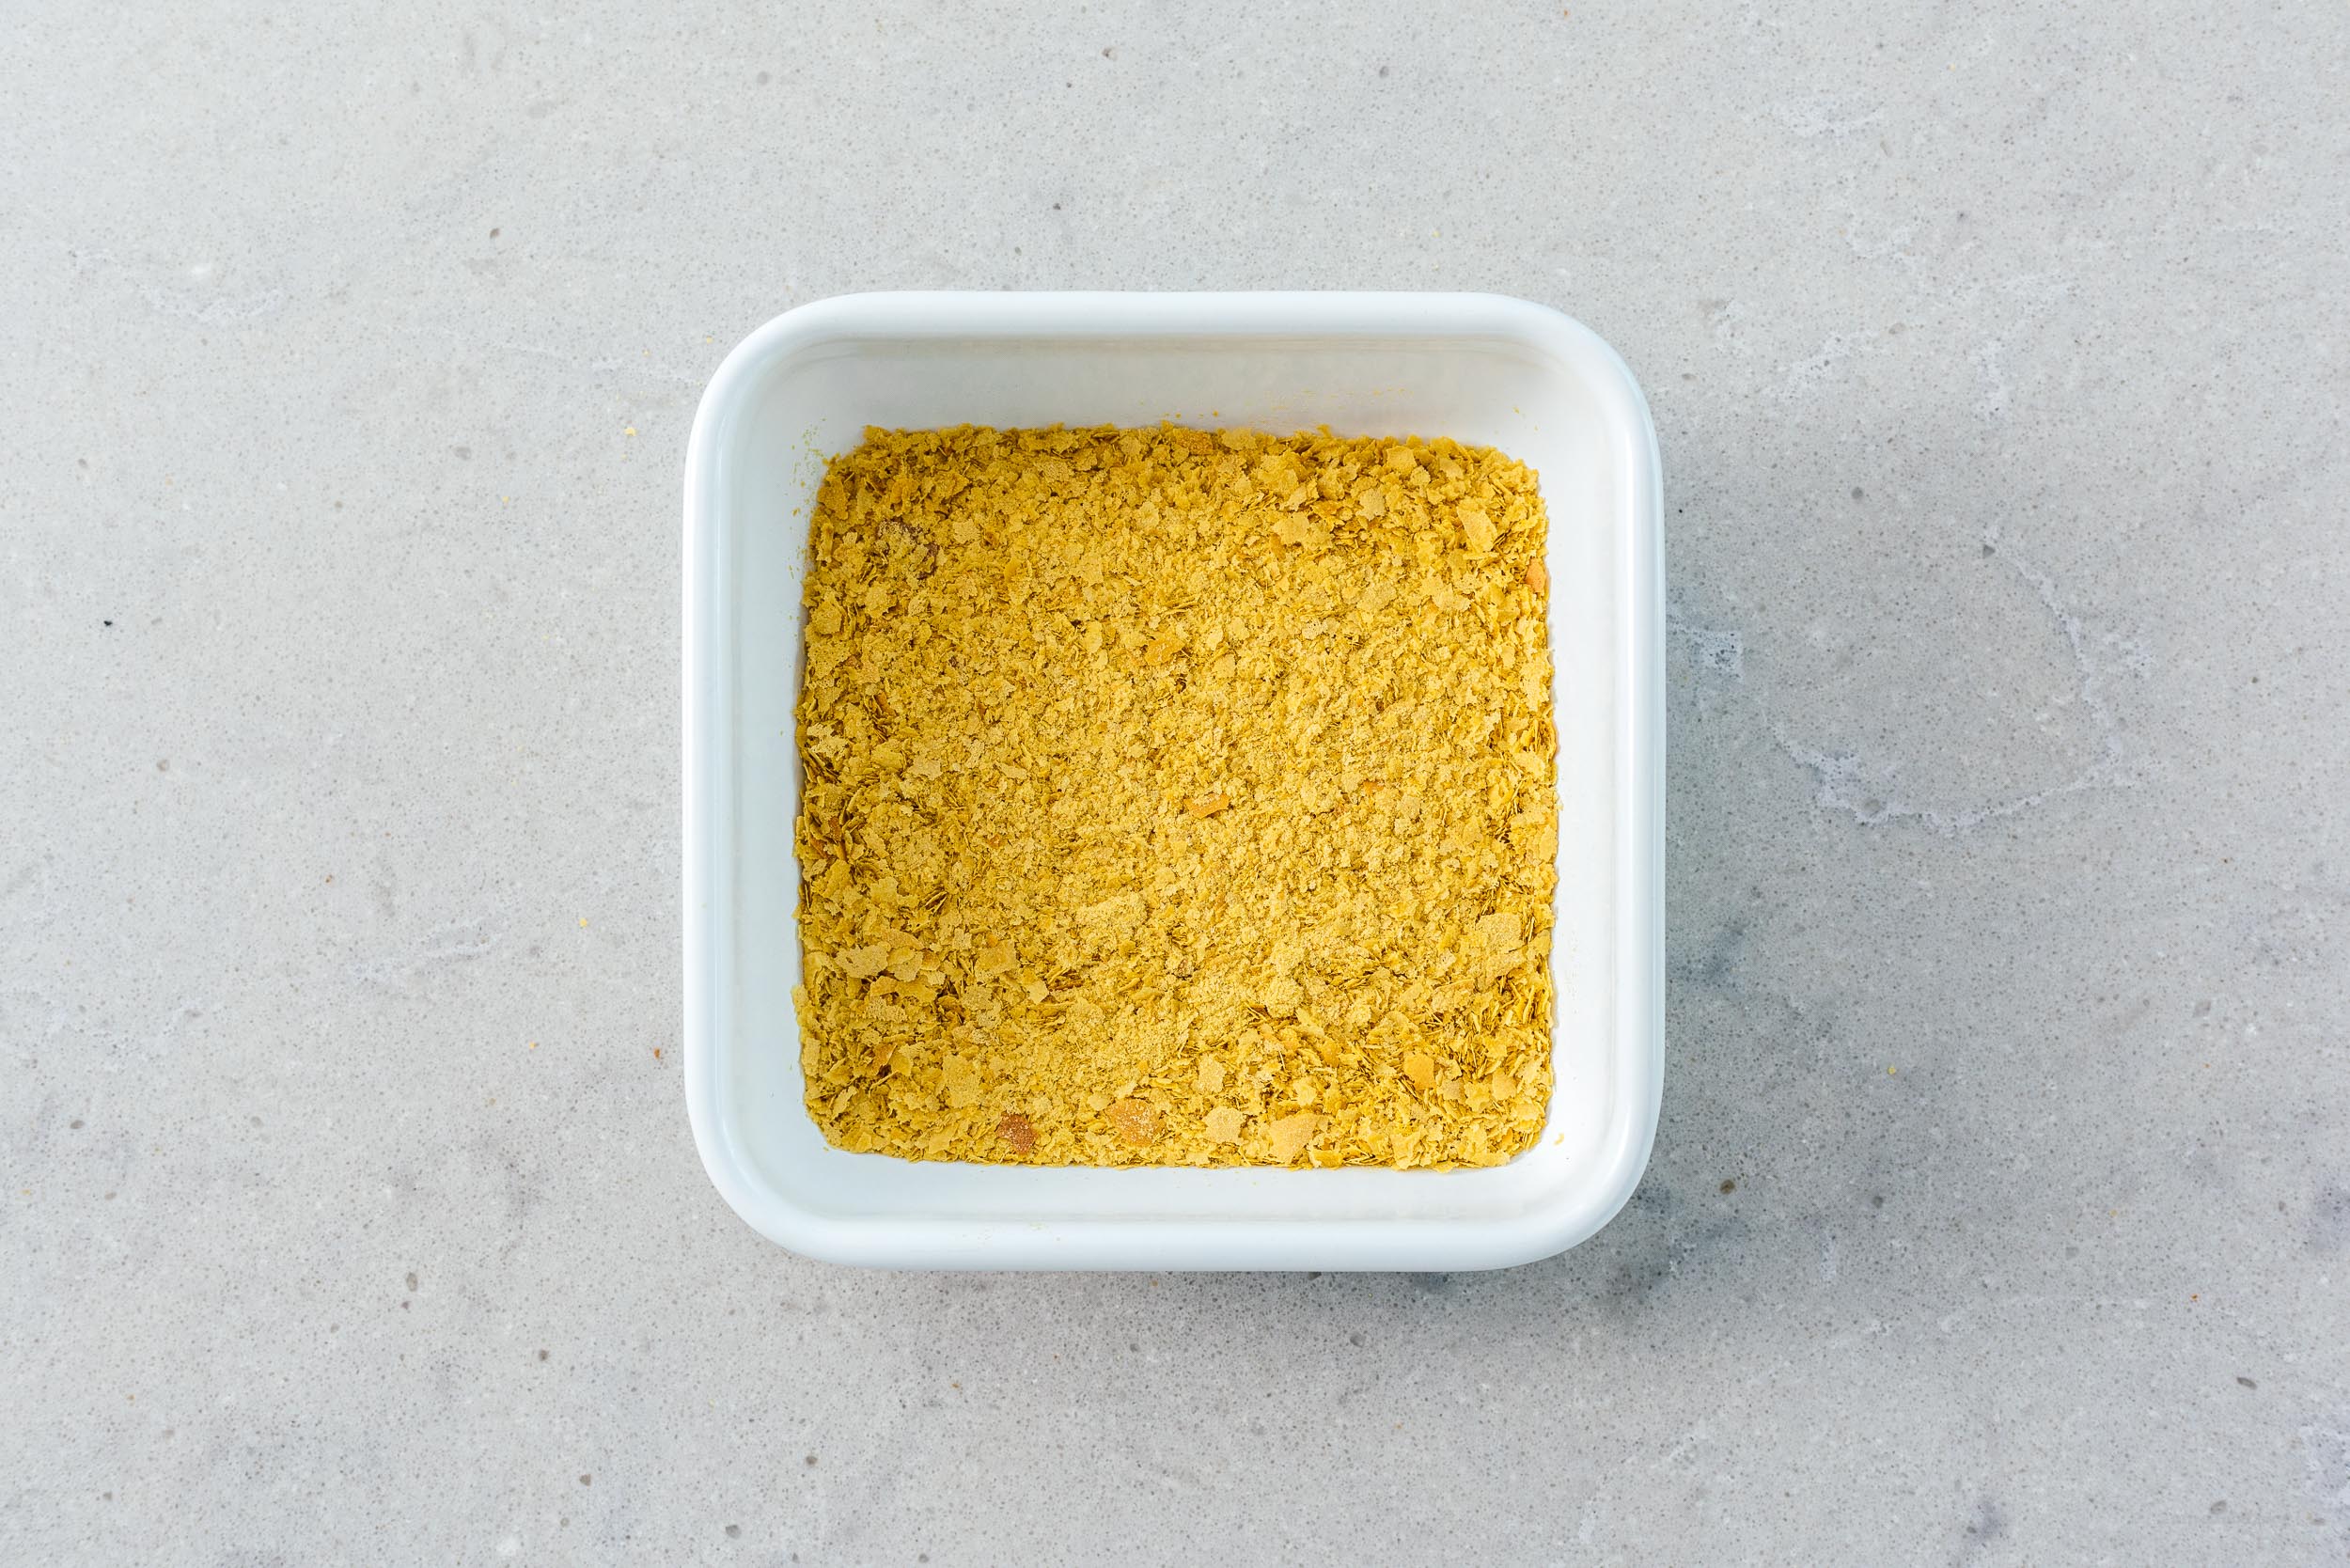
Nutritional yeast is a flaky, golden powder that’s made from a species of yeast that’s the same as baker’s or brewer’s yeast. Baking and brewing yeast is active, which lets bread rise and beer brew. Nutritional yeast on the other hand is inactive. It’s grown specifically for food, then harvested. When harvested, heat deactivates the yeast, then it’s washed, dried, and crumbled. The result is a cheesy, nutty, savory ingredient that is used to make vegan cheese sauces, vegan dips, in soups, scrambles, stews, and more.Fortified vs unfortified
Yeast is a natural source of protein and B vitamins. There are two kinds of nutritional yeast, fortified and unfortified.- Fortified has vitamins added to boost nutritional content. Most of the ones you find commercially come fortified with B12 and folic acid.
- Unfortified doesn’t have added vitamins or minerals. Unfortified yeast on its own has protein and B vitamins.
Flakes, granules, or powder
Based on what you want to use your yeast for, it comes in flakes, granules, or powder. I like large flakes for sprinkling and granules or powder for sauces. You can also just use your food processor to turn flakes into powder.Is nutritional yeast good for you?
Nutritional yeast is, as its name proclaims, very nutritious. It’s a great source of protein, B vitamins, and minerals. It has all nine essential amino acids and is a great way to add high quality protein to your diet. Fortified yeast is great because it has B12 which helps with maintaining a healthy nervous system, energy, and creation of red blood cells. It also has antioxidants which help protect your cells.How to enjoy
Think of it as a vegan grated cheese. Anywhere you want a cheesy hit, add a sprinkle!Sprinkle it onto:
- popcorn
- pasta
- salads
- eggs
- roasted vegetables
Stir it into:
- soups
- stews
- rice
Add it to:
- cheese sauce
- crackers
- biscuits
- sauces
Where to buy nutritional yeast
They sell it at health food stores and in the health aisle at most grocery stores. You can also buy it online. I like Bob’s Red Mill large flake but there are tons of brands out there.Vegan Kale Salad with Nutritional Yeast
You'll never miss cheese again.
- 1/4 cup olive oil (extra virgin preferred)
- 1 tbsp nutritional yeast (large flake preferred)
- 1 tbsp lemon juice (about 1 medium lemon)
- 1 clove garlic (crushed)
- 1/4 tsp salt
- 1/4 tsp freshly ground pepper
- lemon zest (from the lemon before you juice it)
- 1 bunch kale (lacinato kale preferred, about 4 cups finely chopped)
Combine all the ingredients except the kale and lemon zest, let sit while you prepare the kale.
Prepare the kale: Give the leaves a good wash and shake off any excess water, then slice the stems away with a knife or rip the leaves off by running your fingers along the ribs. Finally, cut into 1/4" thin strips.
Toss the kale with the dressing.
Top with lemon zest and extra nutritional yeast. Enjoy!
Serves 2 as a small main or 4 as a side salad.
I Am... Tiktok Yogurt Custard Toast
New breakfast trend alert! Custard toast (aka, yogurt toast), a delicious, protein forward sweet breakfast toast you might have seen on tiktok, is here to stay. It comes together quickly in a toaster over or air fryer and is full of protein to keep you full. If you’re a person who likes a sweet breakfast, this is the toast for you. Custard toast is all over Tiktok and after seeing literally everyone and their grandma make it, I decided to give it a go. I love custard and I especially love toast of all kinds so it seemed like a match made in heaven.
What is custard toast?
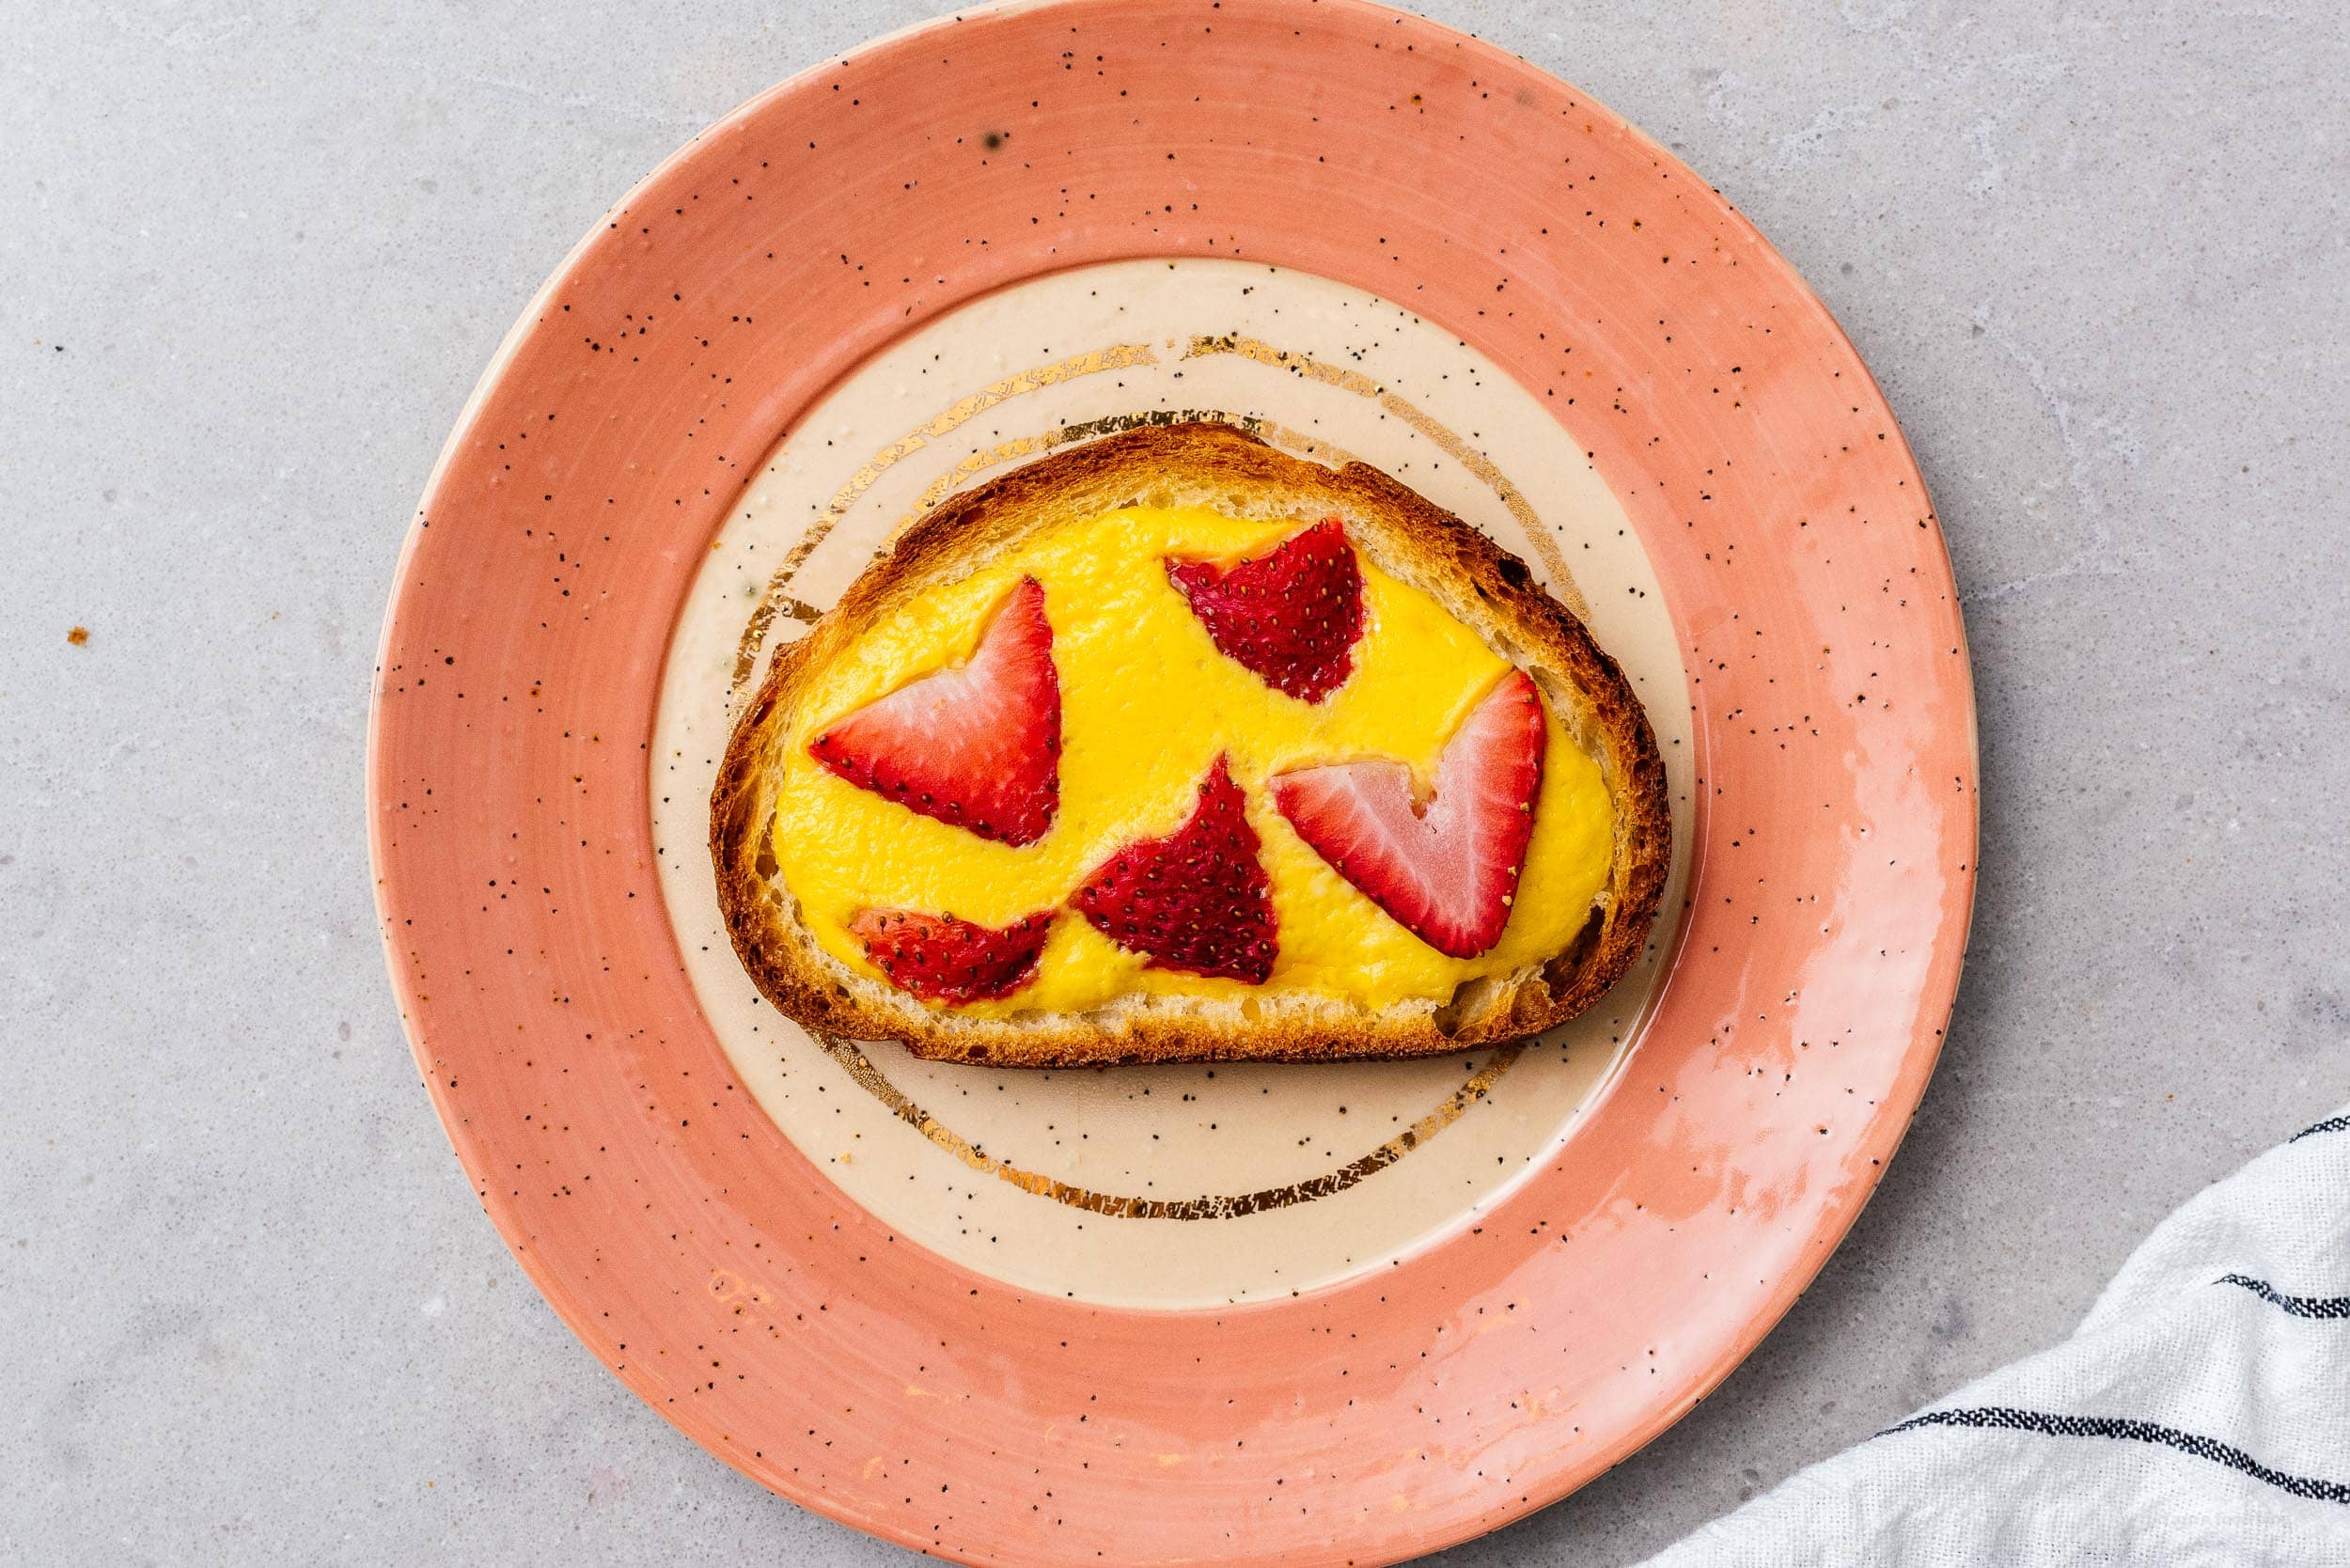
Custard toast (sometimes referred to as yogurt toast) is a breakfast-y take on cheesecake using ingredients most people have at home. I’m not sure who the first person to make it was, but I’ve definitely seen Moody Day’s Tiktok floating around a lot! Essentially, a piece of fluffy bread is is flattened in the middle, then filled with a sweetened yogurt egg mix. Top it with fruit, bake it in the oven until the bread is crisp and toasty and the custard sets and you’re good to go! Almost like dessert for breakfast but a bit more healthy. Creamy, sweet, and a little crunchy, with fruit for freshness it almost tastes like a cross between a danish and french toast.How to make custard toast
- Squish. Use the back of a spoon to make a depression in the middle of a slice of bread so the custard has a little pool to sink into.
- Mix. In a bowl, mix together greek yogurt, an egg, and a bit of sweetener or choice until smooth.
- Fill. Add the custard mix to the little bed you made in the bread.
- Top. Add some sliced fruit on top - anything goes!
- Bake. Bake until the custard is set and the toast is crisp. You can do this in a toaster oven or the air fryer.
Custard toast ingredients
- Bread - a fluffy bread is best. I love fluffy white milk bread or shokupan that you can find at Asian bakeries or grocery stores. Brioche works exceptionally well and challah is lovely. I wouldn’t go for sourdough just because they have a lot of holes and work better as savory toasts.
- Yogurt - I like to use plain Greek yogurt but you can use your favorite yogurt to add a underlying hint of flavor. You don’t need a huge amount of yogurt, just 2 tablespoons or so.
- Egg - The egg is what makes it custard-y, use a good quality egg! Sweetener - you can use sugar, brown sugar, honey, or whatever sweetener you like. I tend to sweeten to taste, with about 2 tsp sugar, but go for more or less depending on your sweet tooth.
- Toppings - This is where your creativity can shine! The most common topping on yogurt toast is fruit. You can do berries, sliced apples, bananas, oranges, peaches, plums, any fruit, really. You can also do chocolate, crushed up cookies, or a bit of granola!
Air fryer
It’s super easy to do custard toast in the air fryer and it gets really crunchy. Just prep your toast and pop it in the toaster oven at 400°F for 10 minutes.Toaster oven
All it takes is 10-12 minutes in the toaster oven at 400°F. Enjoy your custard toasts! My favorite combo so far has been raspberries with a crushed up Biscoff cookie. SO GOOD. xoxo stephCustard Toast Recipe
If you’re a person who likes a sweet breakfast, this is the toast for you.
- Toaster
- 2 slices bread (of choice)
- 2 tbsp greek yogurt
- 1 eggs
- 1 tbsp sugar (or honey)
- toppings (of choice)
Use the back of a spoon to make a depression in both slices of bread.
In a small bowl, mix together the yogurt, egg, and sugar until smooth.
Add the custard to the middle of the bread. Top with fruit of choice.
Bake in a toaster oven at 400°F until the custard is set and the toast is crisp, about 10-12 minutes. Or, air fry at 400°F for 10 minutes.
Let cool slightly, finish with powdered sugar or honey and enjoy!
I Am... Balmuda the Toaster Review
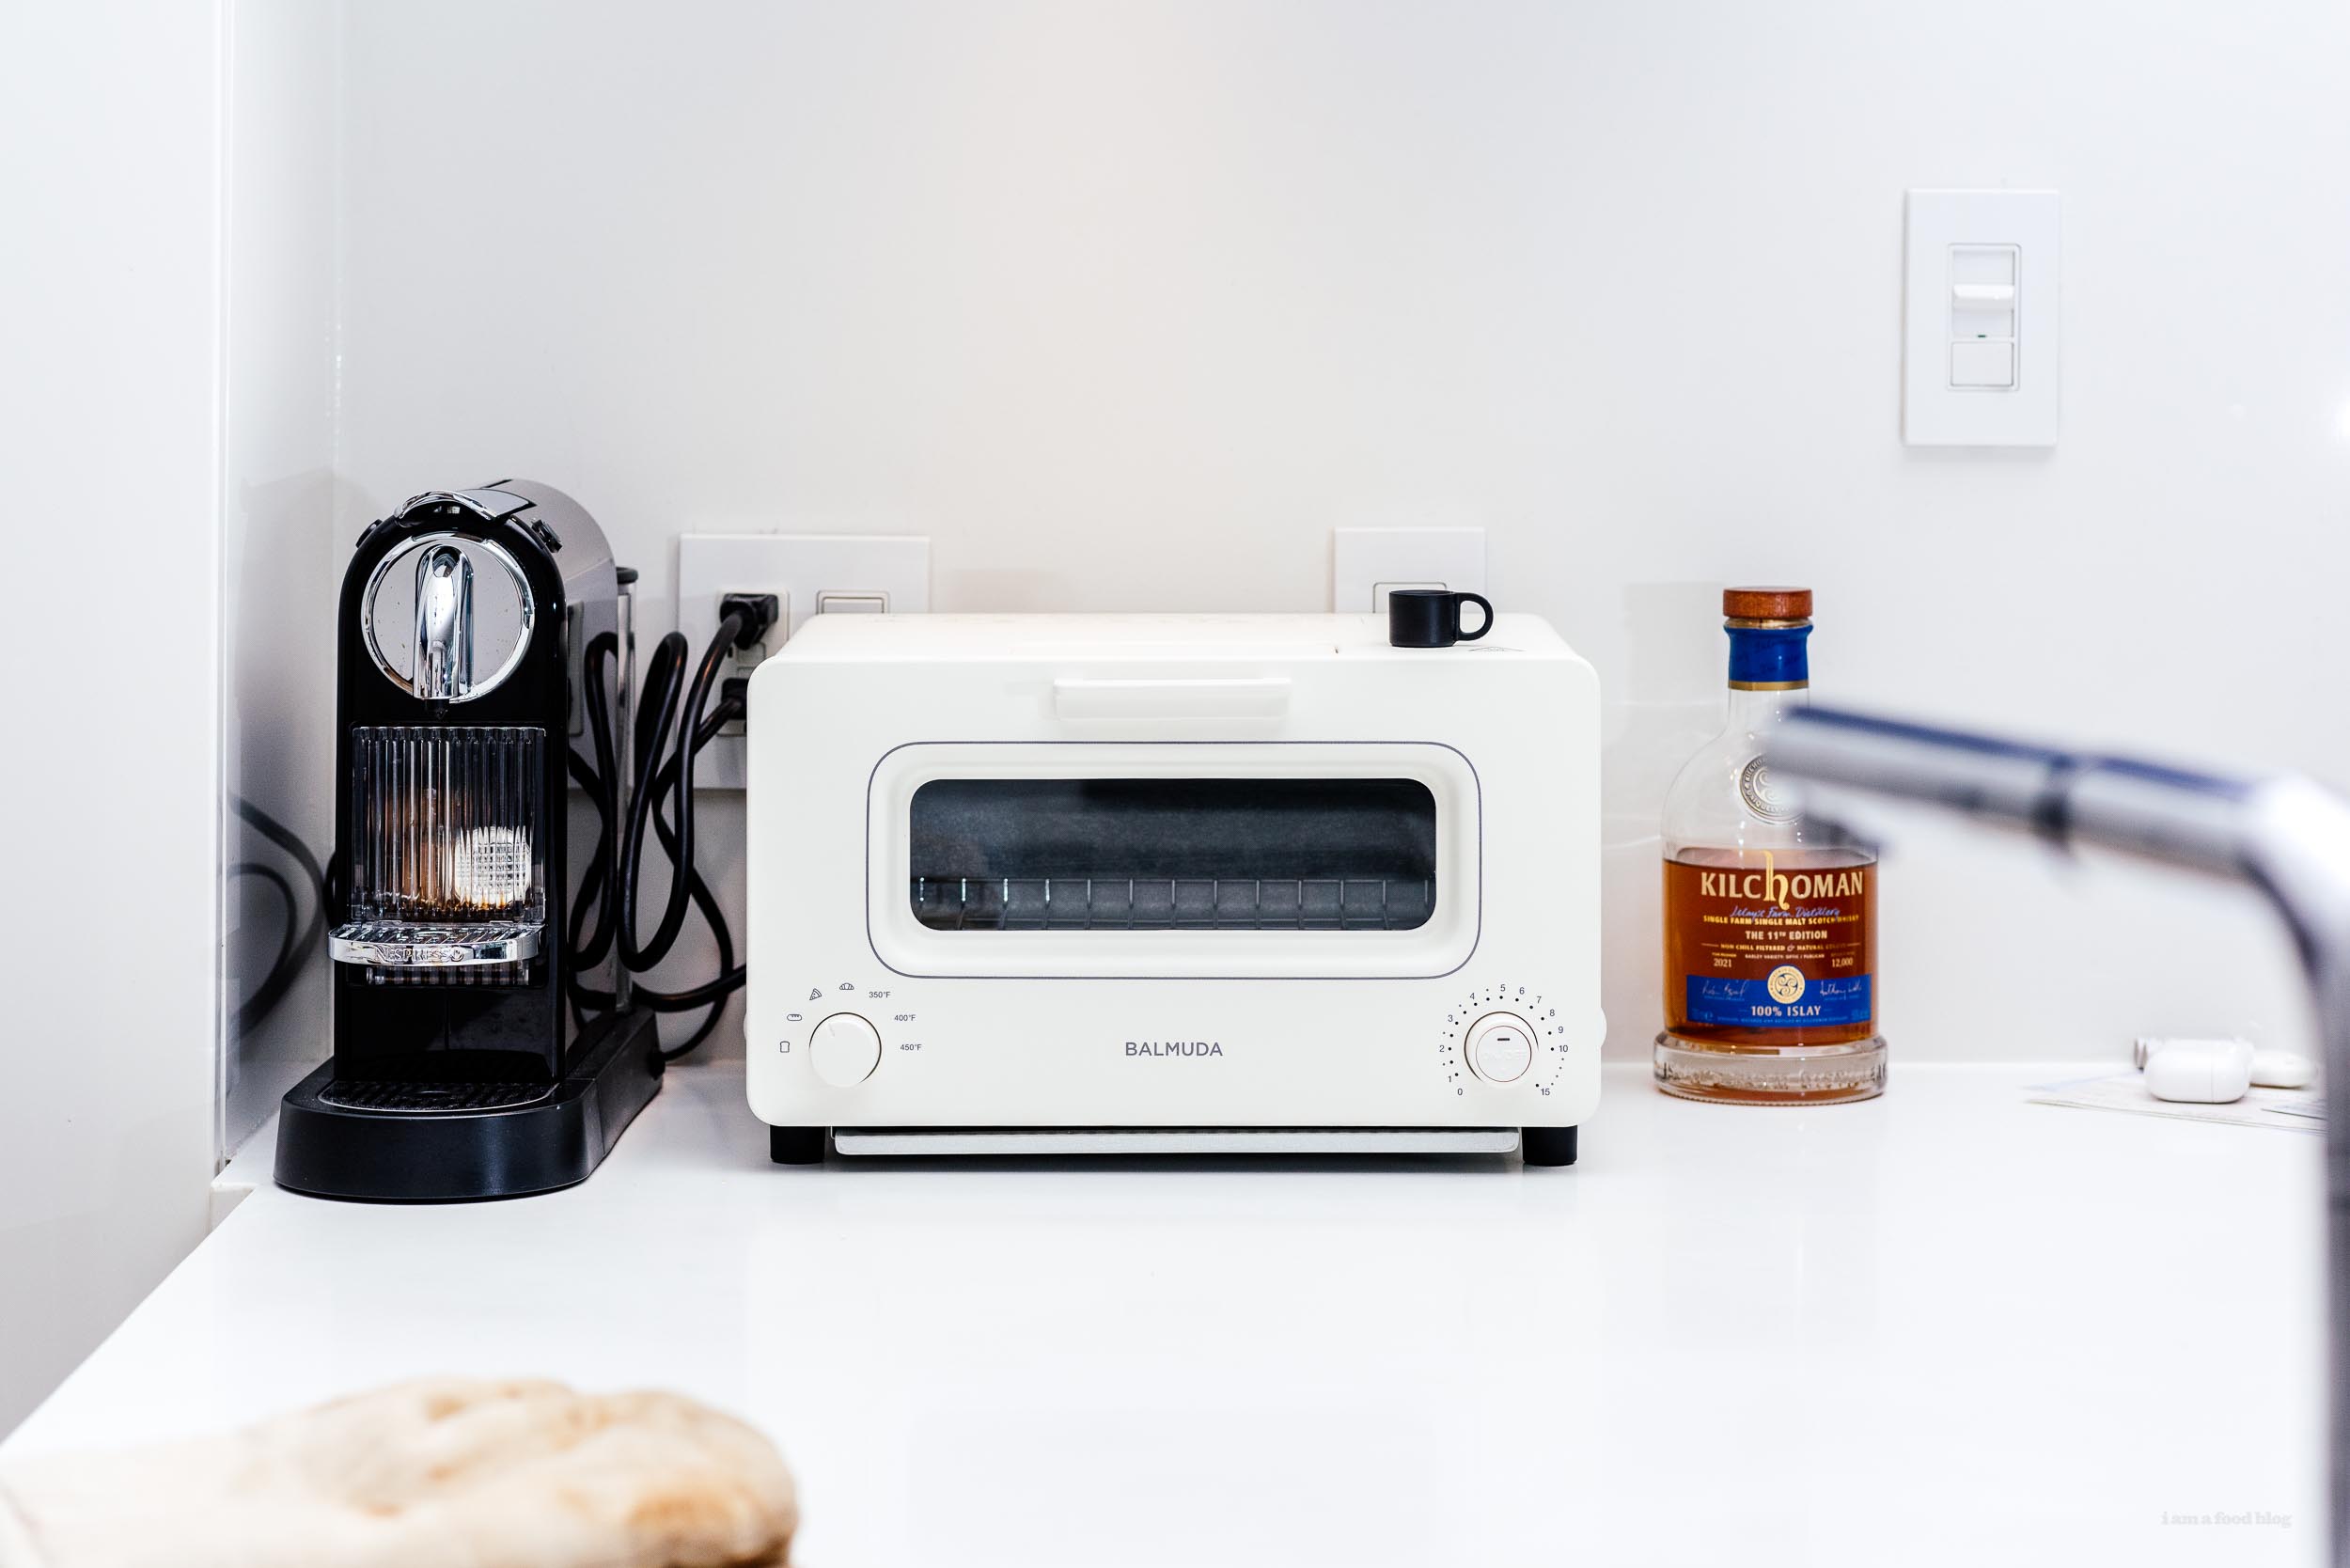
Is it possible to be in love with a toaster? Because I am. Unequivocally, utterly in love. I first lay eyes on Balmuda the Toaster, which I am going to call BTT, the very year it came out in Japan. We were walking in BIC Camera and there was a giant display: a bigger than life poster of picture-perfect toast with a pat of butter lusciously melting in the center. The promo talked about steam technology and crisp-on-the-outside and fluffy-on-the-inside toast. I longed for it, but spending ¥30,000 on a toaster seemed excessive, especially with a lack of luggage space. Fast forward several years and I finally got my hands on one! Mike gifted me Balmuda the Toaster for Christmas and I am SO HAPPY. By the way, this is in no way sponsored, I just wanted to share my love of my new toaster!

 2015 Holiday Giveaway
 One-Pot Lemon Scallop Pea Spaghetti
 Beer Battered Onion Rings, Jalapeno Aioli
 2014 Holiday Gift Guide and a Giveaway
 Easy Gourmet Hot Wings and a Giveaway!
 The Ultimate Veggie Sandwich
 Vegan(!) Creamy Corn Soup Recipe
 Sunday Brunch: Grilled Cheese Eggs Benny