
I Am... Try This Hatch Green Chile Verde Recipe
I have to admit, I'm not sure whether green chile/chile verde is officially from Colorado, New Mexico, or somewhere else in the southwest. What I am sure of is that it's incredibly, impossibly good. If you've never tried it, it's like Texas chili but lighter, brighter, and way more fun (not dissing Texas chili though, I love Texas chili).
Hatch season is here
This is one of my favorite times of the year when the peppers are in season, spicy and smoky. The big roasting events happen at our local grocery store and we come home with a big box of new green chiles for the year. They last for a week or two if you're careful, so we eat as many as we can before we have to freeze them. Usually we eat through about 5-6 ziploc bags full in that time.Green Chili, Chile Verde, or Pork Stew?
In New Mexico this is just called pork stew, and for me it's the best version of pork stew I've ever had. I thought our favorite tonjiru from Tokyo might put up some competition, but after tasting chile verde, it was a hands down clear winner for my top pork stew. If you ever see bags of Hatch chiles for sale you need to buy some up and make this dish asap. It's a perfect stew for warm summer nights or cozy winter evenings.Tomatillos in chile verde
Tomatillos are not really a traditional ingredient, but the smokiness of the roasted tomatillo pairs perfectly with the chiles and is what makes this specific version stand out, for me. I have definitely tried (and love) a version with all Hatch chiles, but the heat can be a bit much for those not used to spicy, like Steph.Hatch vs other green chiles
This recipe uses Hatch chiles because it's Hatch chile season, but if you don't live near the southwest, you can use Anaheims + a spicy green chile of your choice (such as jalapeño, serrano, and my favorite: thai). If the first half of the recipe looks familiar, that's because it's our 4 Ingredient Hatch Chile Salsa Verde, meaning you can double those ingredients and have yourself some awesome salsa to serve on the side. You'll get a lot of purists tell you that Hatch is not a chile, it's a village in New Mexico. That's true, but unless you live in New Mexico, any chile you find at a grocery store is going to be called Hatch chile, it's a catchall for in-season New Mexico grown chile, and it's way better than Anaheim or any other chile you've tried, to be perfectly honest.Best cut of pork for chile verde
The cut on pork used here is pork shoulder. I had to take off the skin and trim it off the bone, but if you can find boneless pork shoulder, it will make this recipe far far easier. This recipe works equally well in a slow cooker, Instant Pot, or in a dutch oven on the stove. I've never tried it at pressure an instant pot, but on the slow cook setting with the lid slightly open it should work exactly the same as a slow cooker. The photos are shot in a dutch oven because #aesthetics.Cooking time
Last note: I tasted this at 2 hours, 3 hours, and 3.5 hours. At 2 hours it's super bright and floral, you can really taste the chile, and the pork is still a little chewy in a wonderful way. By 3.5 hours the flavors are more melded together, the chile is more mild, and the pork is not quite fall apart tender but super soft. I liked both and I gave the win to 3.5 hours, but you should taste it at 2 and see if you like it, because who doesn't love to eat a little earlier? It makes room for second dinner.My love affair with New Mexico
From a food perspective, and from a life perspective, New Mexico is by far and away my favorite state. I love the authentic friendliness of the people, the amazing food, and the beautiful geography. I think it's the prettiest state with the most to offer. We've spent a lot of time in New Mexico:- We went skiing at Taos Ski Valley
- Searched for the best Green Chile Cheeseburger in New Mexico
- Camped in a vintage trailer
- and we didn't talk about it on the blog but we camped overnight at White Sands:
- Air Fryer Chicken Tacos inspired by el parasol
- Oven Baked Carne Adovada Pork Taco better than al pastor for me
- All the Best Hatch Chile Recipes to Make Right Now since it's Hatch season and
- Green Chile Cheeseburger of course
Super Easy Slow Cooker Chile Verde
This Easy Slow Cooker New Mexico & Colorado Hatch Chile Verde Recipe may be the best pork stew you’ve ever tasted
- 1 cup hatch chiles (about 4)
- 4 lb pork shoulder/butt (trimmed and cubed)
- 1 lb tomatillo
- 6 cloves garlic
- 1 cup fresh cilantro (about half a bunch)
- 1 medium onion (diced)
- 1 tbsp cumin
- 2 cups chicken stock (no sodium/unsalted preferred)
- tbsp oregano (Mexican oregano preferred, optional)
Trim your pork butt and cube it. Season well with salt and pepper and set aside.
Set your oven to broil. Wash and dry your tomatillos and hatch chiles. Rub them with oil (any oil is fine) and place in oven. Flip them when they are toasted to your liking and do the other side. This took 18 minutes in our oven at 550ºF.
While you are waiting for your peppers to roast, brown your pork shoulder cubes in your dutch oven on high heat or your slow cooker on high/saute. Work in batches to avoid crowding. Once all the pork is browned, move it to a plate and set aside. Be sure to use a timer so you don’t forget about the chiles roasting in the oven, or check back after every batch of pork.
Once the peppers are done, put them in a ziploc bag to steam for 10 minutes. Transfer the tomatillos along with cilantro, garlic, and a little salt to a blender and set aside.
Once you are done browning the pork, reduce heat to low and cook your onions. When the onions are translucent, add the cumin seeds and continue cooking for another 2 minutes to toast them. Then add the pork, all accumulated juices on the plate, and the chicken stock.
Remove the chiles from the bag and peel them. It’s not necessary but highly suggested that you also seed them with a small spoon. Once the chiles have been peeled and seeded, put them in the blender and puree. Once the salsa verde is pureed to your liking, combine it with the rest of the ingredients, mix well, and simmer for 2-4 hours.
In the last 1/2 hour of cooking, taste the chili and adjust seasoning, and if you are using oregano, add it in now.
Serve with cilantro, tortillas, and rice, or just enjoy by itself.
Serves 4 as a main or 8 as a side. Estimated nutrition is for a side portion.

I Am... Creamiest Pepperiest Cacio e Pepe Pasta
Cacio e pepe is classic: peppery cheesy noodle goodness. You don’t mess with classic, am I right? Well, the other day I saw some noodles on insta and I was immediately drawn in. They were super saucy, extra cheesy, and looked so cravable. It was a twist on cacio e pepe - instead of the starchy pasta water, pecorino, pepper, and pasta route, it went for a pecorino mornay sauce flecked with pepper.
The best cacio e pepe
I’m a huge fan of cacio e pepe in all its forms and its simplicity but sometimes we get messages from people who have problems with cheese clumping up or sauce that isn’t as smooth, glossy, or thick as they like. This cacio e pepe-ish pasta is here to save the day. Because the sauce is thickened with flour and thinned out with starchy pasta water, it has more body and clinging power than the classic sauce.Here’s how to make it
First, start off by melting some butter in a pan with plenty of freshly cracked black pepper. Black pepper is a key flavor in cacio e pepe and toasting it in butter helps coax out it’s spicy floralness. The heat of the butter will draw out flavor and the pepper will infuse the butter with all that goodness.What is Mornay sauce
Mornay sauce, for the uninitiated, is a classic French sauce built off of béchamel, a flour thickened milk sauce. Traditional mornay is made with gruyère cheese but this one uses pecorino, which is the cheese normally used for cacio e pepe. You can use parmesan if that’s what you have but if you see pecorino at the store, it’s worth a buy. It’s slightly sharper, more intense, and less nutty than parmesan because it’s made with sheep’s milk instead of cow. It really makes cacio e pepe amazing and if you’re looking for the same flavor cacio as the ones you get in an Italian restaurant, the cheese is the answer.Thicken the sauce
Next, it’s time to add our thickening agent, flour. Stir the flour in completely making sure there are no lumps. At this point, our goal is to coat eat flour granule with fat so that the flour easily combines with the milk to create a smooth sauce.Lump-free cacio e pepe
It's time to gradually add the milk. Adding it in slowly will help prevent lumps. Don’t worry if the sauce clumps up right away, just keep whisking over low heat.Glorious glorious cheese
Take the sauce off the heat and add the cheese in batches. The residual heat of the sauce will melt the cheese. The sauce will probably look kind of lumpy. Don’t worry though, we’re going to smooth it out with starchy pasta water. At this point, if you want to cool down the sauce and pop it in the fridge in a container, you can do so. If you do, you can have almost instant pasta any day of the week. When you’re ready to make your pasta, cook the pasta according to the instructions. Heat up the cacio sauce over medium heat, and whisk in some hot starchy pasta water until the sauce thins out slightly. Add the pasta and toss, adding extra pasta water if sauce is too thick. Finish everything off with extra cheese and pepper and enjoy!What is this pasta shape?
The pasta in these photos is homemade fresh egg garganelli. I have a whole post on how to make it here.- Creamy Chicken Alfredo
- Sour Cream and Onion Pasta
- Creamy Spinach Chicken Pot Pie Pasta
- Garlic Lobster Pasta
- Instant Pot Pasta and Meatballs
- Homemade SpaghettiOs with Mini Meatballs
- Bolognese of course!
Super Creamy Cacio e Pepe Style Pasta Recipe
A protein packed creamy cacio e pepe style sauce perfect when you’re in the mood for mac and cheese, but trying to adult too.
- 1 tbsp butter
- 1 tsp freshly cracked black pepper
- 1 tbsp flour
- 1/2 cup whole milk
- 3 oz finely grated pecorino (about 1.5 cups)
- 1/4 cup pasta water (more if needed)
- 6 oz pasta (I used homemade garganelli)
In a skillet, melt the butter and add the pepper, letting the pepper infuse the butter as it melts. Stir in the flour and cook for about three minutes, until completely smooth and incorporated.
Pour in the milk in a thin stream while whisking. It might start out lumpy, but keep whisking and it will smooth out into a thick paste. Stir in the pecorino in batches, and remove from the heat. The sauce will be very thick.
Bring a pot of salted water to a boil and cook the pasta according the packaging or until it is al dente.
Take 1/4 cup of the hot starchy pasta water and stir it into the cacio e pepe sauce, whisking over medium low heat until smooth and glossy. Add the drained pasta, stirring in extra pasta water as needed until the sauce coats the pasta. Enjoy with extra pepper and crushed red peppers, if desired.
loosely based on https://www.pastasocialclub.com/post/cacio-e-pepe-style-pici

I Am... Air Fryer Char Siu Recipe
The only thing better than a simple plate of rice and char siu is your very own homemade air fryer char siu. This was so, so good and way easier than you'd expect. Chinese BBQ is a weird and wonderful thing. Like with European community bread ovens, its origins come from ancient times when Chinese villages could only support one central oven capable of making slow roasted meats. There would be one BBQ master, and in their window would hang whole pork carcasses, ducks, and always, sweet, smoky char siu.
The easiest way to make char siu at home
Making char siu at home isn’t hard, and there are lots of recipes online, but most of these recipes are oven-based and complicated. I think using an air fryer is a million times better. It heats up faster; the air circulation gets you a better char; and the inside is perfectly cooked in a tenth of the time.What is char siu
Char siu, if you've never had it, is Chinese BBQ pork. It's a little bit sweet, smoky, and tender yet firm. You'll often see small bits of it in restaurant fried rice, but if it's done right, it's better served up in thick slices over plain rice and some wok fried vegetables.How to make air fryer char siu
- Cube the pork. Because we're doing this in an air fryer, surface area is your friend. Plus, more char equals more flavor.
- Make the marinade. Just 5 ingredients, plus a couple of optional.
- Marinate overnight. You can go as short as 30 mins but longer is better.
- Air fry to perfection: 8 mins at 375º is what I did.
- Enjoy on fluffy white rice with some fresh greens, or use in a recipe of your choice (more below).
Is this better than baked?
This recipe builds on our standard char siu recipe, but replaces the oven with an air fryer, and honestly, I’ll probably never go back to a conventional oven again, unless I somehow have a need for a giant batch. Hey, it could happen. I also replaced the standard pork shoulder with a 1.5" thick cut, well-marbled pork chop. It was way easier to find at the store than a pork shoulder. Moreover, it comes out juicy, sweet, and delicious, the way Chinese BBQ should be. Like Steph with her baking, sometimes small batch is the way to go, although for how delicious this is, you might want to save the marinade and do an easy second or third batch. It’ll go quick.What to do with char siu
Air Fryer Char Siu Recipe
- air fryer
- 1 lb thick cut pork chop
- 2 tbsp honey
- 2 tbsp hoisin sauce
- 1 tbsp soy sauce
- 2 cloves garlic (smashed)
- 1 inch ginger (sliced)
- 2 tsp shaoxing wine (optional)
- 1/2 tsp chinese five spice powder (optional)
- 1/4 tsp ground white pepper (optional)
Cut the pork chop into 1" pieces. Combine the remaining ingredients into a marinade, then marinate the pork in the fridge. Longer is better, ideally go at least 30 minutes, but overnight is best.
Place the pork into the air fryer basket with at least 1/4" gap between pieces, in a single layer. Set the air fryer to 375ºF for 8 minutes (see note).
Enjoy with white rice or on its own as a snack.
Note: If you prefer your pork on the more well done side, set it to 10 minutes instead.
Feel free to save the marinade in the fridge to use again within 24 hours, or bring to a boil for 1-2 minutes to use as a sauce or glaze for an extra rich char siu.

I Am... Easy Viral Salt Bread Recipe
Crispy, soft, pillowy, and bursting with butter, these Korean salt bread rolls are the best rolls you’ll ever make. Do you ever just want a small amount of bread and are too lazy to go to the bakery to get it? Do you want to try making bread for the first time? If so, salt bread is for you. I’m obsessed with salt bread. When I see it, I want it. Salt bread that’s just out of the oven is amazing and if you’ve ever wandered past a salt bread bakery and seen a line up of eager bread lovers, I hope you joined it. You’ll never forget your first salt bread. The crispy crust, the soft and tender insides, the little melted pool of butter waiting for you like a secret. I know it sounds like hyperbole, but it really is just that good.
The trend is real
Salt bread is one of those things where once you’ve had one roll, you immediately want another. Coming out of Korea, via Japan, salt bread, or sogeum-ppang, is a super popular bakery bread roll that showcases the simple flavors of butter and salt.What is salt bread?
The name is deceptively simple and descriptive. Salt bread is literally bread. With salt. Don’t discount its deliciousness though. The addictiveness of salt bread lies in the textural contrast: crunchy, crispy butter-fried bottoms with soft, light, pillowy tops. The centers tend to be hollow with a surprise pool of butter waiting for you. Essentially, salt bread is a crescent roll, if crescent rolls were actually good. The basic recipe for salt bread is a milk bread dough, cut into individual portions, rolled up around a frozen baton of butter. When the bread bakes, the butter melts and pools, creating a pool of butter for the bottom of bun.Where is salt bread from?
The consensus on the origin of salt bread is that it’s a Korean take on the underrated Japanese shio-pan: a salty, buttery bun. Most people now tend to think of salt bread as an “Asian” bread, one that you can find at Asian bakeries like 85°C or dedicated salt bread bakeries. Thanks to the internet, even a humble bun can be viral and that’s where we are now, with people lining up in timed intervals for freshly baked salt bread in Seoul.How to make salt bread
Now that you’re convinced, let’s make salt bread! If you’ve made bread before, you’ll find this relatively easy. You start out with a regular milk bread dough, then divide it and shape each piece into an extra-long tapered triangle. The essential step is adding a small rectangle of butter on the wide end of the dough and roll it up like a croissant. As the bread bakes, the butter melts slowly while the crust firms up, becoming thin and crisp.Salt bread ingredients
- flour - bread flour is your friend and if you’re going to endeavor to make salt bread, do yourself a favor and get the bread flour. The difference between all-purpose and bread flour lies in the protein percentage. Bread flour has higher protein which allows it to develop more gluten, leading to a better network of elasticity. More gluten equals more chew and rise, which is what we want in bread.
- water and milk - all bread needs liquid and here we’re going for a mix of water and milk. You can go with all water if you don’t have milk, but the milk adds a nice delicate milky fragrance. If you love shokupan or other Asian breads, it’s probably because it’s milk bread.
- egg - the egg in the dough makes this an enriched dough, giving the salt bread more flavor as well as helping it bake up golden brown.
- yeast - all bread needs yeast! No special yeast needed here, just go for instant. If you have active dry, that’s okay too, it just might take longer for your bread to rise. We’re using instant yeast because its smaller granules means we don’t need to activate it in liquid and can just add it directly to the flour mix.
- sugar - a bit of sugar adds sweetness and helps with browning.
- butter - it wouldn’t be salt bread without butter. We’re doing two additions of butter, once in the dough so it stays soft and rich, and once when we shape the salt bread so we get that hollow centre. You’ll need softened butter and a straight from the fridge butter block. For the encased butter in the salt bread, you need to cut the butter into little rectangular batons about 3 inches by 1/2 inch and freeze them.
- salt - duh! Regular fine sea salt in the dough and a sprinkle of flaky salt on top to finish.
Step by step salt bread
Most bread recipes have you mix together all the dry ingredients, then mix in the wet ones, but after a bunch of experimenting, I’ve found that adding all the liquid ingredients to the bottom of your bowl, then putting the dry ingredients on top makes for a more even mix, especially when you’re using a stand mixer. By layering the dry ingredients on the wet, you don’t have to scrape the bowl down as much and you don’t end up with any dry bits at the bottom of the bowl. It’s my all time favorite trick for bread making! Here is the step by step:1. Add
To the bowl of your stand mixer, add in this order: water, milk, egg, yeast, sugar, butter, flour, and salt.2. Knead
Mix on low for 5 minutes with the dough hook, then turn up to medium and knead for 15 minutes minimum. You want to knead until you reach the windowpane stage: take a bit of dough in your hand and stretch it out, if you can stretch it out thin without it breaking, you’re good to go.3. Proof
Gather all the dough into a ball and let it take a nap and puff up.4. Cut
While the dough is sleeping, take a block of cold butter and cut it into little rectangles about 3 inches in length by 1/2 inch in height and width. Place the rectangles on a parchment paper lined baking sheet and pop them into the freezer to firm up.5. Shape and proof again
When the dough has tripled, punch it down and divide it into 9 equal portions. Shape each portion into a 6 inch long teardrop/tadpole shape then cover and let rise for another 30 minutes. Once the 30 minutes is up, take a portion of dough and on a lightly floured surface, use a rolling pin to roll it out: you want a super long triangle that’s about 3 inches at the base and 1.5 feet in length. Take a rectangle of frozen butter and place it at the base. Tuck in the sides and then roll the butter up from the base to the tip. Place the shaped salt bread on a lined baking sheet, cover and shape the rest of the buns. Cover the salt breads and let them rise again until doubled, about 90 minutes.6. Bake
When the buns are puffy and tall, use a spray bottle to spray them with water then sprinkle on some salt. Bake until golden and delicious then remove from the oven. Once you take them out, use a pastry brush and some of the butter that’s pooled on the tray to brush the tops to make them nice and shiny. Cool slightly on a wire rack and enjoy!Other breads you can make if you loved this
That’s it!
Whew, I admit, this was a journey, what with three proofs and all, but it’s really worth it, I promise! Just take a day or afternoon to yourself, turn on some binge worthy show in the background and make some bread. It’s so wholesome and homey. I hope salt bread makes it to your table this holiday season. It truly is the BEST bread roll you can make and would be such an elite move as your bread course at any dinner. Happy baking! -xoxo stephSalt Bread
Crispy, soft, pillowy, and bursting with butter, these are the best rolls you’ll ever make!
- 80 g water (warm)
- 40 g milk (warm)
- 57 g egg (lightly whisked (1 egg is about 57g))
- 6 g instant yeast
- 24 g sugar
- 20 g butter (room temp)
- 270 g bread flour (see notes)
- 5 g salt
- 1/2 cup butter (to fill)
- flaky sea salt (as desired, to finish)
In the bowl of a stand mixer, add in the following order: water, milk, egg, yeast, sugar, butter, flour, and salt. Mix on low speed with the dough hook for 5 minutes until the dough comes together in a shaggy mass, scraping down the bowl as needed.
Continue to knead on medium for 15 more minutes. Do the windowpane test: take a piece of dough about the size of a golf ball and stretch it out between your fingers and thumbs. If you can stretch it without the dough breaking, you’re good to go. The dough will be very soft and tacky - try to resist adding flour.
With floured hands, shape into a ball and transfer to a clean lightly floured bowl, cover and let proof until about tripled in size, about 1 hour.
While the dough is rising, cut the butter into batons, about 1.5 inches long and 1/2 inch tall and wide. Place the butter batons on parchment and place in the freezer until ready to use.
When the dough is ready, punch down the dough and divide evenly into 9 portions. Working with one portion at a time, shape each piece into a 6 inch log. Taper one side of the log by using the palm of your hand and slight pressure to make a tadpole shape. After shaping, cover the pieces with a clean kitchen cloth and let rest for 30 minutes.
Use a rolling pin to roll out each portion of dough into a long acute isosceles triangle, about 2 inches in width at the base and about 16 inches in length. Place the frozen butter on the wider end and roll it up, pinching the sides of the dough and encasing the butter entirely. Continue to roll up to the tip of the dough. Place the shaped salt breads on a parchment paper lined baking sheet, with the sharp point of the bun seam side down. Leave at least 3 inches between each bun. Cover and proof until doubled in size, about 90 minutes.
Heat the oven to 375°F, on convection mode. When ready, use a kitchen spray bottle to evenly spray the surfaces of the buns. Sprinkle on a generous amount of flaky sea salt and bake for 15 minutes, or until baked through and golden brown — the bread should come to an internal temp of 189°F if you have an instant read thermometer.
When the buns are ready, remove from the oven and immediately use the butter pooled on the tray to brush the tops of the rolls. Transfer to a wire rack to let cool slightly, then enjoy!
Notes: I make my own bread flour at home with all purpose flour and vital wheat gluten. Vital wheat gluten is the protein found in wheat and what changes the protein percentage of your flour. If you want to use all purpose flour and add vital wheat gluten to up the protein content for this specific recipe, you’ll need to add 2.67 grams of vital wheat gluten to the all purpose flour. No need to change the flour measurement.

I Am... Kewpie Mayo
I am a huge Kewpie mayo fan. Give me a squishy soft red-capped bottle of the good stuff and I’ll be squeezing it on everything. But if you don't have any nearby, read on for a good substitute recipe. Kewpie mayonnaise is my number one condiment of choice. I love it with fries, I love it on sandwiches, I love it as a dip, I just LOVE it. If you’ve never had Kewpie mayo or you have heard of it but haven’t tried it, you need to. It will change your life, I’m not even kidding.
What is Kewpie mayo
Kewpie mayonnaise is Japan’s favorite mayonnaise and salad dressing brand. Invented in 1924, it’s pretty much ubiquitous in every Japanese kitchen. It’s rich, yet light, and incredibly delicious. Kewpie mayonnaise is so beloved in Japan that they even have specialty Kewpie mayo cafes to celebrate all things Kewpie. There’s even a Kewpie mayo terrace slash museum where you can learn all about Kewpie, get samples, and make your own!What is the difference between Kewpie and regular mayo
Mayonnaise is an emulsion of oil, egg, and an acid. Regular mayonnaise uses whole eggs and white vinegar whereas Kewpie uses only egg yolks and rice or apple cider vinegar. The result is an extra rich and thick texture with a bit more sweetness and tang. If you don’t like mayo give Kewpie a try, it will surprise you how different they taste.What does Kewpie taste like
Kewpie mayonnaise is tangier, sweeter, thicker, and creamier than regular mayonnaise. It has a huge amount of umami.Iconic Japanese dishes with Kewpie mayonnaise
Kewpie are deeply ingrained in Japanese cuisine, where it's used as a dipping sauce, seasoning, and topping. It’s one of their favorite condiments and an essential in any Japanese kitchen, right along side soy sauce, dashi, mirin, and sake. It’s beloved for a reason - it tastes amazing! Some iconic Japanese dishes where kewpie mayo is the star include: Takoyaki, Japanese Potato Salad, and Japanese Egg Sandwiches. There are even more below. Thankfully you don’t have to go to Japan to experience the magic of Kewpie. You can find it, in its signature squeeze bottle with a red flip top at most grocery stores these days, in the Asian aisle. The mayo itself is a bit more golden that your standard mayo and much more creamy and luxurious. Kewpie mayo uses just egg yolks – as opposed to regular mayo which uses whole eggs – and rice or apple cider vinegar for a hint of sweetness. It’s absolutely addictive and we always have a bottle in the fridge. It’s the not-so-secret ingredient to ALL delicious things.Where to buy Kewpie mayo
You can find Kewpie mayonnaise at most grocery stores in the Asian aisle. If your grocery store doesn’t carry it, you can find it at your local Asian grocery store or online. They even sell it at Costco sometimes.What can I sub for Kewpie mayo?
If you can’t get Kewpie mayonnaise you can grab another brand of Japanese mayonnaise, but the original and best is Kewpie brand. If you can’t get your hands on any Japanese mayo at all, you can make a substitution at home. Recipe below!Kewpie mayo substitutes
If you can’t find Kewpie mayo but you absolutely need it in your life, you can sub regular mayo and add a bit of rice vinegar and sugar to make a Kewpie mayo substitute. A good recipe is below.How to use Kewpie mayo
Kewpie mayonnaise comes in an incredible squeeze bottle with a red flip lid. It has a thin tip that is perfect for piping kawaii faces onto omelettes or making beautiful lines of mayo on okonomiyaki. If you unscrew the lid, there’s also a star tip that let’s you squeeze out blobs of mayo for those times when you need more, like when you’re making potato salad.What is Kewpie mayo good on?
It honestly tastes amazing with everything. You can use it as a dip for vegetable sticks or use it anywhere you would use ranch dressing. Kewpie mayonnaise and breadsticks? Yes please! Kewpie mayonnaise on pizza? Absolutely. It is great with all proteins and especially delicious when you dip chicken nuggets or tenders into it.The difference between Japanese and American Kewpie
Did you know that there are actually two kinds of Kewpie mayo? There are the ones that are produced in Japan and imported and there are ones that are made right in the United States in California. The main difference between the two formulas is MSG. The American Kewpie mayo instead leans on yeast extract (kind of like nutritional yeast) to add umami. It’s a bit disingenuous though because yeast extract actually has naturally occurring MSG, much like tomatoes and Parmesan cheese. We decided to do a blind comparison taste taste and I totally prefer the Japanese version. There’s a creamy, distinct unctuous to it that is just SO delicious. It definitely has a noticeably savory umami note. Japanese kewpie all the way! As well as the exclusion of MSG, the American version of Kewpie Mayo also includes a bit of sugar. It’s a bit looser and not as rich either. To be honest, I would skip it if it’s the only Kewpie Mayo you can find. For me, it’s got to be Japanese Kewpie or none at all.How to tell the difference between Japanese and American Kewpie Mayo
An easy way to tell the difference between where your Kewpie comes from is the packaging. Japanese Kewpie comes in a bag with a friendly red lattice pattern, housing an iconic oil-shaped, squishy bottle that keeps it fresh and creamy while avoiding oxidization. American Kewpie on the other hand, comes in a more sturdy, similarly shaped, but fatter bottle, not in a bag, with the red lattice reversed and printed on a plastic label. A super easy way to tell, aside from the bag is: Japanese Kewpie has a naked baby on the packaging and American Kewpie has just the baby’s head.Kewpie Mayo Terrace Tour
This is probably more than you ever wanted to know about Kewpie mayo, but if you’re a true fan, I want to tell you about the Kewpie Mayo factory tour! Mike and I were in Tokyo last fall and, as one does, I looked up all the food factory tours that were in accessible distance to Tokyo. The Kewpie Mayo Terrace, located in blah blah offers a free 90 minute tour where you get to taste various kinds of kewpie mayo, learn about the global variations, and get a peek into how the factory works. Unfortunately it’s not a working factory, more like a walk through tour with videos, but it’s still a fun experience and if you’re anything like me, you’ll love it! At the end of the tour they let you choose an omiyage: either a full bottle of Kewpie mayo or a mini Kewpie doll. Naturally, I chose the mayo, specifically the smoked mayo. It’s absurdly good and I’m so glad we got it because it’s a Japan exclusive. I loved all the kewpie plushies and the branding in general. We went on a rainy day and it was the best!How to visit the Kewpie Mayo Terrace
All tours need to be reserved in advance. They offer them in English, so make sure you choose the appropriate tour here. PS - The do have actual factory tours, but they’re not located near Tokyo, but rather in Kobe, Tosu, and Ibaraki. Ibaraki is also known for Japanese imo aka sweet potatoes, so that is definitely on our list. Happy Kewpie-ing! xoxo stephRecipes to make with Kewpie mayonnaise
Here are some recipes that use Kewpie mayo to get your mayo-imagination up and running.- Mayo ramen - for an extra rich luxe restaurant style ramen
- Ebi chili mayo - Deep fried tempura prawns with sweet and spicy Kewpie
- Japanese Egg Sando (or this one) - Japanese egg salads aren’t Japanese unless you use Kewpie. This is gonna be the best egg salad you’ll ever taste
- Japanese potato salad - It just hits different. It’s the Kewpie!
- Takoyaki - the classic takoyaki topped with Kewpie
- Deviled eggs - eggs get an upgrade with Kewpie mayonnaise
- Sushi bake - because it’s the creamiest, warmest, most satisfying casserole
- Vietnamese Pizza - just a super fun street food you can make at home
Kewpie mayo recipe
Make this easy hack version of classic Kewpie mayo if you're in a bind, but it's better to get the real thing
- 2 tbsp mayonnaise (Hellmann’s/Best Foods preferred)
- 3/4 tsp rice vinegar
- 1/4 tsp sugar
Mix everything together until smooth and eat on everything.

I Am... My Best Sushi in Tokyo aka Tokyo Sushi Guide 2026
If you’re heading to Tokyo, sushi is probably on your must-eat list. This is my best sushi in Tokyo for 2026, from low- to high end. Sushi is beloved in Japan (as it is all over the world) and the range of the quality of sushi goes from the sky’s-the-limit high-end to discount end-of-the-night supermarket. Mike and I have eaten so much sushi in Tokyo that I’m surprised I haven’t developed a fish allergy (I did develop a caviar allergy from too much free caviar in Las Vegas). We are sushi obsessed. From 4 am sushi breakfasts at the old Tsukiji Market way back in the day to chain restaurant kaiten/conveyor belt sushi to Michelin starred omakase, we’ve eaten it all and more. Most of the places on this list are ones we've visited/revisited in the past year or so, so they should all still be open and still maintaining their standard of quality.
My Ultimate Guide to Sushi in Tokyo
This is my ultimate guide for sushi in Tokyo. I’ll go through the tourist traps, the places that are under the radar good, and whether or not you should drop upwards of ¥30,000 on an omakase dinner. Tokyo is probably my most favorite city in the world. We’ve spent so much time there (from 2011-2020 we lived in Tokyo for 3 months every year) that it’s a second home for us. Sometimes it feels like we’re more comfortable there than here. We've made Japanese friends, we have our favorite sunset spots, and we definitely have our favorite places to eat sushi.What are the different price points of sushi in Tokyo?
First off, the thing you should know is that sushi is the food of the people and everyone in Tokyo eats it, from young to old. Because it’s so universal, it’s available at every price point. When you go to Tokyo, it’s best if you have a solid idea of how much you want to spend. Keep your expectations in check and of course, be respectful (but please not quiet, more on that below). My sushi guide is separated by budget, so feel free to scroll to your preferred spend.Tokyo Budget Sushi (¥100 - ¥2000)
This is the sushi we get when we’re super hungry and can’t be bothered to make a reservation or wait in line. Budget sushi is premade and found in supermarkets, convenience stores, and depachika (the food halls in the basement of large department stores). Contrary to what you may think, this kind of sushi is decent. Think of it like a good sandwich: when it hits, it hits. If you want to truly maximize your budget, the fresh sushi take away trays at grocery stores or depachika are deeply discounted an hour or so before closing.My favorite combini sushi
7-11, Lawson, and FamilyMart all sell sushi, ranging from rolls (maki) to nigiri assortments. They also sell onigiri, which, technically is triangle sushi. Most combini get multiple deliveries daily and if you time it just right, either in the morning or right before the evening rush, you’ll find a pretty decent selection. Generally, the Japanese public rate 7-11 as having the best sushi, followed by Lawson, then FamilyMart, but I personally have a soft spot for FamilyMart as we lived in the center of a circle of 4 of them within a 1 block radius.Grocery stores
You know how in grocery stores in North America you can get deli food and rotisserie chicken? Well, in Japan, you get things like curry bowls, yakisoba, and sushi. Grocery store sushi tends to be sightly higher on the scale of quality compared to combini. There are so many grocery stores in Tokyo, even in the middle of the city. Some of our favorites are Seijo Ishii, Maruetsu, Life, and AEON. All the grocery stores will have a large selection of assorted sushi trays. We usually shop at Life but when we can justify the trip, we always stop at Odakyu OX at the end of the Chiyoda line to pick up some sushi. Truly though, I love all Japanese grocery stores.Tokyo Depachika aka department store sushi: two ¥1000 - ¥2000
If you’re on a budget and looking to try sushi in Tokyo, your best bet is to go to a department store at the end of the night. On the basement level of department stores, they have what they call depachika, essentially a high-end food hall. They have sushi counters where the sushi is made fresh and packaged into convenient trays. At the end of the night, the sushi gets discounted and you can fight with the grannies while trying to score the best tray. I've tried every one of these depachika and they're all great. Our two favorites were the Tokyu in Shibuya which is now gone (RIP in peace old Shibuya) and the very first one you'll probably run into at Daimaru, conveniently connected to Tokyo Station. Daimaru Tokyo Depachika Basement Level Gran Tokyo North Tower 1 Chome-9-1 Marunouchi, Tokyo Open daily, 10am - 8pmCost-effective and casual ¥2000 - ¥6000
Moving on from pre-made sushi, we’re going to go to made to order sushi. In this category, we’ll explore my favorite kaiten/conveyer belt sushi, standing sushi bars, and casual chain restaurants. Most of the restaurants in this category don’t require reservations, as in you can just walk in, but they usually have line ups which in my opinion are worst than scoring a reservation. If you’re the kind that gets hangry, be sure to factor in wait times.Kaiten sushi
Kaiten sushi or kaitenzushi is a beloved sushi experience for locals and tourists alike. In Tokyo these days you usually order via an ipad and is either handed to you or comes directly to your table via express train. I love kaitenzushi because it's nice to try a variety of sushi without any pressure. There’s usually quite a bit of a wait for any kaiten sushi, so put your name down and then circle back after doing a bit of a wander. Our favorites depend on whether or not we need to eat right away. We frequent either Nemuro (a Hokkaido sushi chain that has expanded all of Japan) in KITTE if we're willing to wait an hour+ or Megumi in Shibuya (owned and operated by a tuna wholesaler) if not. In both places, an ipad is available but it's pretty helpful if you can read (or use translate) the handwritten signs, as that's where the best and most interesting pieces are. Kaitenzushi Nemuro Hanamaru KITTE Marunouchi ¥2000 - ¥4000 KITTE Marunouchi 5F, 2-7-2 Marunouchi, Tokyo Daily 11am - 11pm Miuramisakiko Megumi ¥2000 - ¥4000 Shibuya Hikarie 6F, 2-21-1 Shibuya, Tokyo Daily 11am - 10pmStanding sushi bar
When we want to step it up from kaitenzushi but still keep it casual, standing sushi bars are where we go. Here the ipads (if they exist) are often only in Japanese or you need to just call out your order to your chef. You don't need to speak Japanese but it's super helpful if you can identify and know the names of all the sushi you like. Mike is really good for this, especially with obscure pieces. I on the other hand keep things simple with my core 3 (akami, torotaku, and menegi - see below) that I order on repeat. Our current fave standing sushi bar is Sushi Mitaka, which now has a Michelin recommendation and is reservations only and is super out of the way, but worth it. It's run only by a husband-wife team - he does the sushi and she does the drinks and hot food. It can be a little quiet as it's very much a neighborhood kind of place but I love how charming and authentic it is. Sushi Mitaka Johnan Building 1F, 4-1-4 Mita, Minato City Reservations onlyOmakase sushi
So far, all the sushi places I’ve talked about serve sushi a la carte style. The truth is, 9 times out of 10 we're usually at an omakase, aka chef’s choice. If you’re going to have sushi, omakase is the way to go. A lot of people think omakase is super expensive and sophisticated (and it can be) but like all sushi, omakase comes at many price points and vibes.Entry level omakase sushi in Tokyo ¥5,000 - ¥12,000
Entry level omakase, at least the way it exists now, is a somewhat new experience in Tokyo. These intro omakase sushi bars are typically chains with several sushi wakiita (chefs and apprentices working under the head chef) and one itamae (head chef). Unlike super traditional sushi bars, these restaurants often have a table or two for slightly larger groups. New-style omakase is not as chef-y as traditional. The menu doesn’t change much based on the season - instead they’ll focus on the standards, starting off with delicate, light fish before moving on to deeper flavors, then fatty flavors and other types of seafood. Entry level omakase is a great place to dip your toes into omakase. The quality is good, the rice is properly cooked and seasoned, and if you’re a sushi lover, you’ll be absolutely enchanted before quickly moving on. Entry level omakase is a gateway and it won’t be long until your sushi standards move you to the next level. Our favorite here is the lunch omakase at Sushi Tokyo Ten Shibuya in the Stream complex.Sushi Tokyo Ten ¥5000-¥10000
A new-ish omakase chain with several locations in Tokyo. Their lunch omakase starts at ¥5000 and their dinner starts at ¥10,000. All of their spaces are beautiful and if you can, get a counter seat for the most omakase experience. Shibuya Location Shibuya Stream 3F, 3-21-3 Shibuya, Tokyo Daily 11am-3pm, 5pm-11pmMid range omakase Sushi in Tokyo ¥12,000 - ¥25,000
The next level of omakase is what Mike and I call mid-range. This is our sweet spot, the places that we find have good cospa (cost-performance aka the cost-benefit ratio). Restaurants in this range tend to be excellent. They’re a bit more involved compared to entry level omakase but without the pomp and ceremony of the more famous places. This is also the niche where you can find more seasonal fish and seafood, innovative rice vinegar mixes, as well as cool vibes beyond zen minimalism. Beyond Tokyo Ten above, all omakase requires reservations. These are our current faves:Sushi Itsutsu ¥12000 - ¥20000
I love looking at tabelog for highly rated, yet affordable sushi places. Japanese people are BRUTAL with their reviews and really, anything that scores over 3.5 is going to be solid. Itsutsu is sitting at 3.6 and only ¥12000. For a sushi place in Ginza, that’s amazing cospa. The room is quiet and refined and the fish was premium. The shari at Itsutsu is tender, seasoned well, and shaped with experienced hands. I even enjoyed their otsumami (cooked dishes) which is rare for me. It’s a solid, fun experience and I hope it doesn’t blow up too much because Mike and I want to go there on the regular. 1F 3−12−8 Futaya Bldg Ginza,Tokyo Tues - Fri 6pm- 11pm Monday Closed Sat-Sun 1pm - 3pm, 5:30pm - 10:30pmSushi Hiroya ¥14000 - ¥20000
Hiroya sits near the top the mid-range, price point wise.Their lunch omakase starts at ¥14,000. The space is small and cozy with 10 counter seats and an exceptionally young chef. It’s really impressive - Hiroya sits at a very high 3.74 rating on Tabelog, as well as being one named one of the coveted 100 best sushi shops in Tokyo in 2025. We showed up for lunch there as I love omakase lunch. Give me all the nigiri sushi and none of the appetizer/otsumami. It was mainly tourists with only a couple of Japanese at one end of the bar. I like to believe they seated us at the other end as honorary Japanese. We were served 10 pieces and the fish was premium and unique, with tempura mehikari (green eye fish) hand roll being a stand out. One of the best omakase lunches I've had in Tokyo, ever. Sushi Hiroya 1F 1-9-2 E-GAMI Bldg Hamamatsucho, Tokyo Wed + Sun 12pm - 3pm Daily 6pm - 11pmSushi Onikai ¥14000 - ¥20000
If you’re looking for cospa, Sushi Onikai is for you. The dinner omakase starts with a couple of seasonal otsumami and then goes directly into a three kinds of tuna hand roll before heading straight into 16 exquisite pieces of sushi. Standouts for us during the fall season included: the kohada, kampachi with pickled daikon, and marinated katsuo. They do interesting (for sushi) stuff with smoke and fire, it's a whole show. No melon to end here, just a simple rectangle of tamago. Onikai is very much a locals place, where the few tourists also spoke excellent Japanese, but Chef Toda speaks a bit of English (actually quite a lot but he seems shy about it). He told us about the several annex branches of Onikai, where Toda-san doesn’t chef. We haven’t been to the annexes, but the fact that they exist speaks to Onikai’s popularity. We loved it so much we went back several times in the same season, which we hardly ever do. Sushi Onikai 2F, 2-18-11 Kamimeguro, Tokyo Daily 6pm - 11pm Closed MonSushi Bar Mugen ∞
Sushi Mugen feels like its on the verge of becoming high end but the owner/chef intentionally prefers not to me. The cospa is amazing here as is the selection of sushi. Most of all, the tamago is to die for. I'm a tamago connoisseur, sometimes I think it might be the most important part of sushi for me. Mugen is different than other sushi bars because it's opinionated. The owner doesn't have much sake on hand but a huge selection of gin. Unlike the soft atmospheric music of most places, he spins his personal collection of (mostly) jazz. The sushi is served on pottery that looks like records, or maybe they're just real records, I'm not quite sure. Overall the vibe is really cool and unique. Mike says that Mugen is one of his favorite sushi places, money no object. Mugen is very hard to find. It's on a back street just off a main street and looks like a deserted cafe space at night. You just have to look for the signage and follow the instructions to be buzzed in. Sushi Bar Mugen ∞ 1F 2-2-13 Roppongi, Minato City Closed WedsHigh end luxury omakase sushi in Tokyo ¥30,000 - ∞
When a lot of people think of omakase in Tokyo they dream of Jiro -an exclusive super high end omakase experience you can brag about. The truth is, true super high end omakase restaurants are actually quite rare for tourists to get into because they typically have a rolling reservation system for regulars only. These are the sushi bars that you have to jump through hoops to get into. They’re the places that you need to have a relationship with the sushi chef/owner. Typically, your family has been going there for generations. They roll out reservations to their loyal list first, then put the remainders up for grabs. If you dream of high end sushi, and you’re incredibly lucky, there are ways to get reservations (or so the internet tells me). Two higher end places that we’ve had the pleasure of eating at are Tokami and Kizaki. For Tokami, Mike used our credit card concierge back when those still worked and for Kizaki, a friend introduced us and made the reservation directly with Chef Kizaki-san. We haven't been back to these places in awhile, but they've only become more famous and harder to get into, so hopefully that speaks to their continued excellence.Tokami
¥30,000 - ¥40,000 Tokami opened in with great fanfare in 2013 by renowned tuna wholesaler Yamayuki/Yamasachi. Thanks to the head chef, Hiroyuki Sato-san, they earned a Michelin star during their very first year. In 2017, Sato-san left to start his own restaurant, Hakkoku. We got to eat at Tokami while Sato-san was still there and it was absolutely a dream come true. It’s when I truly fell in love with akazu, or aged red sake yeast vinegar. Sato’s shari (rice) is exquisite, with the temperature, texture, and ratio of seasoning adjusted to each and every piece of fish. Somehow Sato-san’s akazu seasoning, which is a custom mix of two different vinegars, makes rice taste even more like rice. I'm not 100% sure but I feel like Sato-san might have started the current akazu trend. If not, he sure helped it along. The rice at Tokami (and I assume is now at Hakkoku) is dark, almost rusty-ruby, coated with umami, and deeply aromatic. The fish supplied by Yamayuki is insanely high quality with loads of seasonal catches. Currently, Tokami is helmed by Shota Oda-san, a chef who worked directly with Sato-san while he was still at Tokami. From what I see on reviews, after a brief hiatus, Tokami re-opened again and so far the reviews (from Japanese citizens) have been glowing. Tokami New Ginza Bldg 11 B1F 8 −2−10 Ginza, Tokyo Daily 6pm - 9pm Closed Sun + WedKizaki
¥30,000 - ¥40,000 Kizaki, started by Hitoshi Kizaki-san, is a direct offshoot of Tokami and since we love the shari at Tokami, it was a no brainer when a friend managed to score us a last minute reservation. Kizaki-san has an impeccable resume: he studied at Kyubey, worked at Saito, and staged at Tokami before he opened his own shop. Kizaki’s shari, also imbued with red sake lees vinegar, is reminiscent of Tokami’s, but with a slightly lighter touch, and firmer grains. The neta is fresh, varied, and delicious. The room is just 9 counter seats, run by Kizaki and his wife, a former sake wholesaler, who sommeliers the sake list. Truly, there’s a huge difference between mid-range and high-end omakase. Every bite is thought out, the technique is amazing, and the meal is immaculate. You enter a sushi flow state where every piece builds on the last and your tastebuds literally die and go to heaven. Kizaki 5C Akasaka Seimei Kaikan Bldg 3−21−10 Akasaka, Tokyo Daily 12pm - 2pm, 6pm - 11pm Sunday 12pm - 2pm Closed MondayMy tips and tricks for sushi in Tokyo
Go for the lunch omakase
Lunch omakase is what I think is the best cospa of all omakase. Mike isn’t as huge of a fan as I am, because, rightfully so, he believes that all the best pieces are reserved for dinner service. But as someone who wants sushi and only sushi, lunch is the way to go. It’s cheaper and they usually don’t have any otsumami/hot appetizers to start you off. They go straight into nigiri sushi, just the way I like it. Most mid-range and high-end sushi will have a lunch option and it’s almost always easier to score that reservation.Make reservations
Yes, you will need reservations. Please make them and be on time. Omakase is coursed around the diners and most places have a set time. They won’t start until everyone is seated at the counter, so this is one of those occasions where you absolutely don’t want to be late. Find the restaurant beforehand, planning out your route, and figure out which floor it’s on. As a rule of thumb, it’s probably best to show up 10-15 minutes early. Don’t go inside though. Hang around slash near the street entrance. Usually you can up nod at the other patrons that are waiting around for the exact same thing.Order drinks
This one is a little under the radar, but when you go to omakase, drinking is part of the experience. This is the first thing they will ask you. Please don’t say “mizu” aka water. You don’t have to drink alcohol as they typically have non-alcoholic drinks. Be sure to get one drink per person and if you’re the kind, keep it free flowing. Sushi chefs LOVE it when you do the sake pairing or ask them to recommend you their favorite sake. Mike has so much experience with this ;)Enjoy yourself
A lot of tourists kind of put a damper on sushi places by being too polite and proper. That's not to say you should whoop it up and start throwing things (please don't) but loudly chatting with the chef or your friends is highly encouraged. Most omakase sushi is a celebratory event meal even for Japanese, so they're there to have fun and hope you are too. All of my favorites have been at places where a bunch of salarymen are celebrating closing a big deal and having the time of their lives. Whew, that was a super long post! I hope you get to enjoy some sushi in Tokyo soon! If you have any recommendations, leave them in the comments, Mike and I love trying new sushi spots. may all your sushi dreams come true, xoxo steph PS - If you want a detailed what happens when you go to mid-range to high-end omakase, from deciding where to go, to making the reservation, finding the restaurant, and what you’ll experience, let me know in the comments and if there’s enough interest, I’ll write that up!Other Tokyo Dining Guides
- Top 10 Ramen in Tokyo to Try Before You Die Spring 2026
- The Search for Perfect Purin in Tokyo
- Tokyo Food Guide: In Search of the Best Tokyo Gyoza
- Tokyo Food Guide: Where to Eat the Best Udon in Tokyo
- Where to Eat Modern Affordable Shabu Shabu in Tokyo
- The Best Place for Tuna Lovers in Tokyo: Maguro Mart Nakano
- Nogami Bakery, Tokyo
- Tokyo Food Guide: Where to Eat Fluffy Japanese Pancakes in Tokyo
- Tokyo Food Guide: Where and What to Eat in Tokyo

I Am... Cane’s Sauce Recipe
Just like the rest of the world, Cane’s sauce with its creamy, tangy, peppery, addictive pink sauce has me in a chokehold. If you’re not particularly into the fast food scene, you probably don’t know about Raising Cane’s. Here’s what you need to know: they sell chicken fingers and only chicken fingers. Okay, that’s an exaggeration. They also have the best crinkle cut fries (the best of all the style of fries), Texas toast, and coleslaw. Not to sound like a sponsored post (this is not a sponsored post) but I am obsessed with Raising Cane’s. As a chicken finger lover, I love them and their 24 hour marinated chicken cooked-to-order crispy chicken fingers. Don’t get me started on the sauce. It’s made in every store daily and the recipe is top-secret. They don’t sell it, they haven’t published the recipe, and that makes it all the more craveable.
What is Cane’s sauce?
Cane’s sauce is Raising Cane’s super top secret sauce that is served with their chicken fingers. It’s a pretty pink salmon-color sauce that kind of looks like Thousand Island or Russian dressing. What’s in it? No one knows. It’s a true trade secret. Even the general managers (the only ones that are allowed to make it) don’t know what goes in it. They don’t make it from a recipe, they just mix together unlabelled ingredients. Even just mixing unlabelled blends of ingredients need strict non-disclosure documents signed. The seasoning blend is the most secret thing of all.What is Cane’s sauce made of?
There’s lots of speculation on what Cane’s sauce is made of. Generally, it seems like people agree that it’s a mix of mayo, ketchup, and Worcestershire. There’s also the spices, the aforementioned unlabeled blends. No one is quite sure what’s in that, but people usually guess salt, pepper, garlic powder, and paprika. Lemon pepper (the seasoning that you find in the spice aisle) is also mentioned a lot.Our sauce methodology
I scoured the internet for different recipes of Cane’s sauce and blind taste tested them with Mike, fooling around with ratios and ingredients. I can’t say for certain that our recipe is a perfect copy but I can say it has that signature bite with the creamy, addictive flavor of Cane’s.How to make Cane’s sauce
- Mix. Measure out all of the ingredients below and mix until smooth.
- Rest. Cover the sauce and let rest in the fridge for 24 hours.
- Enjoy. Give the sauce a stir and dip all the things.
Cane’s Sauce Key Ingredients
- mayo - the extra heavy duty kind, more on this below
- ketchup - Cane’s sauce is a rosy salmon pink hue. Some people say the pink is paprika and some people say ketchup. I think it’s ketchup. The sweetness and tang of ketchup add an unmistakable flavor to Cane’s sauce.
- Worcestershire - Worcestershire wasn’t in my mind when I first tasted Cane’s sauce but after my research and experimenting, Worcestershire is a key ingredient. It adds so much umami and depth, thanks to the fact that Worcestershire is a fermented fish sauce.
- Soy sauce - According to the allergens listed, Cane’s sauce has soy, eggs, and fish (anchovies). Most of the recipes I found online don’t have soy sauce in them, and it’s true that the soy could come from the oil in the mayo, but I suspect there is a touch of soy, so instead of solely using Worcestershire, I went with a mix of soy and worcester.
- Freshly ground coarse black pepper - A huge amount of black pepper is what gives Cane’s sauce its kick. More on that below too.
- Garlic powder - A wee bit of garlic powder adds a background note of warmth and sweetness. Most people agree that garlic powder is in Cane’s sauce.
Extra heavy duty mayo
Almost everyone agrees that mayo is the base of Cane’s sauce. The secret though, is something that people have identified as extra heavy duty mayo, a common ingredient used regularly by the restaurant industry. Essentially, it’s mayo with extra egg yolks in it, which makes it thicker, richer, and more emulsified than regular mayo. It’s sold by restaurant supply stores in giant gallon jugs, so it’s not something that regular people buy. But, you know what mayo I buy on the regular that is thick and rich and irresistible? Kewpie. If you’re not familiar with Kewpie mayo, I go super in depth here. Essentially it’s a mayo made with only egg yolks instead of whole eggs. It’s extra creamy and extra delicious. Kewpie mayo is the secret to making Cane’s sauce at home.Fresh black pepper
It’s been argued that the spice comes from cayenne or a Cajun spice mix, but I suspect that Raising Cane’s sources a really quality black pepper and grinds it on the daily. For me and Mike, we are obsessed with Tellicherry black pepper. Tellicherry peppercorns are the gold standard for black pepper. The berries are deep and complex. When freshly ground, Tellicherry pepper is bold, super flavorful and actually packs a punch. The pepper you use matters, so get the best you can and for sure coarsely grind it, none of that black pepper powder stuff. If you do go the distance and grind your own pepper, a super basic spice/coffee grinder is pretty cheap and we use ours almost daily. I didn't think we would when Mike just announced he bought one on Prime Day, but I'm willing to accept I was wrong and I love it so much.Cane’s Sauce tips and tricks
- Let it rest - The number one thing you need to do for your sauce to taste legit is to let it rest. Make the sauce the day before and let it chill out in the fridge for at least 24 hours. The flavors mingle and coalesce and the result is much more Cane’s sauce after 24 hours compared to trying it fresh right away.
- Kewpie mayo - If you have access to heavy duty mayo, that’s the way to go. For the rest of us, Kewpie mayo is going to give you that distinct creamy, rich base for the backbone of our homemade Cane’s sauce.
- Coarse ground black pepper - The pepper is more important than you think. It’s what gives Cane’s sauce that spicy hit. If you think pepper isn’t spicy, it’s because you’ve been eating sub-par pepper your whole life. If you’re committed, get whole Tellicherry peppercorns, dry toast them until aromatic, let cool, and then coarsely grind before stirring into your sauce.
- orange sauce - it’s giving Panda Express and I am here for it.
- duck sauce - duck sauce is constantly aura farming with it’s sweet and sour dip-ability
- sour cream sauce - a creamy, dreamy sauce that coats every nook and cranny
Cane's Sauce Recipe
Just like the rest of the world, Cane’s sauce with its creamy, tangy, peppery, addictive pink sauce has me in a chokehold.
- 1/2 cup mayo (Kewpie mayo preferred)
- 3 tbsp ketchup
- 1 tsp Worcestershire sauce
- 1 tsp light soy sauce
- 2 tsp freshly ground black pepper (coarse ground preferred)
- 1 tsp garlic powder
In a bowl, mix together all of the ingredients until smooth.
Cover and let rest in the fridge for 24 hours before enjoying with everything.

I Am... Viral Crispy Shanghai Butter Mochi
Shanghai butter mochi, butter mochi, butter tteok, crispy butter mochi, Korean crispy butter mochi — call it whatever you want — but definitely make some and enjoy the bestest, easiest, crispy, chewy treat. If you like squishy, chewy deserts, you'll love these lil butter rice cakes. They’re mochi-full and delightfully soft and chewy on the inside and addictively crisp and crunchy on the edges. They’re not-too-sweet, as most Asian desserts are, and are the perfect treat to bake even if you have no baking skills. Plus, they’re naturally gluten-free. I’m back again with another viral trending recipe from Korea. Move over Dubai chewy cookies, there’s another, newer, shinier, younger dessert in town. Unfortunately, that’s the way the world works. Or dare I say, the way the cookie crumbles? Anyway, the world, especially the internet loves viral content and what’s going viral right now is crispy Shanghai butter mochi.
What is Shanghai butter mochi / butter tteok
Butter tteok is a viral baked treat that comes to us via Korea. Golden-brown, crispy on the outside and chewy on the inside, it is epically viral on Korean socials in early 2026. (Side note, sometimes I feel like a food anthropologist who writes about food trends and it both delights and disturbs me LOL). Shanghai butter mochi has glutinous rice flour, butter, milk, and eggs. Everything is mixed together and poured into individual cake pans and baked. If you’ve ever had Hawaiian butter mochi, it’s essentially the same, but with a bit more crisp. It’s also kind of similar to French canele, with its crisp outside and tender insides.How to make Shanghai butter mochi
- Butter - Grab a muffin pan or any other pan that has small wells. I used a super cute taiyaki pan that makes the tiniest lil butter mochis. In Korea, they seem to favor pans that are shaped like chestnuts or shells, but really, any baking vessel with individual wells will do. Butter the pan generously with butter. If desired, sprinkle in a bit of sugar, it will caramelize while the mochi bakes, making a crunchy crust.
- Melt - Heat the milk and butter in a small pot over low heat, stirring, until the butter melts. Don’t let it come to a boil.
- Mix - Mix together the egg, sugar, and vanilla until light and fluffy.
- Whisk - Whisk in the milk and butter mix.
- Stir - Stir in the glutinous rice and tapioca flour, being sure to stir out any lumps.
- Strain - Optional, but highly recommended, strain the batter through a fine mesh seive.
- Pour - Pour the batter evenly into the prepared molds.
- Bake - Bake until golden brown and crispy.
- Cool - Remove from the oven and tip the mochi out of the tins and cool on a wire rack. The mochi will get crispy as it cools.
Crispy butter mochi ingredients
- butter - it wouldn’t be butter mochi without butter. Butter is what makes these guys crispy and golden brown.
- sugar - regular granulated sugar is what makes this not-too-sweet and helps with the deep-golden crust’s caramelization.
- egg - an egg adds richness and a bit of rising powder.
- vanilla - a touch of vanilla adds a nice, deep, round note to these cakes.
- milk - I like using whole milk because it has a higher fat content, but you can use any kind of milk or even milk substitue.
- glutinous rice flour/mochiko flour - this is the key to these cakes. If you can find mochiko flour (usually produced in North America by Koda Farms), it’s you’re best bet. If not, the very commonly found Erawan/Elephant brand of glutinous rice flour will work too. Glutinous rice flour is the key to mochi. It’s what gives it that chewy texture. It also happens to be naturally gluten-free, since all it is finely milled glutinous rice.
How to store butter mochi
I love this recipe because it makes just the right amount, 6 lil cakes to snack on. That being said, if you have any leftovers, be sure to let the mochi cool completely before popping into an air tight container. They’ll keep for a couple of days but won’t be crispy after storage.How to crisp up butter mochi
To make the butter mochi again, you can lightly toast them in a toaster oven for 4-5 minutes at 350°F. You can also air-fry them for 1-3 minutes. Just keep an eye on them to make sure they don’t get too brown. Alright, hopefully you guys try this recipe! I’m a sucker for viral recipes and this is no exception. I am already a mochi lover so crispy-edged Shanghai butter mochi is a dream come true. Mike and I ate the whole batch, not a single one was left. Happy mochi—ing! xoxo steph PS: If you're as cuted out as I am over this pan, it's from here.Crispy Shanghai Butter Mochi
If you like squishy, chewy deserts, you'll love these lil butter rice cakes.
- 1 cup milk (200g)
- 2 tbsp butter (25g, plus extra to butter the baking sheet)
- 1 large egg
- 1/4 cup sugar (50g)
- 1 tsp vanilla
- 3/4 cup glutinous rice flour (130g)
- 2 tbsp tapioca flour (15g)
Preheat the oven to 350°F. Generously butter 6 muffin tin wells or a baking tin of your choice.
Add the milk and butter to a small pot and heat over low, stirring, just until the butter is melted. Remove from the heat and set aside.
In a bowl, whisk together the egg, sugar and vanilla. Pour in the butter-milk mixture and stir. Add the glutinous rice flour and tapioca flour. Strain the batter through a fine mesh sieve.
Evenly divide the batter amongst the muffin tins and bake for 30-40 minutes, or until the edges turn a toasty golden brown.
Remove from the oven and let cool slightly before removing from the tin and letting cool on a wire rack. Enjoy!

I Am... Chicken Salt
If you love seasoned fries, you’re going to love chicken salt. For the uninitiated, you’re probably wondering what the heck is chicken salt. Is it chicken? Is it salt? The answer is yes. And it’s amazing on everything. Especially chicken wings.
What is chicken salt?
Australia has a secret umami bomb you may never have heard of. Basically, it's a seasoning blend full of punchy, mouth-watering, umami rich flavors. It's the default seasoning blend sprinkled on fast food fries down under. It’s beloved and revered and sprinkled on just about anything to add a fairy dusting of flavor.The best chicken wings I've ever had
Aussies use it for fries but I've found that it's even better on air fryer chicken wings. Just make the wings the way you like (I use a wet/dry cornstarch mix in the air fryer) and then toss with chicken salt for the easiest, tastiest wings you've ever had.How to make chicken salt
It’s as simple as taking all the ingredients below and mixing them together evenly. Afterward, store in an air tight container.Chicken salt ingredients
- chicken bouillon powder: this is what is going to give us our chicken flavor. Take a look at the chicken powder ingredients, making sure that chicken is an ingredient. It’s what’s going to give your chicken powder that huge umami flavor you’re looking for. More on chicken bouillon powder below.
- garlic powder: garlic powder is straight up garlic that has been dehydrated and ground up into a fine powder. Make sure you get garlic powder, not garlic salt. You want to get a garlic powder that has only dehydrated garlic. Garlic powder is a perfect way to add pure garlic flavor without peeling fresh cloves.
- onion powder: same for the onion powder. Onion powder should be only dehydrated onion ground into a fine powder for pure onion flavor.
- sweet paprika: a touch of sweet paprika adds a hint of smokiness, a pop or red, and a bit of a sweet fruity flavor.
- salt: you need salt for this the best part of making your own is that you can customize the amount of salt. You can even leave it out entirely, or use a sodium-free substitute.
What is chicken salt made of?
Gourmet versions start with roasted, braised, dried, salted chicken, which is then dehydrated and blended with salt and a variety of spices. The usual seasoning suspects are salt, garlic powder, onion powder, and white pepper. Commercial versions on the other hand is made with chicken bouillon (more on that below). Basically, it's chicken flavored spices.Why is it called chicken salt?
Surprisingly (for me) chicken salt is called thus because it actually contains chicken. Although some commercial ones may not, the original recipe definitely has chicken bouillon in it.Who invented chicken salt?
Chicken salt comes to us via Australia from Peter Brinkworth, a chicken shop owner in the 1970s. Originally, this spice blend was for his roast chicken, but when the shop sold in the late 70s, the new owners (the Mitani’s) reformulated it and sold it commercially as a seasoning. The rest is history. Chicken salt is now the most common seasoning on fries in Australia. Ironically, the version that Mitani now sells is completely chicken free, instead comprising of sea salt, rice flour, onion powder, garlic powder, and paprika.Short cut chicken salt
If you want all the flavors of chicken salt and don’t want to roast a chicken, dehydrate and powder it, this shortcut is for you. The secret ingredient is chicken bouillon powder.What is chicken bouillon?
Bouillon is French for “broth” so chicken bouillon is essentially chicken broth. It’s colloquially used as a term for condensed broth/stock that’s available as cubes, granules, powder, paste, or liquid. Chicken bouillon is an amazing short cut to adding chicken flavor to just about everything. It’s used a ton in Chinese cooking. When shopping for chicken powder, look for one that contains chicken. It’s up to you whether or not you want to look for an MSG free powder – there’s lots of discourse on MSG (most of it incorrectly stating that’s it’s horrible and unnatural). Personally, we have no issue with it. My favorite for pure chicken flavor with no other spices is Lee Kum Kee chicken bouillon powder. It’s made with chicken meat, skin, and fat. Lee Kum Kee also makes a MSG-free chicken bouillon, but I haven’t tried it and can't vouch for it.Vegan chicken salt
If you’re vegan or vegetarian you can still enjoy chicken salt – just use a vegan chicken flavored powder like Orrington Farm’s.Why make it at home?
You’re probably wondering why I’m urging you to make this, even if you are Australian.- It tastes amazing. It’s like ranch seasoning or everything bagel spice but much, much more savory and flavorful.
- Even if you do live in Australia, a lot of the commercial ones contains a heck-ton of preservatives.
- You can control the salt content and flavors. The less salt you use, the more chicken flavor you get. You are in control of the sodium content.
- If you’re vegetarian or vegan you can make a chicken-free version.
- It makes a fun, quirky, custom gift for all the chicken lovers in your life!
What can you use chicken salt on?
Basically, everywhere you want a bit of extra umami. Try it on:- fries for an authentic Australian takeaway classic
- popcorn
- roasted vegetables
- on the rim of a bloody mary or caesar
- sprinkled on rice or even added to the rice while cooking
- mashed potatoes
- cheesy potato balls
- roast chicken
- baked potatoes
More amazing seasoning powders
Chicken Salt
Australia has a secret umami bomb.
- 3 tbsp chicken bouillon (powder)
- 2 tbsp garlic powder
- 1 tsp onion powder
- 1 tsp white pepper (see notes)
- 1 tsp paprika
- 1 tsp salt (or to taste)
Add all of the ingredients to a bowl.
Stir everything together until evenly mixed.
Use immediately or store in an air tight container in a dark space for up to 6 months.
If you don't have white pepper you can sub black pepper, but it won't taste the same.

I Am... Viral Creamy Lays Chips aka Peri Peri Chips
I love chips. To me, they are the perfect snack. I never thought the perfect snack could be improved, but I stand corrected because viral creamy chips now exist. Yes, creamy chips, viral creamy peri peri Lays chips. I didn’t foresee those words going together, but they do. Looking at photos and watching videos do not do these chips justice. I went in thinking that they would end up being a soggy mess, but instead, they turned out to be a delightful mix of contrasting textures and flavors. You’ll start off by make one batch, but trust me, it won’t be your last.
Chips and dip
Remember when chips and dip were a thing? For some reason, chips and dip seem so much more special than just opening up a regular bag of chips. I remember being so excited when I was a little kid when there were chips and dip as a special snack. I think maybe it’s the act of dipping because grabbing a chip and dipping it makes it feel more like a mini experience rather than just a snack. If you want to create that feeling, of a snack that isn’t just a snack, these chips are for you.Viral creamy peri peri Lays chips
Viral creamy peri peri Lays chips are ripple chips (supposedly Lays) tossed in a creamy sour cream-based sauce seasoned with butter, garlic, chili flakes, oregano, chili powder, and freshly chopped cilantro. If you’re on the socials, you’ve probably seen bowls of chips tossed in what looks to be a creamy pink sauce. These are those chips. They absolutely remind me of chips and dip but extra. We’re living in 2026 and this is the future where there's AI chatbots, meme wars, and creamy chips.How to make creamy peri peri lays chips
- Make the spiced butter. To start, melt some butter over medium heat and add garlic. Cook, stirring, until the garlic is just golden and smells amazing. Add in red pepper flakes, oregano, chili and powder. The heat of the butter will activate the spices and make everything smell amazing. Remove the pan from the heat and set aside to cool.
- Make the creamy sauce. In a large bowl, whisk together the sour cream and milk. Stir in freshly chopped cilantro and the cooled spiced butter.
- Toss. Add the Wavy Lays to the bowl with the sauce and very gently toss.
- Enjoy immediately. Enjoy the sauced chips immediately while they’re still crunchy.
Creamy peri peri chips ingredients
The tangy, savory, sweet, and spicy flavor of these chips can be made with simple, easy, every day ingredients.- butter - a bit of butter helps the garlic, spices, and herbs meld together into a fragrant blend.
- garlic - fresh garlic fried in butter makes everything better.
- chili flakes - chili flakes add the up front heat while also giving the sauce tiny bits of crunch.
- oregano - oregano adds an earthy balance.
- chili powder - this is where the spice comes in. Depending on how spicy your chili powder is, these chips can pack a punch or be on the milder side. The chili powder is completely optional.
- yogurt or sour cream - yogurt or sour cream, it’s your choice, but I like using sour cream because it adds just the right amount of tang.
- milk - a little bit of milk loosens up the yogurt and makes the sauce coat each and every ridge of the chips.
- cilantro - freshly chopped cilantro adds a bright freshness to these chips making them even more irresistible.
- ripple chips - more on this below.
Do I really need to use Lays?
The internet says you need to use Wavy Lays, but any ripple chip will do. The ripples hold on to the sauce and the natural thickness of ripple chips holds up better than just regular. I started this post off with Wavy Lays but ended up using just a regular ripple and honestly, they look and taste better. Go for your favorite brand of ripple chips, in whatever flavor you love best. On Instagram and Tiktok, BBQ is used most of the time. I tried this recipe with both original and ketchup chips. The original chips let the sauce shine, but the ketchup were more addictive. If you can get ketchup chips where you live, I highly recommend those.What are creamy chips?
Creamy chips are chips, the kind that come in bags, tossed in a creamy spiced sauce. Think of them like wings but the wings are chips and the wing sauce is a homemade spiced butter and yogurt sauce. I’m not sure who came up with them, but from googling, they started trending in Dubai and India. Who came up with the idea first is a mystery to me.What do the viral creamy chips taste like?
If you’re a fan of peri peri sauce and Nando’s, you can probably imagine what these chips taste like. They’re garlicky, tangy, and savory with a hint of spice and herbs. The sauce coats each and every ridge of chip, making the chips simultaneously crunchy with slightly softened edges. The contrasting textures and flavors are what make these chips so addictive.Are the chips soggy?
Yes and no. The heartiness of wavy Lays holds up well to the creamy sauce but it’s a race against time because if you let them sit for too long, yes, they will get soggy. This is a snack that’s best eaten right away when the chips are still crunchy and just starting to soften at the edges. Think of it like tempura, where fresh out of the fryer, the tempura is super crispy, but then it’s dunked in tentsuyu/tempura sauce and then the result is a delightful mix of crispy, crunchy, and soggy all at the same time.Tips and tricks for the best creamy chips
- Use ripple chips. Ripple chips, aka the chips that have ridges, are sturdy and hold up well to the creamy sauce. Regular chips will fall apart, so this is a case in which you definitely need a specific kind of chip.
- Eat right away. This is the kind of snack that is meant to be made and eaten right away. Once you toss the chips in the sauce, it’s a race to the finish. Although, I have to admit, I don’t mind a saucy soggy chip at the end after I’ve crunched to my heart’s content.
- Sauce with your heart. Speaking of saucy and soggy, you don’t need to use ALL of the sauce. Use your judgement. If you want a lighter coating, simply add the chips to another bowl and drizzle the sauce on top until it looks about right, then toss.
- Make ahead. You can make the creamy peri peri inspired sauce ahead of snack time and put in an air tight container in the fridge if you want instant creamy chips.
How to keep creamy chips crunchy?
The key to creamy crunchy chips is to enjoy immediately. The thickness of ripple chips means that they don’t instantly turn to mush when the sauce coats them, but for maximum enjoyment and crunch, toss, then eat right away. These were a hit for me and surprisingly Mike liked them too. I say surprising because he only likes one flavor of one brand of chips that comes in a very specific package. If these passed Mike’s chip bar, I feel like it’s an extremely solid recommendation.If you loved these, you'll love these chip adjacent recipes
i am creamy, i am crunchy, i am viral creamy chips! happy chipping! xoxo stephViral Creamy Chips
Looking at photos and watching videos do not do these chips justice.
- 1 tbsp butter
- 2 cloves garlic (minced)
- 1 tsp red pepper flakes
- 1 tsp dried oregano
- 1 tsp chili powder (or to taste)
- 1/4 cup sour cream
- 2 tbsp milk
- 1 tbsp fresh cilantro (chopped)
- 2.5 oz Wavy Lays
- Melt the butter in a small pan over medium heat. When melted, add the garlic and stir, until fragrant and golden, about 1-2 minutes.
- Reduce the heat to low and stir in the red chili flakes, oregano, and chili powder. The butter should be a bright vibrant red. Remove the pan from the heat and let cool.
- In a large bowl, whisk together the sour cream, milk, and cilantro.
- By now the butter should be cool, stir it into the cream mix. Taste, add salt and freshly ground black pepper, and adjust the seasoning if needed. If the sauce looks too thick, loosen it with milk, teaspoon by teaspoon. You want something that is pourable and not thick like a regular dip.
- Add the chips to the bowl and gently toss until all the chips are evenly coated. Enjoy immediately!

I Am... Tiktok One Pan Dumpling Bake
The coziest one pan dinner is this viral one pan dumpling bake from Tiktok: juicy dumplings nested in a creamy, sweet-n-spicy sauce, perfect for scooping onto rice. I’m a sucker for viral recipes. I don’t know, there’s just something about my personality that is easily influenced by hype. It’s a curse because I’ve been burned more times than I want to recall. But, I can’t help it, in the words of Ariana Grande, “I see it, I want it, I like it, I got it.” In this case, it’s the TikTok viral dumpling bake. I resisted for so long — the dumpling bake went viral several months ago near the beginning of the year. I saw it and immediately thought that I would never make it. Ever. I love love love dumplings and they’re already super easy to cook in a multitude of classic ways so my brain thought, why would I do a silly baked dumpling trend? Then, I kept seeing it and seeing it and we had a can of coconut milk in the pantry and a tub of red curry paste in the fridge and it was inevitable.
How to make the viral one pan dumpling bake
- Prep - preheat the oven to 375°F. While the oven is warming up, mince up some garlic (or use a garlic press) and grate some fresh ginger.
- Assemble - In a baking dish, whisk together the coconut milk, red curry paste, garlic, and ginger. Scatter in the leafy greens and stir to coat. Add the dumplings, straight from the freezer, nestling them in, then spooning some sauce on the tops.
- Bake - cover the dish and bake until the dumplings cook through and the sauce thickens slightly, about 20 minutes, depending on the dumplings. If you like you can take the foil off for the last 5 minutes to get some extra browning on the tops of the dumplings.
- Top - finish with freshly chopped cilantro, thinly sliced green onions, toasted sesame oil, and a bit of extra chili crisp.
- Enjoy - enjoy hot either on its own or spooned over rice or noodles.
What is the viral one pan dumpling bake?
A one pan dumpling bake, as the name implies, is a dish of baked dumplings, specifically gyoza or potstickers. Aromatics, coconut milk, curry paste, and dumplings all get put in an oven safe dish and bake. The flavorful curry paste mixes with the coconut milk into a creamy, spicy sauce that thickens slightly in the oven while the dumpings become plump and juicy on the bottom and slightly crispy on top.Where did the viral dumpling bake trend come from?
As with most trending recipes, it’s a little hard to trace the original source, but from what I can tell, Danielle Brown, from Heathy Girl Kitchen came up with the idea on TikTok.Ingredients for viral dumpling bake
- Dumplings - frozen dumplings are the best for this dish because, really, it’s all about getting dinner on the table quick. Save those homemade dumplings for another day. Bags of frozen dumplings, specifically potstickers or gyoza, can be found at most grocery stores, so buy a bag of your favorites. More on dumplings below.
- Red curry paste - red curry is the backbone of all the flavor in this dish. Red curry paste combined with coconut milk is a weeknight superstar. A little bit spicy, super aromatic, and delicious. You can get this is at all Asian grocery stores and in most major grocery stores in the Asian foods aisle. It’s also on amazon! It comes shelf-stable in a little tub or a can and keeps in the fridge once opened for future use.
- Coconut milk - a can of coconut milk is going to bring so much richness and creaminess to this dumpling bake. Coconut milk can sometimes be confusing. What you want is the one that comes in a can in the aisles, not the tetra packs you find in the fridges.
- Aromatics - grated ginger and minced garlic are going to add a layer of freshness, but let’s be real, if you don’t want to break out the cutting board, you don’t have to because the red curry paste is going to be plenty flavorful. That being said, I’m always going to champion grating fresh ginger and mincing garlic because fresh is best.
- Toppings - finish off the dumpling bake with a generous sprinkle of freshly chopped cilantro, thinly sliced green onions, toasted sesame seeds, and a drizzle of chili crisp. To be honest, these toppings are completely optional, but they add a bit of pizzaz and make your dumpling bake super pretty, so I think they’re well worth it!
What size pan for viral one pan dumpling bake?
You want a pan or dish that’s not too big and not too small — the dumplings need to be half submerged in the sauce. A square 9x9 casserole dish works perfectly as does an 11x7 rectangle or a 12 inch oval or circular pan. You can play around here, what you’re looking for is a big enough dish to accommodate all of your dumplings in a single layer.Which frozen dumplings are the best?
There are SO many frozen dumplings out there, so the best is definitely a personal preference sort of thing. But, that being said, I do have some favorites and some tips on how to find good frozen dumplings. First off, go to your local Asian grocery store. There, in the frozen section, they’ll have an entire aisle of frozen dumplings. In the case of the viral dumpling bake, I think the best dumplings are gyoza or potstickers. They come in that classic curved moon dumpling shape and bake up nicely because they typically have thinner dumpling skins. The fillings are endless, so just go with what sounds good to you. Classic is pork and cabbage/vegetable and chicken with cabbage is just as tasty. If you dont want to go to the Asian grocery store, you’re in luck because you can pretty much find frozen dumplings everywhere these days. Two of our favorites are new-ish dumpling brands: MìLà and Lao Ban. You can find both brands at major grocery stores, Whole Foods, and Costco (depending on location). They both make a variety of dumplings, so be sure to pick up the potstickers for this particular recipe. Also, shout out to Trader Joe’s frozen gyoza potstickers which always hit in a pinch. You can even make your own, it's easier than you think!What to serve with the viral dumpling bake
Any sort of saucy dumpling goes great with simple steamed rice https://iamafoodblog.com/how-to-make-fluffy-white-rice-perfectly-every-single-time/If you want to go all out and make a feast
That’s it! Are you going to succumb to the siren song of viral dumplings? Or do you have more self-control? I was on the fence but I have given in to the dark side of baked dumplings and I’m not coming back :) xoxo stephViral Dumpling Bake Recipe
The coziest one pan dinner
- 1 bag frozen gyoza (/ dumplings of choice~ 1lb)
- 1 can coconut milk (~ 14oz)
- 2 tbsp Thai red curry paste
- 3 cloves garlic (minced)
- 2 tsp ginger (grated)
- 3 cups spinach (or leafy greens of choice)
- green onions (sliced, to finish)
Preheat the oven to 375°F.
While the oven is heating, in a baking dish, add the coconut milk, curry paste, minced garlic, and ginger. Whisk the ingredients until combined.
Add the vegetables to the dish and toss to coat.
Nestle in the frozen dumplings (no need to defrost), spooning some of the liquid on top of the dumplings.
Cover the dish with an oven safe lid (or foil) and bake for 20-25 minutes, or until the dumplings cook through.
When the dumplings are ready (cut one open to check), finish with green onions and chili crisp. Enjoy!
Estimated nutrition is a guideline only and will vary considerably based on the dumplings you use. The numbers below are based on Trader Joes frozen dumplings and reduced fat coconut milk.

I Am... How to Cook a Tomahawk Steak
Sometimes I dream of having a tomahawk steak all to myself. Of course, I think better of it for health reasons. For special occasions though, it's a great choice: cheaper than a prime rib, more impressive than a roast. And the best part, you can make a perfect tomahawk at home better than most restaurants you're likely to find it at only half the cost. Home-cooked steaks are always the best steaks. Here is everything you need to know to buy, cook, or serve a perfect tomahawk steak.
What is a tomahawk steak?
Tomahawk steaks are bone-in ribeyes, cut from ribs 6-12, with a huge length of bone left intact and the meat frenched up to get everything clean looking. Is it the same as a regular bone-in ribeye? Yes, but you eat with your eyes, and what can beat the sight of a 24" centerpiece steak?How to cook tomahawk steak
You cook a tomahawk steak just like a normal one, the most important factor is to make sure it’s well tempered (rested to room temperature) so you’re getting the inside up to temp fast enough before the outside burns. It’s much better to get the inside right up to medium rare so you can sear without worrying. There are a bunch of ways of doing that, here are my favorites. One thing to remember is that a tomahawk is actually a 2" thick (or even more) ribeye. Ribeyes tend to have a large vein of fat right in the middle, so if you cook it too rare, you could end up with a more or less solid and chewy chunk of fat in the middle of your perfect steak. Because of this, I usually cook a tomahawk to medium rare (135ºF). At this temp, the fat tends to render into a translucent, delicious pop of flavor.In the oven
Set your oven as low as it can go, about 250ºF for most people, and leave your steak in there for about 45 to 90 mins. In my oven from the fridge (48ºF) to medium rare takes almost exactly 80 mins. If you have a meat thermometer or oven probe (more on that below) leave it in until it is 10 degrees lower than your desired final temperature. A chart is below as well for easy reference.Sous vide
This one is easy: add your steak and any rubs, marinades you would like to a water bath and set it for 10 degrees lower than you want to end up at (see the doneness table below).The steak can stay in the bath for up to 8 hours, although 1-2 is usually more than enough, depending on how cold your steak was when it entered the bath.On the grill
This one definitely needs a meat thermometer but also produces the best flavor in my opinion, espcially if doing charcoal. Move your coals to one side, or if using gas, only light up one side of the grill. Leave your steak as far away as possible from the coals or the burner on the other side of the grill and close it. Flip once in awhile to make sure you’re getting even heat.Searing your tomahawk steak
Once you have your internal temperature up to where you want it, you’ll need to sear it. I like to always rest a steak before searing (more on that later). When searing, use as high of a heat as you can produce. If you’re already grilling it, all you need to do is warm up the grill to max while you’re resting it, then move it over to the direct heat zone and grill it to the right color (for me, that’s 30 seconds on a side). If your steak was done sous vide or in oven, you’ll need to sear it on a stove (more on that below) or some other way - I use our 800 degree pizza oven.How to sear a tomahawk steak on a stove
Cooking a tomahawk on the stove is difficult because of the bone. Even if your cast iron pan is huge, aka 14”+ wide, you’ll probably find it hard to contact the entire steak to the pan. You can buy a low side pan such as a plancha or this cast iron crepe pan. You can also try to squeeze it down as best you can, then baste whatever can’t touch with some butter. Recently, I realized that the sides of a wok are both large enough and hot enough to sear a tomahawk without the fire and flames that you might get if you use a crepe pan. I've used the wok several times now with pretty good results.Fire
Because a tomahawk is so large and requires a low sided pan, there is a very real possibility of 3 foot high flames. Ask me how I know. Unfortunately, I was too busy putting out the flames to snap a photo. To avoid such a fire, don't get the oil smoking hot and turn the gas off before adding the steak, or use a wok, BBQ, or pizza oven as shown above. If a fire starts, don't panic, just cover the steak with something ideally non-flammable. In my case, I just dropped the same baking sheet that the steak was resting in. It went out instantly, no sweat.The importance of a meat thermometer
When cooking steak, especially one that costs north of $100, a meat thermometer is essential. A buddy of mine overcooked his tomahawk while reverse-searing it, which for most people just means guess and pray. With a meat thermometer, you can just forget about it until the alarm goes off. Plus, if your oven is not perfectly precise or runs hot, a meat thermometer can save your steak from unknowingly becoming chewy leather. I recommend an oven probe that beeps when the target temp is hit. They can be really cheap, wireless app driven, or something in between. Personally I always go with the cheap option. If all you have is an instant read, be sure to check often to make sure the steak doesn't get overcooked.Steak cooking temps
For a quick and easy reference, when we have dinner parties in our house our steaks are roughly done at:- Rare: 125ºF
- Medium-rare: 135ºF
- Medium: 145ºF
- Medium-well: 155ºF
- Well done: Don't do this
How long to let tomahawk steak rest for
When you apply heat to muscle fibers they contract and squeeze out moisture. Resting time allows the fibers to relax again, reabsorb some of the moisture, and generally produces a more tender and much juicier steak. You don’t necessarily need to wrap the steak in foil but allowing it to rest for 5-15 minutes after the main cooking process is absolutely vital. Longer is better. I prefer to rest my steak, then sear so it's as hot as possible when serving.Where do you buy a tomahawk steak?
Costco is often your best bet to get a tomahawk if you want one right away. Our local Albertsons even has them. Lately our local Costco has been carrying "tomahawk style" cuts which look like they've cut away half the bone for easier packaging and, more importantly, to save you money. These mini-tomahawks range between 2-4lbs and I think they're great. That said, the best place to buy any meat is your local butcher. All of the best steaks I’ve ever had came from local shops no matter where in the world I was. They may need a few days to get it ready or order it in, but it’s the best option. You can also try one of the many premium online butcher shops they have days days, we've tried a bunch and they're always pretty good, you can even get wagyu steaks this way.Best sauces for steak
Some people believe in nothing but good ol’ salt and pepper. I prefer to change the taste of the meal as it goes on, so I start with a pure bite of salt and pepper, then move onto a nice steak sauce or other preparation. When we had our expensive steak dinner in Kobe, they served it 16 different ways. You can just make your steak with salt and pepper and serve it alongside a nice selection of steak sauces. Check here for our guide to all the best steak sauces.Are thick-cut bone-in steaks better?
Without a doubt, thick bone in steaks are better. Often the meatiest, beefiest, most flavorful parts of the meat are right next to the bone. The thickness of the steak allows you to get a good medium rare/whatever finish you want on the inside while still getting the deeply browned thick crust of your dreams on the outside. The thickness of the steak makes it more forgiving: it's basically impossible to overcook a 2" steak without great effort and forgetfulness.How big are tomahawk steaks?
Depending on which bone you get, tomahawks can range in size between 30 oz to 60 oz. In my experience, every tomahawk I’ve ever bought has been between 48 oz and 60 oz, except the Costco mini ones which are way closer to 30oz.What is American Wagyu?
American wagyu are Japanese cows, hopefully Japanese black cows (called Kuroge Wagyu in Japan) that are raised and pastured in America. They can be full-blooded or cross bred with other breeds. It can range in quality from ordinary to amazing. USDA Prime and Certified Angus are both easily as good, if not better, so there's no need to hunt any specific cow down. With any steak, even and consistent (and copious) marbling is often a great sign of how good that steak will be. Grass fed is better than Grain or Corn fed/finished, as well, in my opinion. It makes for a more complex, satisfying taste.Are they a scam?
Someday, someone will inevitably tell you that tomahawk steaks are a scam, overpriced, and that you’re just paying for a bone. And, they wouldn't be totally wrong: a tomahawk steak absolutely goes for a premium over a regular bone-in ribeye steak at a restaurant. And, yes, it does taste more or less the same as a bone in ribeye. But any large cut of steak also goes for a premium over a smaller steak of the exact same kind. Fewer people buy them, and that raises the price. I love tomahawk steaks because their popularity means they're so much easier to come by than a good 2.5” thick cut bone-in ribeye. If you’re making them at home, the price premium is much smaller and makes sense for a special home celebration or weekend meal. The moment you pull out out that giant tomahawk steak for the grill, everyone instantly smiles.How to reheat steak
To reheat a steak, just let it come to room temp on the countertop for about an hour, then sear and serve. If you cut it into slices, a 10-15 sec burst in the microwave will warm up the steak nicely without overcooking it.Side dishes
Is it even steak without sides??- frites
- mashed potatoes
- steak and salad
- steak with rice like they do in Japan
- cacio e pepe
- asparagus
- mushrooms
- brussels sprouts
- onion rings
- surf and turf, aka steak and shrimp
Steak sauces and rubs
- Lori Jayne Peppercorn Steak Sauce
- 8 Super Easy Classic Steak Sauces
- Steak Diane
- Cajun Butter Steak
- Dashi Butter Steak Sauce
How to cook Tomahawk Steak
How to cook tomahawk steak perfectly every time
- Meat thermometer with probe
- 1 tomahawk steak (48-60oz)
- salt and freshly ground pepper
- 1 tbsp butter (if desired)
Let your steak come to room temp on the countertop. Preheat your oven to 250ºF or one side of your gas/charcoal grill on low. Season your steak with salt and pepper.
Put the temperature probe into the thickest part of the steak (see notes if you don’t have a probe-type thermometer) then put the steak in the center of the oven or farthest away from the heat on the grill until it hits 10ºF below your desired temperature, flipping every 5 minutes or so. See notes for steak cooking temps.
Rest your steak for 5-15 minutes (longer is better) while you heat up your grill, pizza oven, or cast iron pan.
Sear your steak until your desired color is achieved (about 30 seconds per side for me on a BBQ or 2-3 minutes per side on a wok).
Serve immediately with fixins and sauces, if desired.
If you don't have a probe type thermometer, check with an instant read as you flip every 5 minutes.
Steak cooking temp
Rare: 125ºF | Medium rare: 135ºF | Medium: 145ºF | Medium well: 155ºF | Well done: 🙅♂️

Latest Comment
“These are my favorite. Basically foolproof, so easy, and the sauce is delicious. I keep coming back here even 11 years l...”Cat on Spicy Thai Oven-Fried Chicken WingsPopular
 2015 Holiday Giveaway
 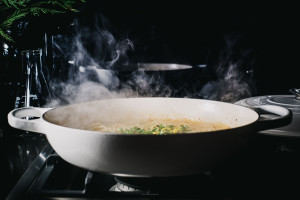 One-Pot Lemon Scallop Pea Spaghetti
 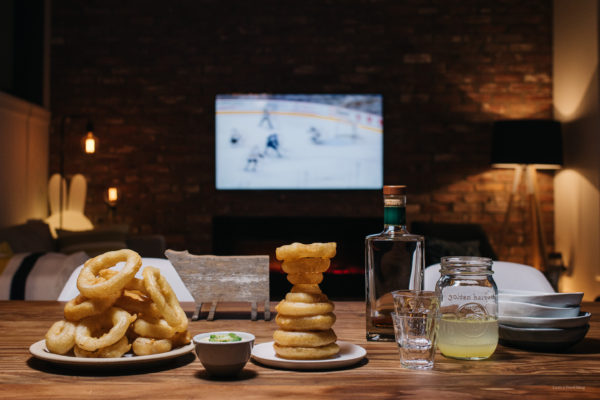 Beer Battered Onion Rings, Jalapeno Aioli
  2014 Holiday Gift Guide and a Giveaway
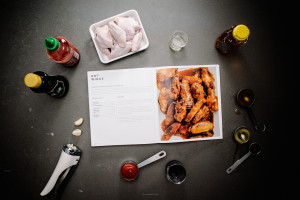 Easy Gourmet Hot Wings and a Giveaway!
  The Ultimate Veggie Sandwich
  Vegan(!) Creamy Corn Soup Recipe
  Sunday Brunch: Grilled Cheese Eggs Benny