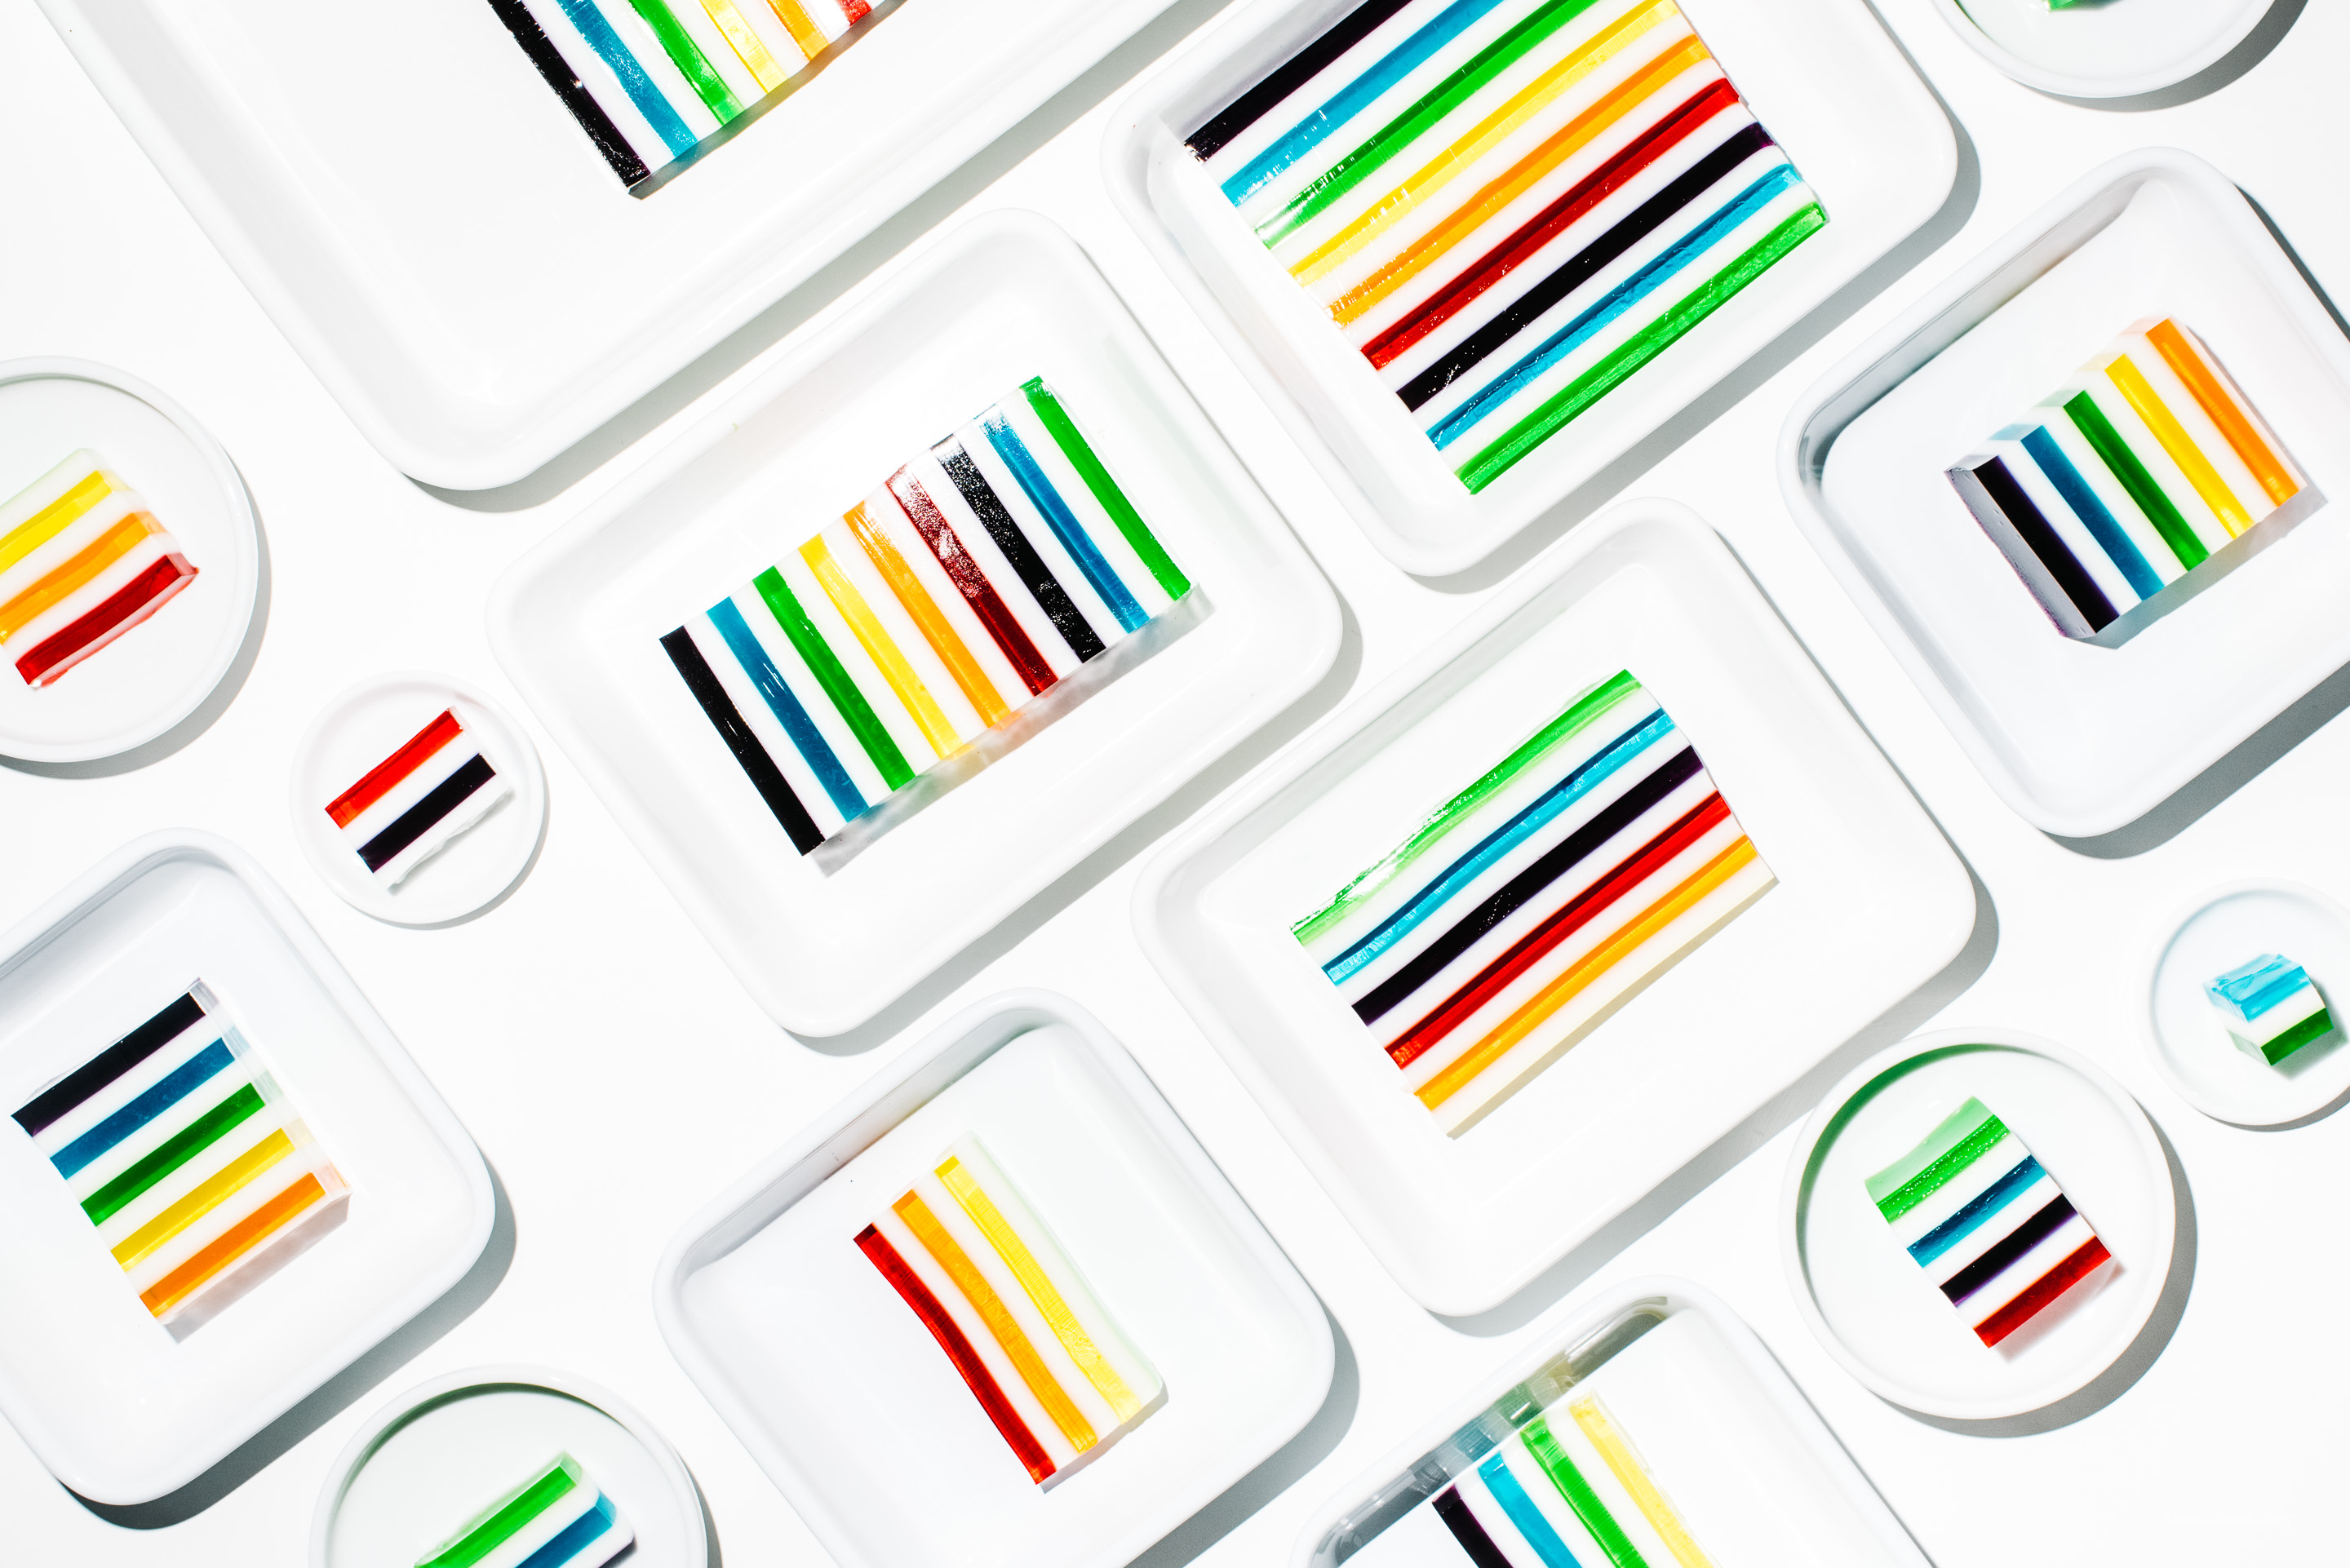

Is there anything more magical than rainbow jello? I remember being so excited when my mom used to make this for us when we were kids. Of course, she didn’t really do whole rainbows, just 2 or three colors. I have fond memories of me trying to peel apart the layers perfectly.
I love rainbows – that shouldn’t come as a surprise, considering I have rainbow hair. There’s something about them that makes me so happy. When I was a kid, my answer “what’s your favorite color” was always: rainbow! I get so absurdly excited when I see them, which always seems to happen on road trips.
I feel like rainbows are everywhere now, even in food. I’m kind of weirded out by rainbow grilled cheese and rainbow bagels, but maybe I shouldn’t be since I love rainbow jello so much? Anyway, this jello takes a bit of time (as all good things do) so set aside a rainy day and a good book (maybe a Rainbow Rowell) and get jello-ing.
Mike and I finished this jello in record time, which, for some reason, surprised me. I was thinking we’d have some so we could eat it on St. Patrick’s day, but we demolished it so I guess I’ll just have to hope that there’s a rainbow in the sky, with a pot of gold at the end :)
Rainbow Jello Recipe
makes a lot of jello
- 3 ounce package grape jello
- 3 ounce package blueberry jello
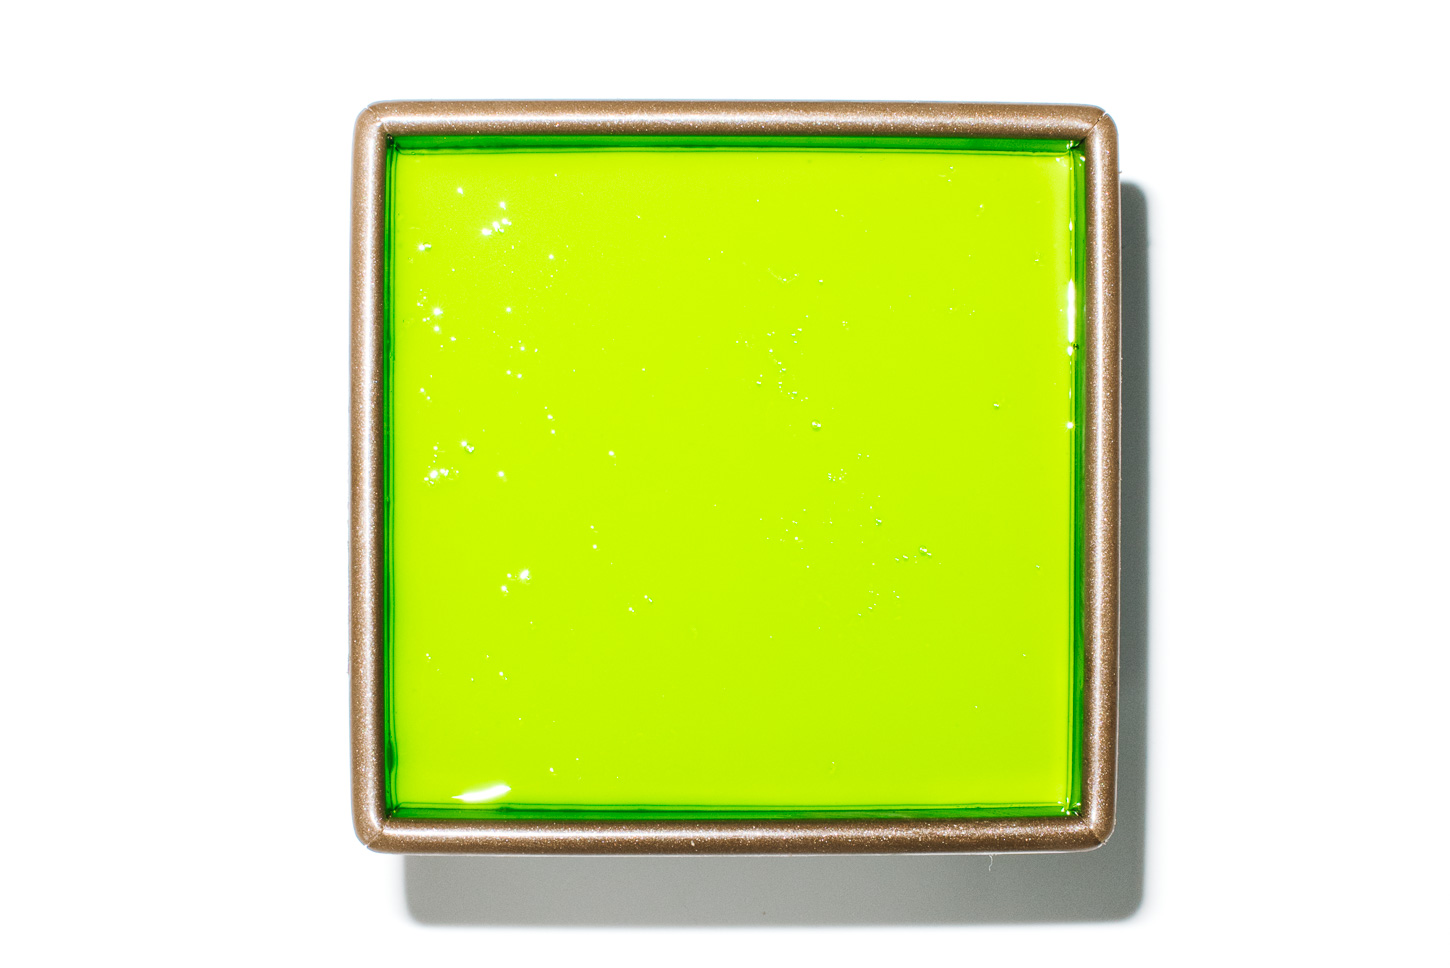
- 3 ounce package lime jello
- 3 ounce package lemon jello
- 3 ounce package orange jello
- 3 ounce package cherry jello
- 5 tablespoons unflavored gelatin (5 envelopes)
- 1 can sweetened condensed milk
Tips for smooth jello: measure out 1/2 cup of the jello and pour onto the set jello using a spoon to diffuse the impact of the warm-ish jello and to minimize bubbles.
In a liquid measuring cup, mix the grape jello with 1/2 tablespoon (1/2 envelope) of gelatin. Add a cup of boiling water and stir to dissolve.
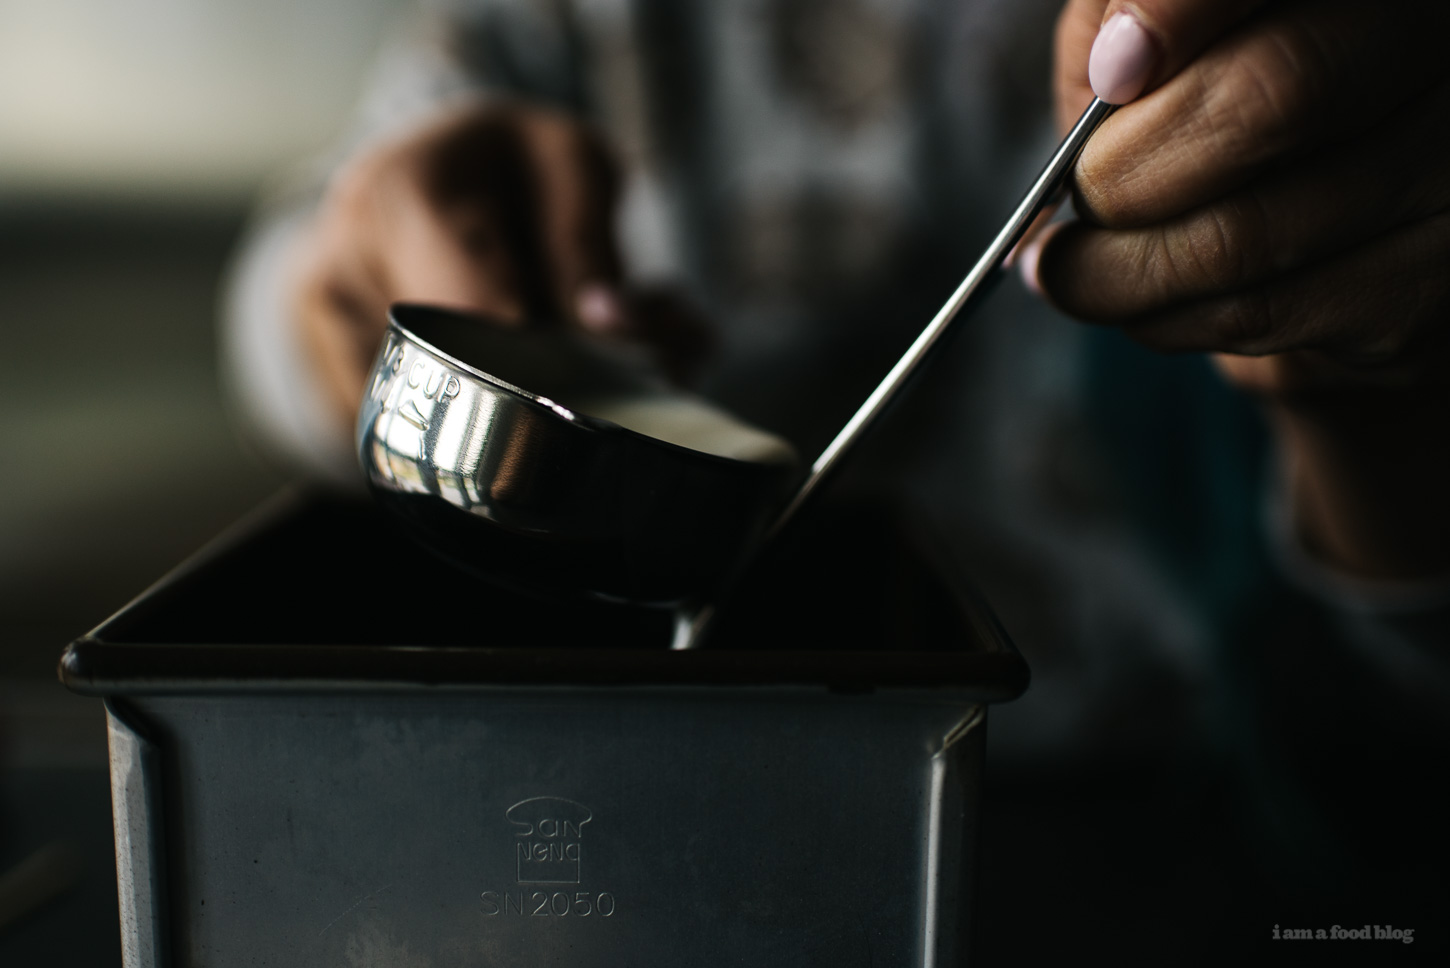
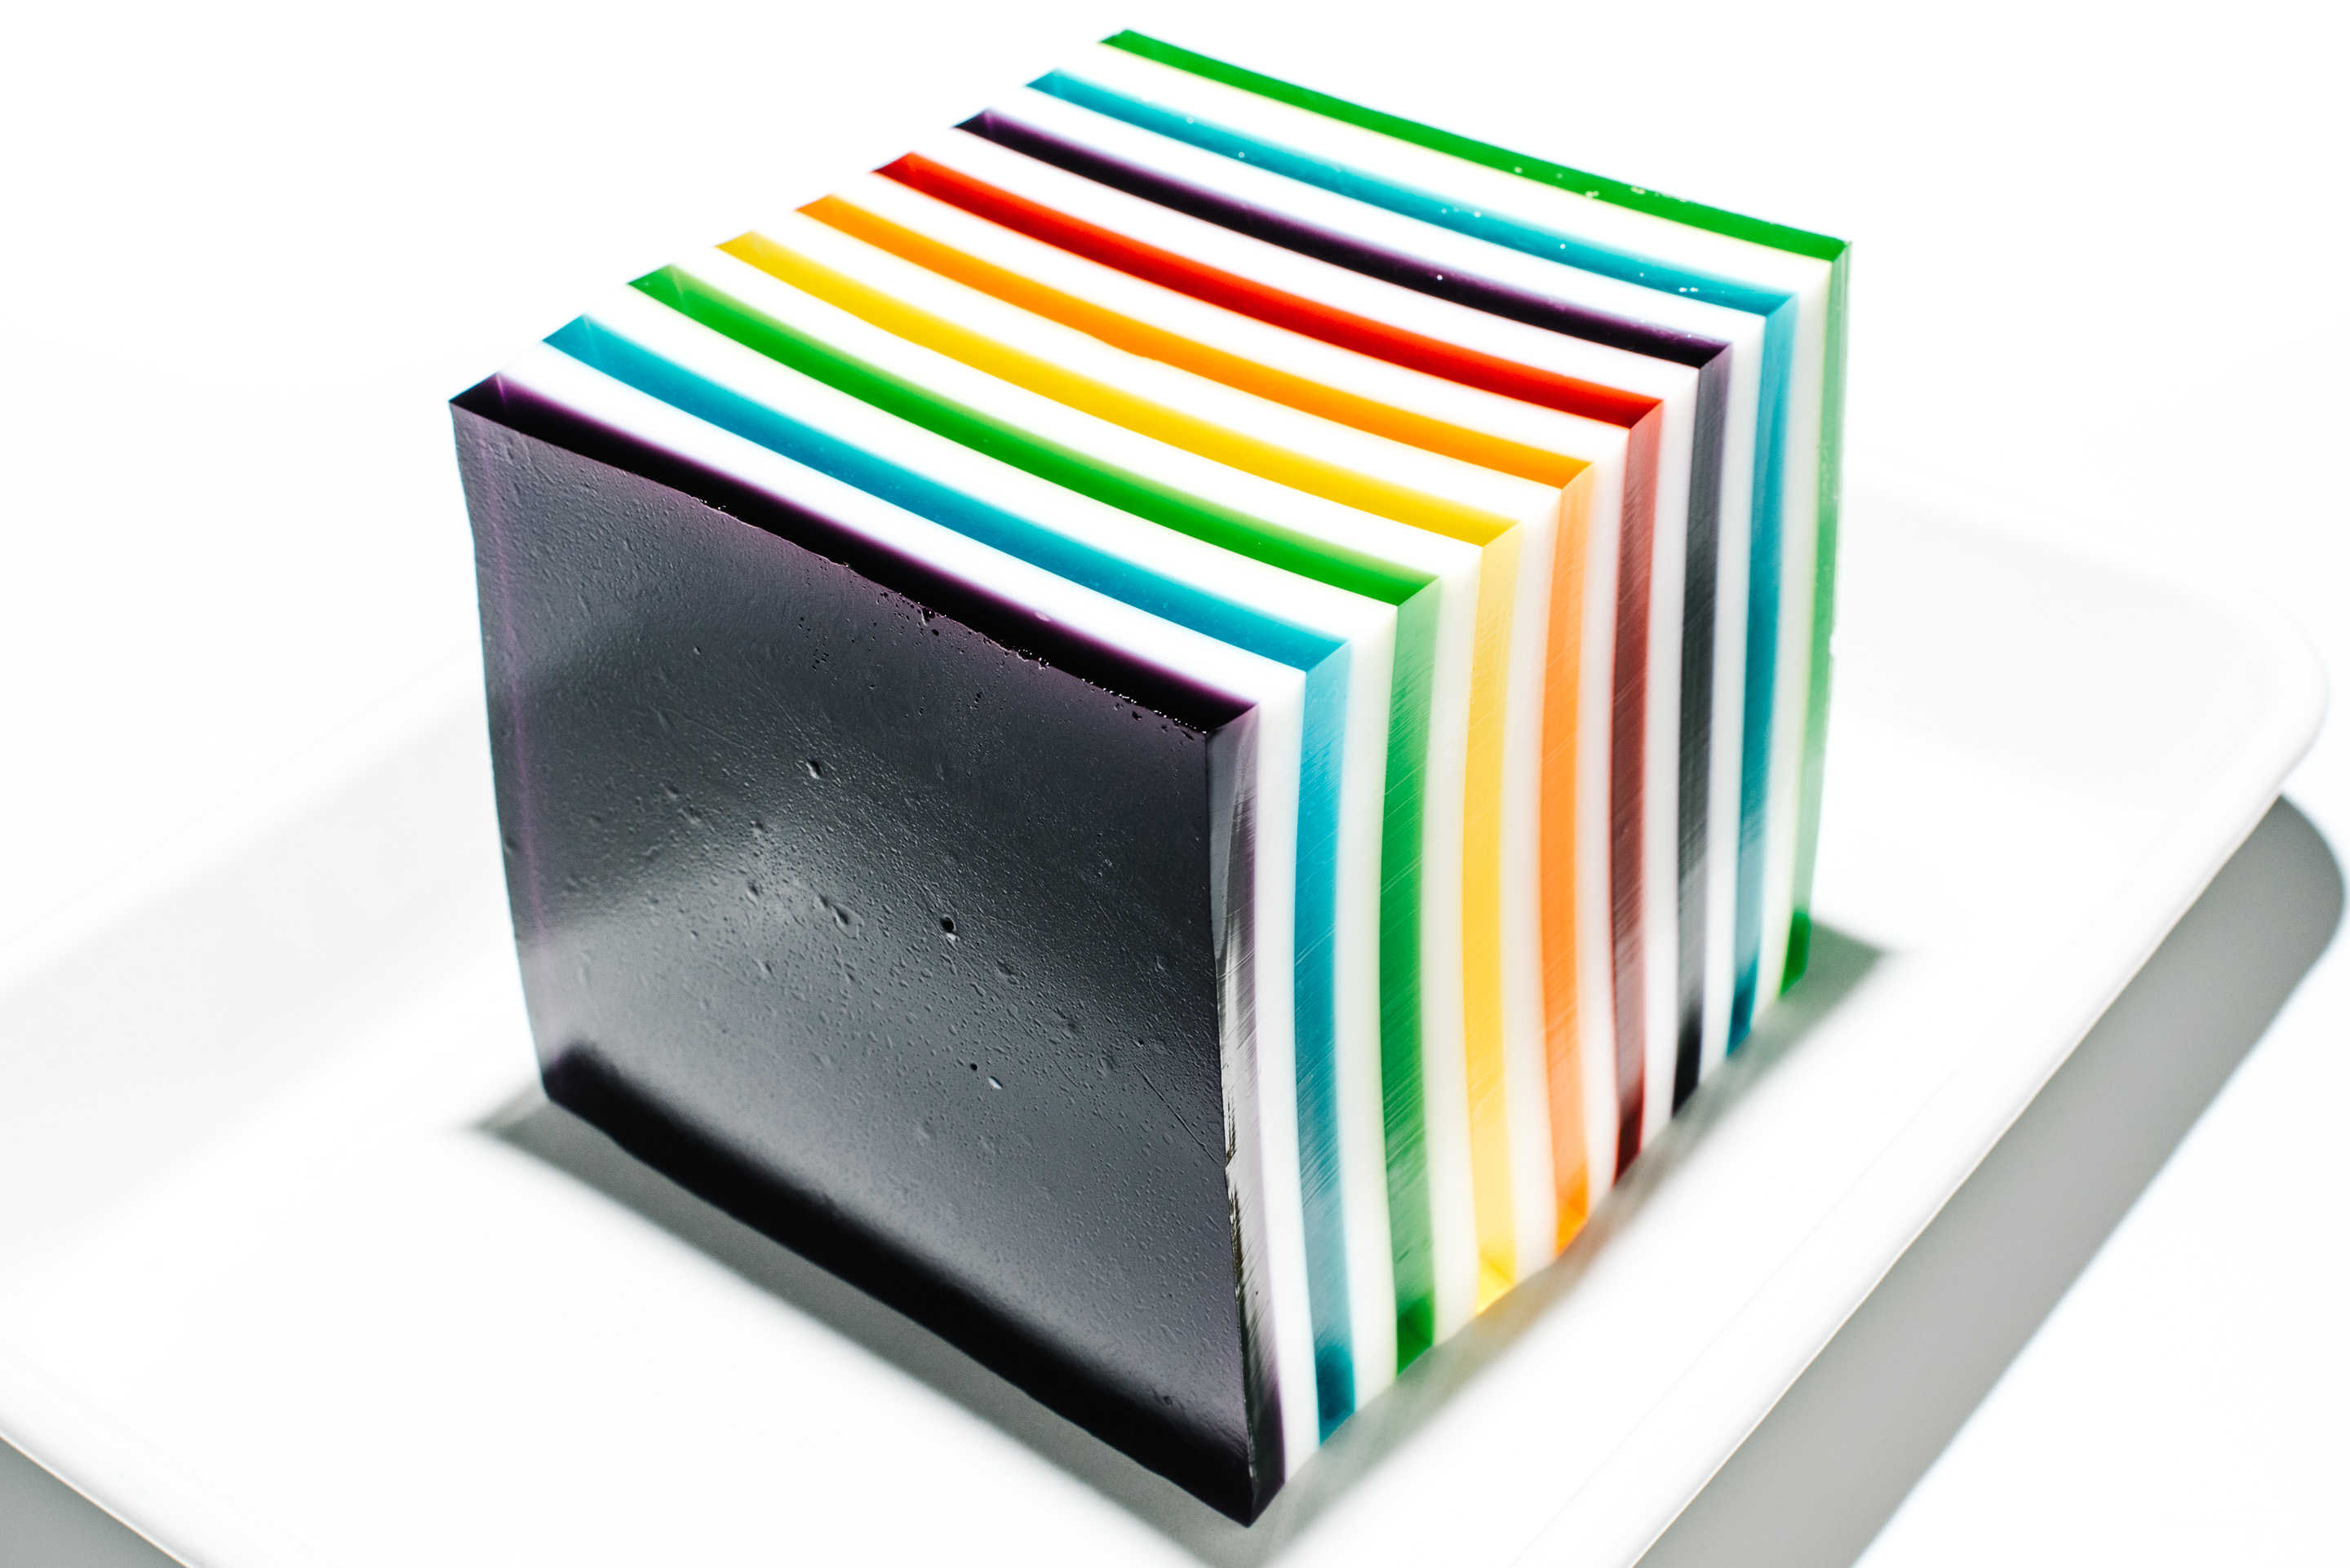
I used a deep square loaf pan to make my jello, but this works in any container. If you want multiple rainbows, make sure your container is deep enough. I also recommend using metal, preferably non-stick, over glass containers just because it was easier to un-mold.
Pour in 1/2 cup of purple jello into your pan and put in the fridge to set for at least 10 minutes, or until firm, yet jiggly.
While the purple layer is setting, make the white jello and remaining colors – this will let it slowly cool down at room temperature and help the layers set more quickly.
In a bowl or large liquid measuring cup (my preferred method), sprinkle 2 tablespoons of gelatin (2 envelopes) over 1/2 cup of cold water and let bloom for a couple of minutes then add 1/2 cup of boiling water and stir to dissolve completely. Mix the can of sweetened condensed milk with 1 cup of boiling water. Stir well, add to the milk mixture and mix thoroughly.
Make the other colors: in separate liquid measuring cups, mix the jellos with 1/2 tablespoon (1/2 envelope) of gelatin each. Add a cup of boiling water to each and stir to dissolve. Because this jello takes such a lot time to set, turn your oven on to proof mode (or just turn the light on) and place the measuring cups inside. The slight heat of the oven should stop the jello from setting, but if you need to liquify, pop the jello into the microwave for 5 seconds.
Once the purple jello is set and firm to touch, pour on 1/2 cup of white jello and let set for at least 10 minutes.
Repeat, alternating 1/2 cup white with blue, green, yellow, orange, yellow, and red, then starting again with purple, until you’ve used up all of the jello.
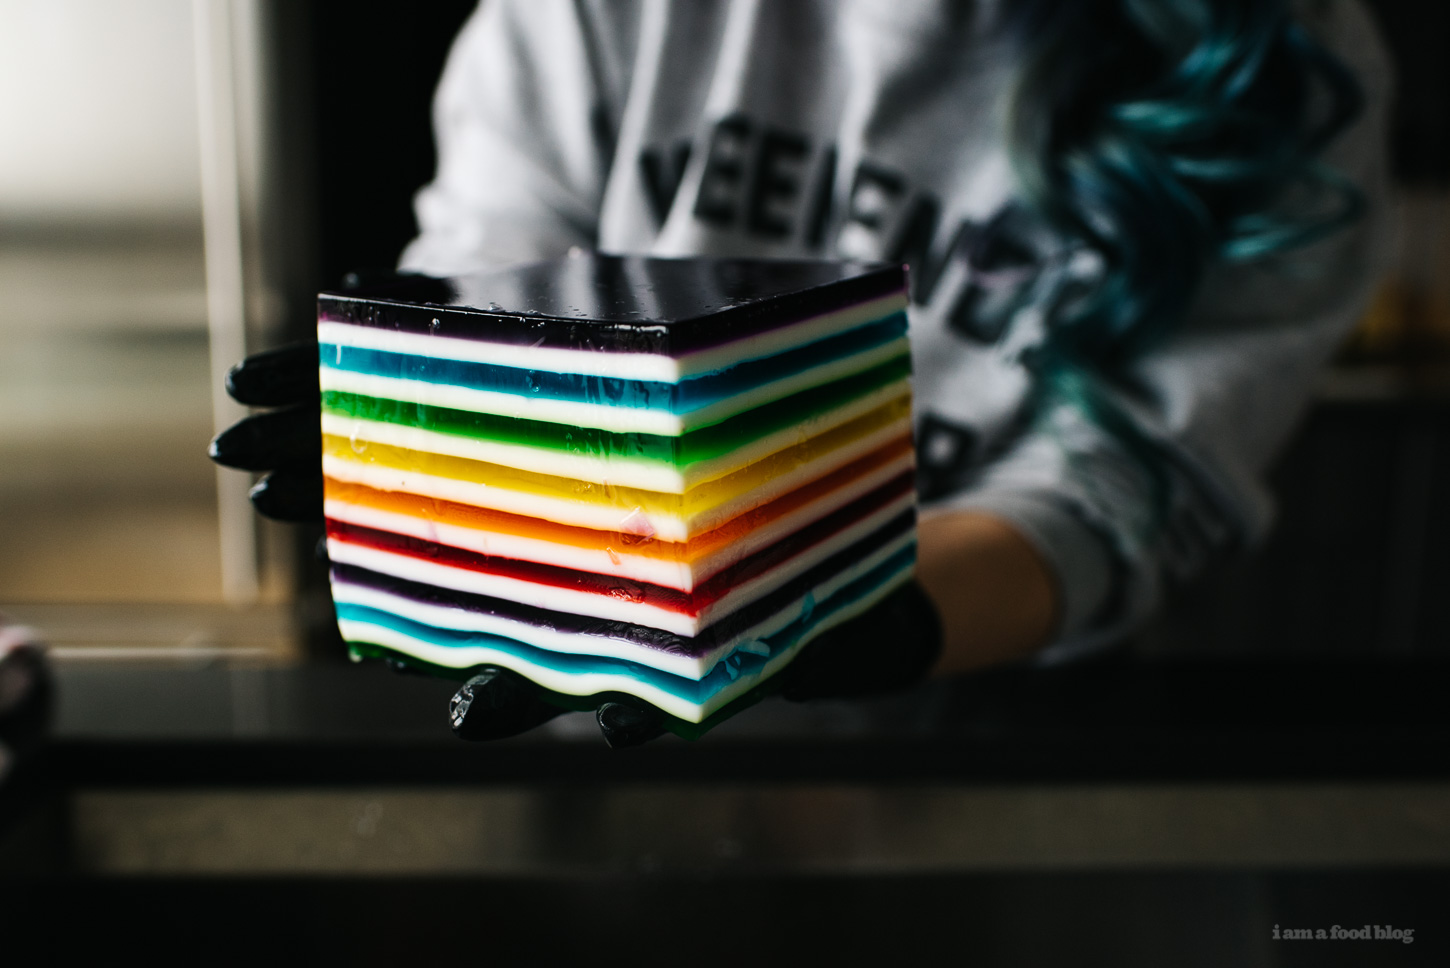
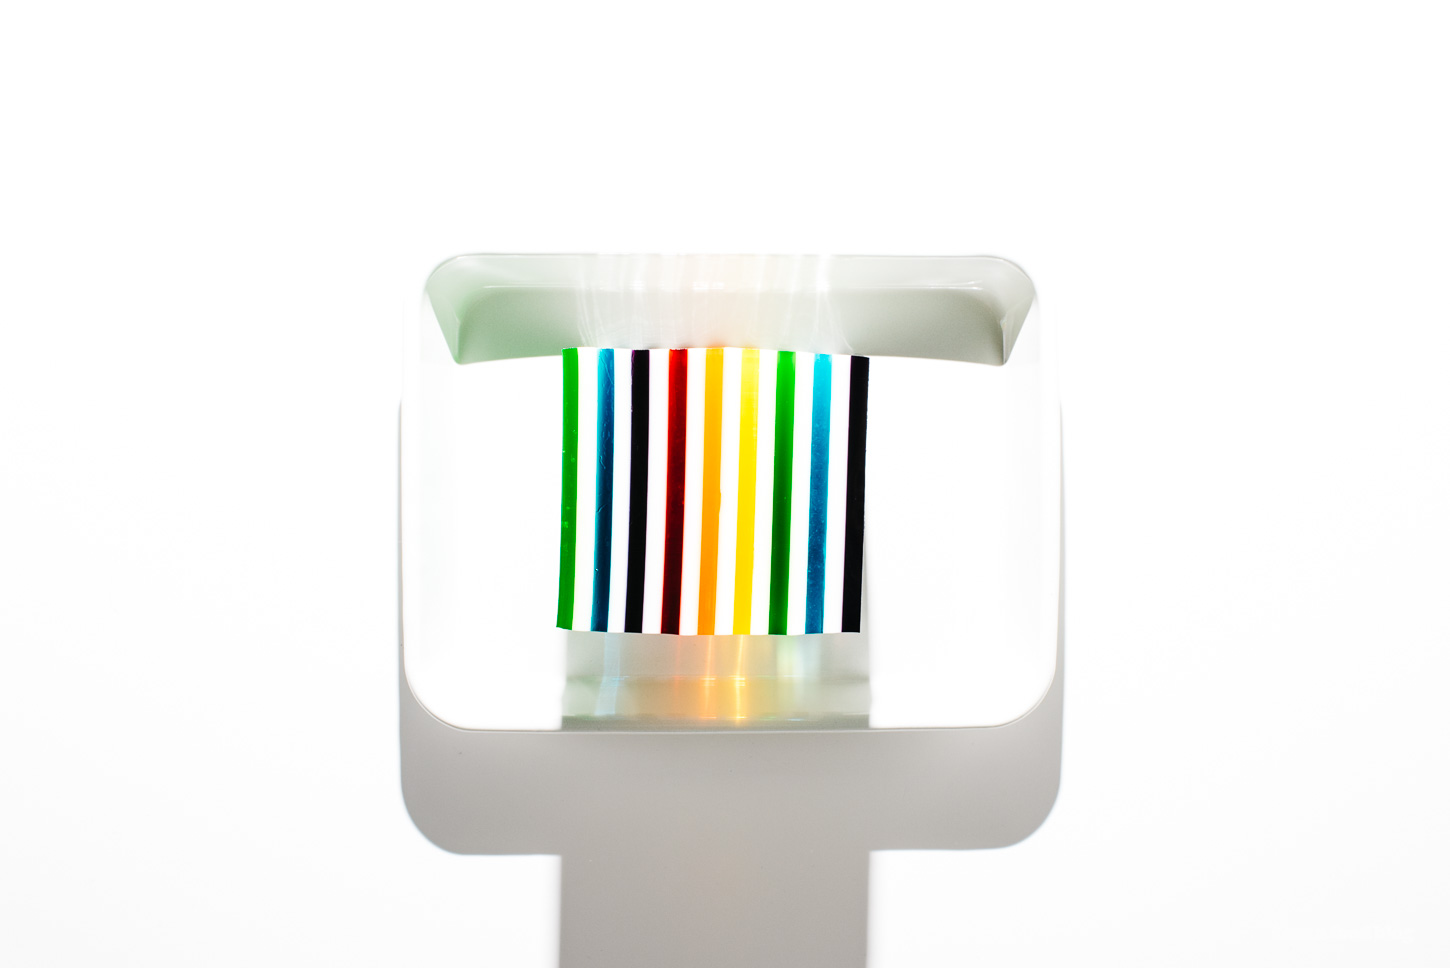
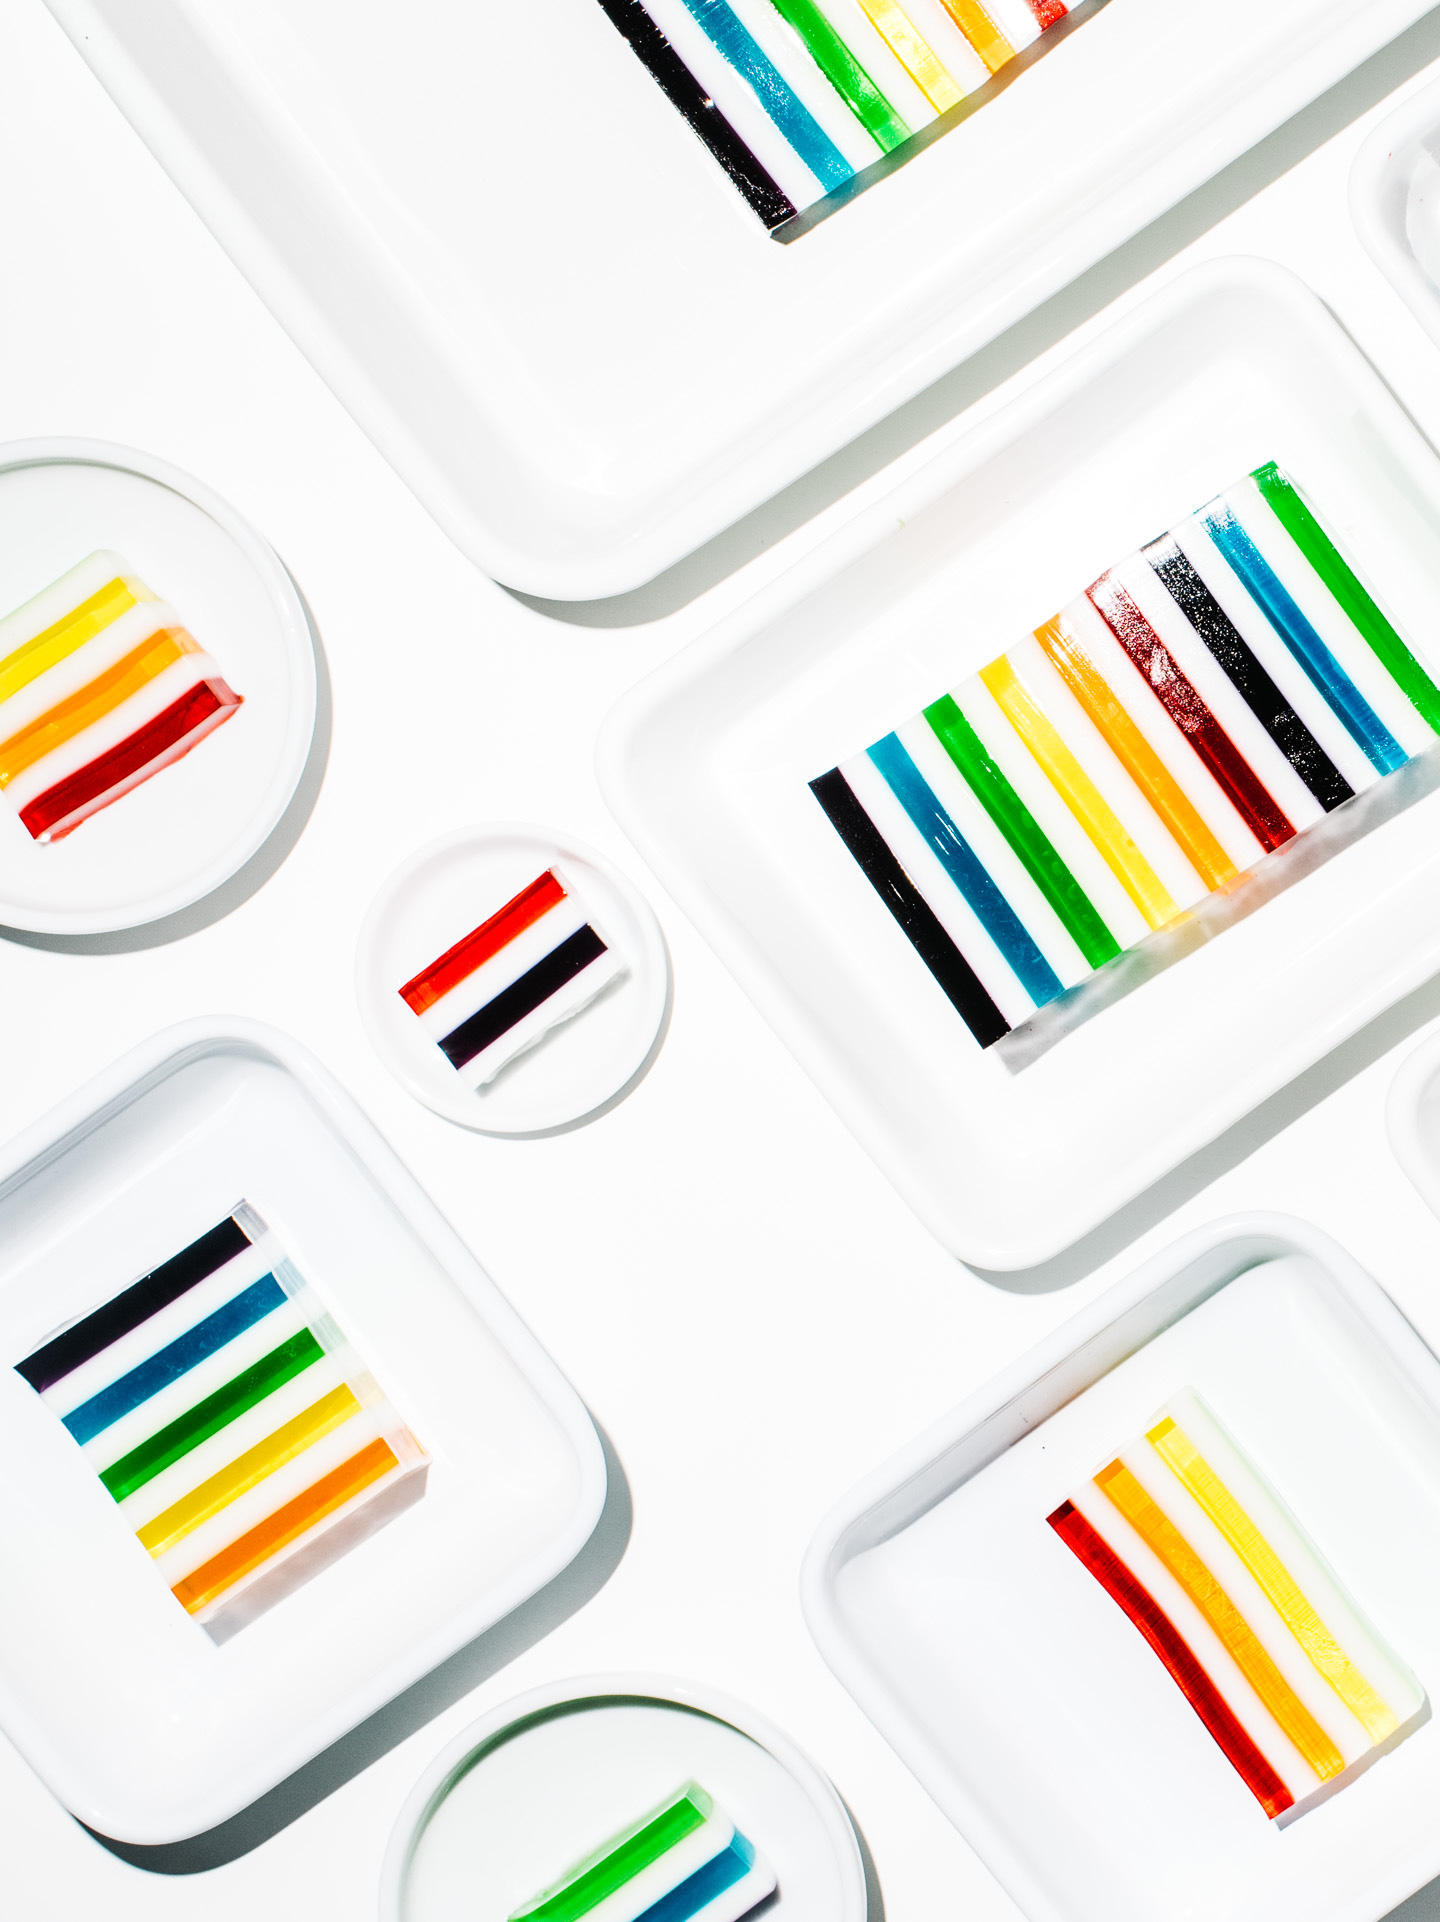
It’s best to let the jello set overnight. The next day, unmold, slice, and enjoy eating the rainbow!
oooh this is so cool steph!
heehee i almost had a panic attack removing it from the pan :P
Wow – you did a great job on that!!!
Your recipe is great
Where did you buy the molds?
Love the recipe!But you could try making more healthy recipes
hi andrea, i used a square pullman pan that i got in japan but you can use any non-stick pan that you have at home. hope that helps!
You have such patience Steph!! This jello is gorgeous!
ahhhhh this is the coolest!! that block is epicly huge and perfect.
So I made this for a St. Patrick’s Day party on Saturday (3/18). Let me tell you what, it was a huge hit! People couldn’t stop taking pictures, the kids gobbled them up, adults peeled the layers off one by one, and I snacked on a whole bowl of leftover scraps from trimming. This is a showstopping dessert that’s not that hard once you get the hang of it. That said, I have some notes:
– I lined a rectangular ceramic baking dish (probably 10x5x4) with clingfilm so I could just lift it right out — this is a great idea.
– You really do need a deep dish for this. Around layer 4 it will look like you’ll have plenty of room and then all of a sudden you won’t. However, you don’t want a wide dish. A deep square or circular pan is perfect because otherwise the layers won’t be a nice thickness.
– Instead of boiling water individually for all the jellos, I just set a big pot of water on the stove and brought it to the boil while I hunted for bowls to use. I then just ladled it into bowls to make my gelatins.
– Speaking of bowls, metal bowls will cool significantly faster than glass, so be aware and get everything into the warm oven asap.
– This recipe is all about timing, preparation, and speed. Turn the temp in your fridge down to make it colder. Put your bowls on a sheet tray and get in the oven asap. Have the next layer ready in a measuring cup while the current layer is setting. As you get higher, it will require slightly longer to set so start adding an additional 5 minutes halfway up. Using a spoon to gently pour the layer is a must, as a stream of slightly warm jello will melt a hole through a 10-minute-set layer and ruin your color. It happened to me on my second to last layer.
– I used Knox gelatin sachets which I thought were a tablespoon per sachet, but actually aren’t; they’re like a half teaspoon shy. Turns out, this doesn’t matter so much. I happened to have extra (I love a good jello shot), but don’t fret if you come up short on a layer.
– The sweetened condensed milk layer was too sweet in my opinion. Next time I want to try evaporated milk or maybe tea or juice. I don’t think it needs that level of sweetness with all the other layers.
– In all, it took me a good 2.5 hours from start to finish, and I wasted absolutely no time. And it’s not that hands off as you need to be prepping the next layer, so don’t think you can do anything other than wash dishes.
– Speaking of washing, set a big bowl of really hot water in the sink. That way, when you prep the next layer, you can rinse your utensils to prevent color bleeding. I used a 4oz ladle, a 1c pyrex, and a large spoon for pouring.
HOW ON EARTH DID YOU UNMOLD THIS MF!!! This is the most BEAUTIFUL rainbow Jello I have ever, ever seen. I love it!! And that pic of you holding it with black gloves reminds me of a scene from some 1980s Alien movie!!!!!!! Like you’re about to prod it with a stick or something.
It is pretty simple recipe but it will be take a lot of time! I like jelly so I want to try it.